Introduction

  1. bbmlHeqJ2AcAAfZC
    bbmlHeqJ2AcAAfZC
    uWuPnSoENURFjnXJ
    • Remove battery and card

  2. SFY2y4bIcFaEHkCg
    SFY2y4bIcFaEHkCg
    SprAdAZHqPXUxXSv
    GD34JjAKgADaMqeh
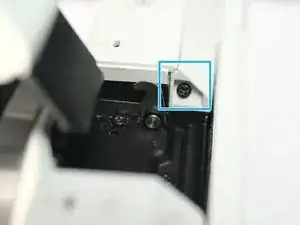
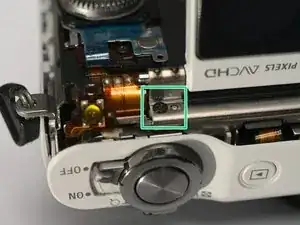
    • Right side, remove 1 M1.4x3.7 screw

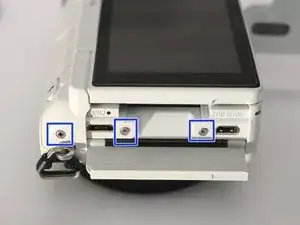
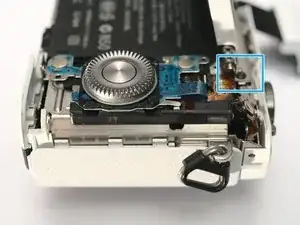
    • Left side, remove 3 M1.4x3.7 screws

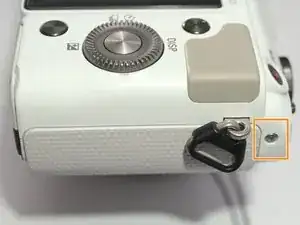
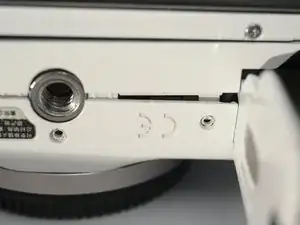
    • Bottom side, remove 5 M1.4x3.7 screws, including 2 in battery bay. 2 of them out of this photo, you can find them.

    • Do NOT touch screws on the bottom of LCD assembly.

  3. hGFMlxleZcJAGpBX
    • Pop the flash.

    • In flash room, remove 1 (one) M1.4x3.8 black screw.

  4. HkZhyWqijQoj4UNY
    HkZhyWqijQoj4UNY
    ebJLVB6oYdVcDHsP
    jfANQmLymrxIClEK
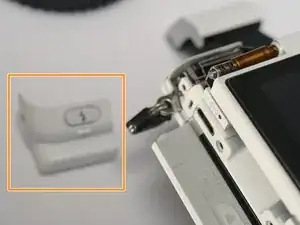
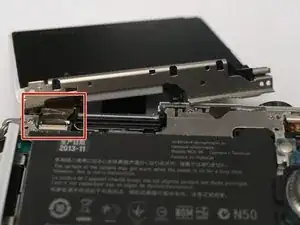
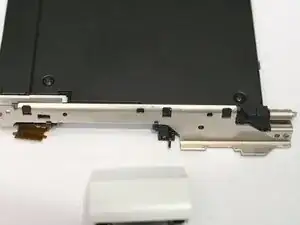
    • Remove LCD hinge cover, by sliding to the left.

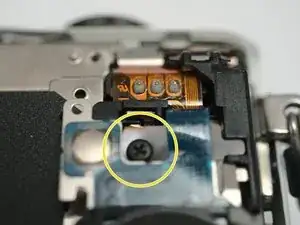
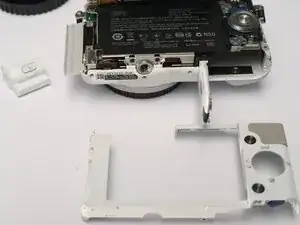
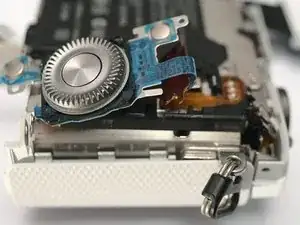
    • Remove back cover, actually just a plastic frame.

  5. AXLdgtqhOpu4t5IZ
    AXLdgtqhOpu4t5IZ
    piNTK5EGJveScKpr
    • Remove 1 M1.4x2 screw

    • Remove another M1.4x2 screw, sorry for the angle.

  6. rlBMAbDYPTWAuXAn
    rlBMAbDYPTWAuXAn
    hIKIndM2Aj5RR36l
    2BjKPxUyAh21lsMW
    • CAUTION. Sony makes world's MOST BRITTLE FPC!

    • Loosen LCD assemble with caution!

    • Release FPC cable, the connector is flip type.

  7. D4gxMAohfcFPUDlH
    • The LCD assembly

  8. WM4YXYOq4AABXTRF
    WM4YXYOq4AABXTRF
    g5JFBv1biBELPr4w
    Dg6EEjyGJd2VTfcD
    • Remove 1 M1.4x2 screw

    • Lift the keypad.

    • Detach FPC

Conclusion

To reassemble your device, follow these instructions in reverse order.

Terrance

Member since: 18/11/09

6359 Reputation

0 comments