Introduction

This guide will show you how to replace the fuel lines and filter on your Ryobi RY253SS String Trimmer. It requires no prior experience in small engine repair.

The fuel filter, for this model string trimmer, needs to be replaced either after 25 hours of run time or each year. The filter ensures that debris does not enter the fuel system of the engine, thus maintaining proper performance of your string trimmer. Another reason you may need to replace the fuel filter is if you have not been using the proper fuel to oil ratio in the fuel mixture. This can cause the engine problems when starting. This fix can breathe new life into your string trimmer and have it running similar to the day you got it out of the box.

  1. DIOVhbbtGj3IHWag
    DIOVhbbtGj3IHWag
    djpO1b4xOjWc3X2k
    IKB5G6XGDtdMjOZA
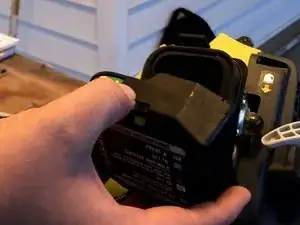
    • With your hands, remove the air filter cover from your edge trimmer.

    • This will expose the air filter and the screws that attach the housing to the frame.

    • Remove the air filter before moving to the next step.

  2. wVKBRYsl126jUpfB
    wVKBRYsl126jUpfB
    BZ6KCYGTDIRglVAg
    SrYE34VQHpBHCwRf
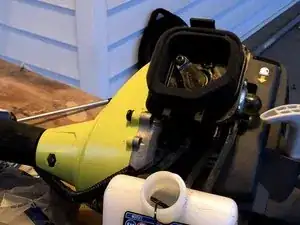
    • Remove the two M5 x 45 mm shoulder screws attaching the air filter housing to the engine frame using a flathead screwdriver.

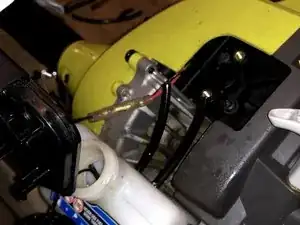
    • Pull the housing away from the engine block.

    • The screws also attach the carburetor to the frame.

  3. niREqal6b4Yi3Xor
    niREqal6b4Yi3Xor
    NJJoKX3jh3LTTNeT
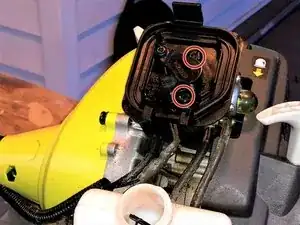
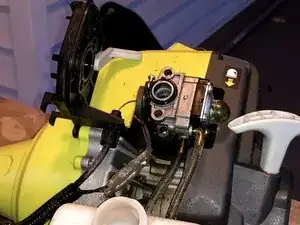
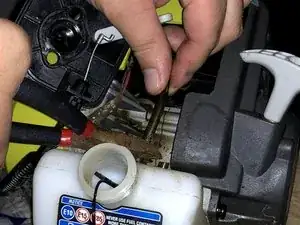
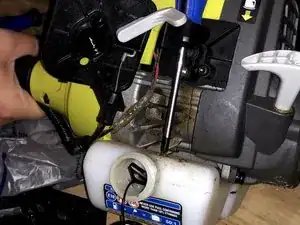
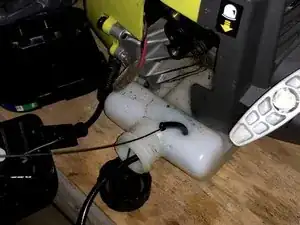
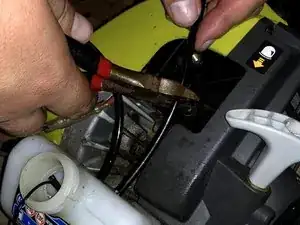
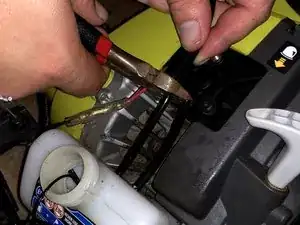
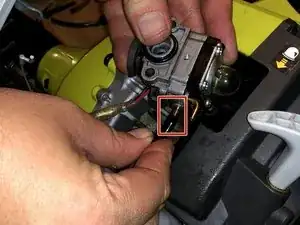
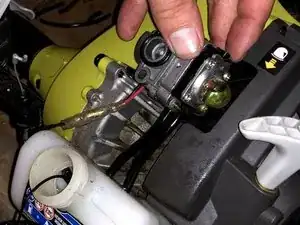
    • Pull the carburetor away from the engine block.

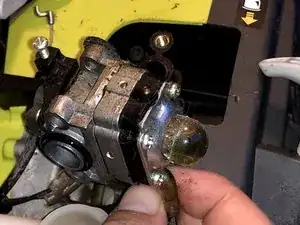
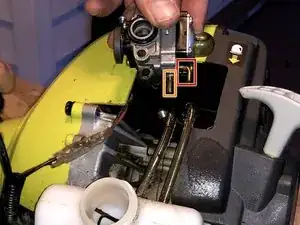
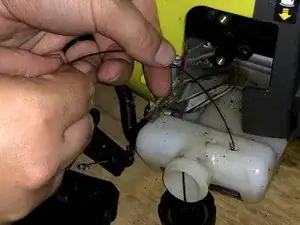
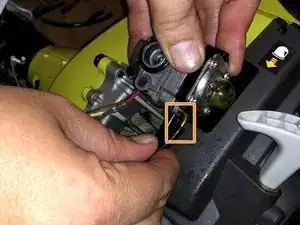
    • Gently remove the input fuel line from the carburetor.

    • Gently remove the output fuel line from the carburetor.

  4. 2APVDYCNTMF3NVnW
    2APVDYCNTMF3NVnW
    VCj5WPXAERWB1X2L
    2tjLvCmLPKQdrPIw
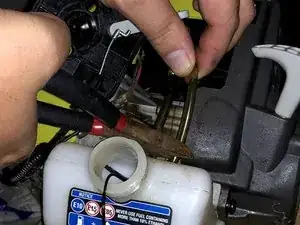
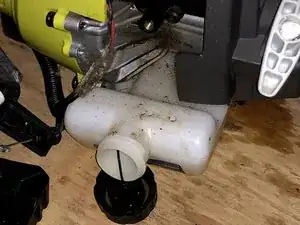
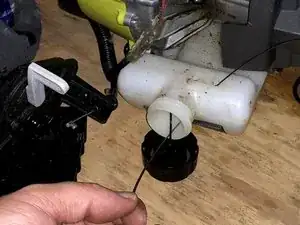
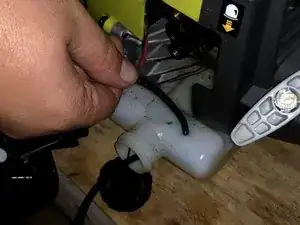
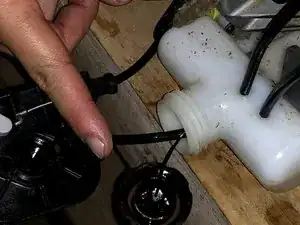
    • Use the cutting pliers to cut the excess line flush to the tank.

    • Use a screwdriver to push the remaining line into the tank.

  5. hH1PU1dOyGZeF1xS
    hH1PU1dOyGZeF1xS
    gbUIGwnKHet3PtUD
    eHJhoRDE5pMqTmRT
    • The lines should now be in the tank.

    • Lift and shake the edge trimmer until both lines fall out of the tank.

  6. qeaZqMBEn51ZAMeW
    qeaZqMBEn51ZAMeW
    4PoUBAw6ymmcfow2
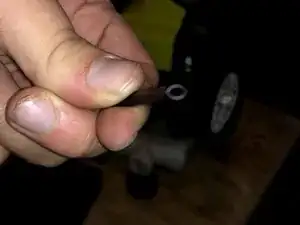
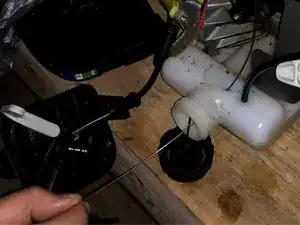
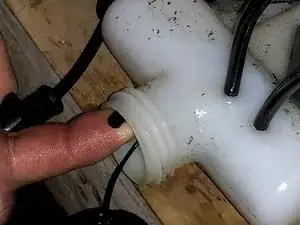
    • Thread the gripping tool through the input line on the tank.

    • Thread the tool through the gas cap opening.

  7. CVBeZgZTwmqfAakw
    CVBeZgZTwmqfAakw
    WbVaGBwqRBhIdUGb
    • Use the cutting pliers to taper the end of the fuel line.

    • A larger taper will make it easier to thread the fuel line through the hole in the tank.

  8. ETPFZc1lAYFSl1jl
    ETPFZc1lAYFSl1jl
    S1kiK6RNrDidWZHg
    • Insert the hooked end of the gripping tool into the fuel line.

    • Clamp the hook to avoid puncturing the tube or the gas tank when pulling it through.

  9. QwoMaXTCOgNBWXkv
    QwoMaXTCOgNBWXkv
    I3C3DSxcOkNclOTW
    wEi63ZXTTyGIyfWe
    • Lubricate the fuel line with the 2-Cycle oil.

    • The 2-Cycle Oil will more easily allow the fuel line to move through the hole in the gas tank.

    • Only use proper 2-Cycle oil to avoid contamination of the fuel tank.

  10. wlAjWG6HraGZYoJX
    wlAjWG6HraGZYoJX
    utHw6v2Zd1qPYjMl
    HwpTR26uapWytMIY
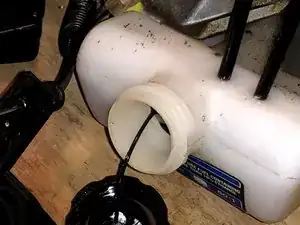
    • Place your finger through the key ring end of the gripping tool.

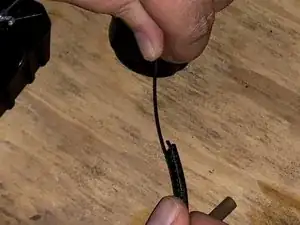
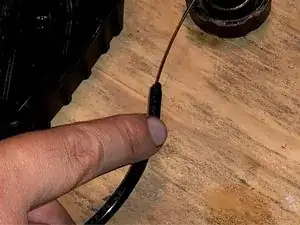
    • Pull the tool until the line begins to make its way through the hole.

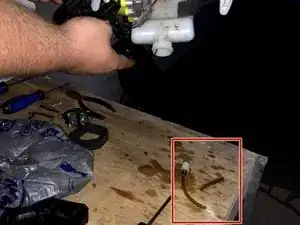
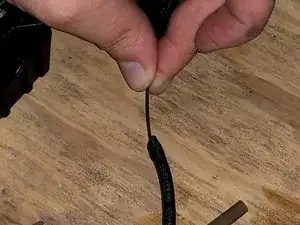
    • Grab the fuel line directly with your hand to continue pulling it completely through.

    • Make sure to use the fuel line connected to the fuel filter for the input line.

    • Use caution when pulling on the gripping tool, if you use too much force you can not only puncture the fuel line, but you can also puncture the tank.

  11. 5OJIDHLEa6AOSUJm
    5OJIDHLEa6AOSUJm
    Y4IUQDoWRmBXASCf
    lbgLbwE1YcjT4TV4
    • Using the same methods as the previous steps, thread the output fuel line through the tank.

  12. fSJxUPyWjBQqxXKy
    fSJxUPyWjBQqxXKy
    lSSgttUtIR5SQs2E
    FKLSN5ihqPnouG4X
    • Push the remaining fuel line into the gas tank.

  13. PIdmZQJNxUAUNKvJ
    PIdmZQJNxUAUNKvJ
    vVmt2BCQttGZpdoo
    yJAMGU4RyXZljYSY
    • Use your cutting pliers to cut the excess fuel line to an appropriate length.

    • Cut the line to an appropriate length as shown in Picture 3.

  14. GNgDCNKDCWtBOLhg
    GNgDCNKDCWtBOLhg
    jMSJNpYPqQ1yZ2P2
    rOnnBFmZeFwutaQj
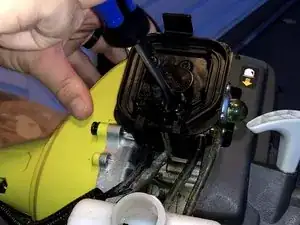
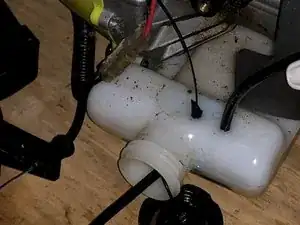
    • Attach the output fuel line back to the carburetor.

    • Attach the input fuel line back to the carburetor.

    • Push the fuel lines up as far as you can to the carburetor block.

Conclusion

To reassemble your device, follow steps 1 and 2 in reverse order.

Nathan McKinney

Member since: 08/10/20

330 Reputation

0 comments