Introduction
I was having a glitch with the scrolling function of the mouse wheel whereby the scroll would studded and often time travel in the wrong direction. The mouse was barely a month old when this started to happen and I was hoping there was some way to correct the problem rather than sending it in for an RMA. As luck would have it there was a post for a similar Roccat mouse that gave me the confidence to open up my mouse and take a peak…
How to adress scroll-wheel issues with Roccat Kone mice
The only reason for this tutorial is to show the different steps required for this particular mouse as there are some noteworthy deviations from the aforementioned tutorial.
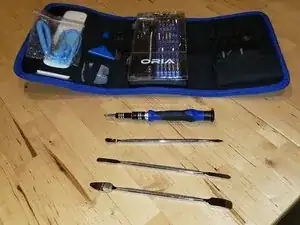
Parts
-
-
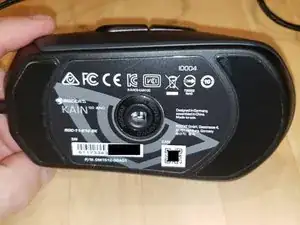
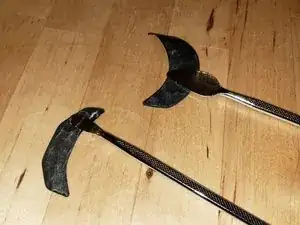
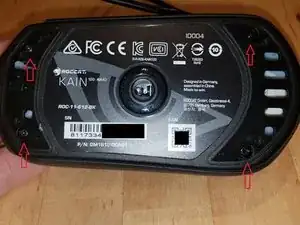
Grab your spudgers and remove the feet from the bottom of the mouse. The previous guide advocated using a heat gun, but I was able to remove mine quite easily without the use of heat. Just be careful to not touch the glue sections of the pads if you can help it. I set my tools aside with the pads still attached to them for easy reassembly.
-
-
-
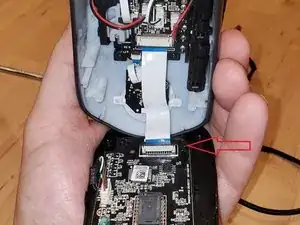
For easier handling of components, lift the black clip where the ribbon inserts and the ribbon will easily pull out of the socket.
-
-
-
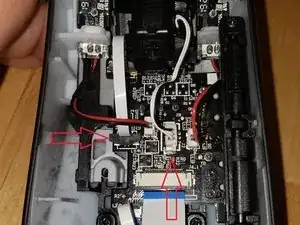
For easier handling, lift the black clip from the ribbon connector (left) and then remove ribbon cable. Firmly grab white connector (center) and lift to disconnect from PCB.... do NOT pull by the wires!
-
-
-
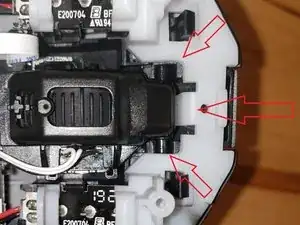
Hold the mouse wheel down from left side, simultaneously use spudger to push back white clip on right side (center arrow), simultaneously push up on the wheel from the other side to release the two black pins from their clips (top and bottom arrows). Rocker mouse back and forth to clear from housing being mindful of the small PCB on the wheel.
-
-
-
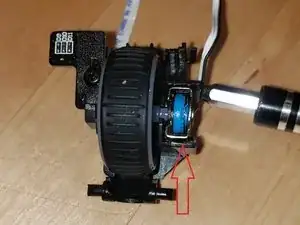
Clean and/or lubricate the sensor. Some say use compressed air, some say WD-40, others contact cleaner.... I used silicone spray. It's your call at this point. Just be careful to not get it all over the place and then clean off any over-spray before reassembly.
-

To reassemble your device, follow these instructions in reverse order.

3 comments
Worked perfectly for me on a Kain 200. Used WD40 and then compressed air.
Bodart -
Thanks for this guide, it definitely solved the issue. I would perhaps add that I used a toothpick to remove fuzz/hairs from around the axle of the wheel. I used electrical contact spray however, I was not too sure from your diagram exactly where to focus the jet.
Thanks for this detailed disassembly. I was able to fix two of the Kain 120s. Your pictures were great.
I also found that it was possible to spray silicone lubricant on the left side of the wheel without disassembly and clean the encoder.
ABC -