Introduction
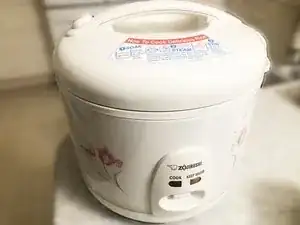
This guide shows how to repair the internal cooking switch on a Zojirushi rice cooker NS-RNC10. Although the instructions are specific to this device, the general principles should apply to a large class of similar devices.
The symptom of the problem addressed is simple: you load up your rice cooker as usual, press the "Cook" switch, expecting the "Cook" light to come on. Instead, nothing happens except that the "Keep Warm" light stays on. Your rice doesn't cook, and you become hungry for answers on iFixit.com.
In this case the fault was in a microswitch inside the unit. Lucky for us, the switch is easy to access, easy to test, and not that difficult to replace.
Tools
Parts
-
-
This is your basic rice cooker. You measure rice and water in an internal pot, place it inside the cooker, and press the single button to begin cooking. When the rice is done, the Cook light goes off and the Keep Warm light goes on.
-
When the Cook light won't go on, it might be due to a faulty microswitch inside the unit. It is relatively easy to clean or replace the switch.
-
-
-
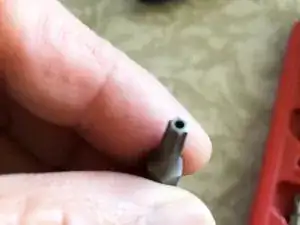
The bottom of this rice cooker is held in place by 3 Phillips screws and one Torx T-20 anti-tamper screw hidden underneath the retractable power cord.
-
I purchased a full set of anti-tamper screw bits at an auto parts store.
-
-
-
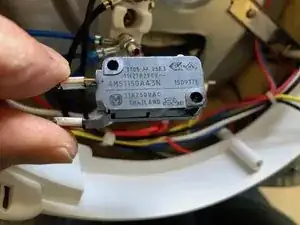
The microswitch is the black plastic rectangular solid that is circled in red in the first photo. It is attached to one red wire and one white wire.
-
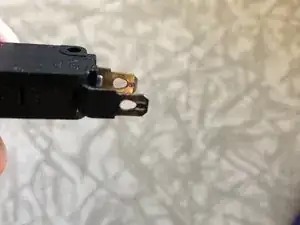
Pull off these red and white wires by pulling on the connectors, after first noting that the white wire connects to the terminal closest to you, while the red connector attaches to the terminal deeper inside the unit. The connectors may have mechanical latches that you have to depress in order to slide the connectors off.
-
The microswitch is held in place by a single Phillips screw. It may be difficult to remove, particularly if there is Loctite on the threads, but if you persist you can remove it without damaging anything.
-
In the second photo, the microswitch has a tiny plastic finger that is pushed to activate the switch.
-
In the third photo, scrape off any corrosion on the switch connectors, leaving the metal shiny.
-
Attach your multimeter to the switch terminals. Check the switch continuity as you press and release the tiny plastic finger. If your rice cooker is like mine, nothing happens because the switch is defective.
-
-
-
If the microswitch is defective, you can replace it. Searching online revealed that the switch is obsolete and no longer available from electronics supply houses.
-
The first photo clearly shows the part number of the switch. The second photo shows that the exterior of the switch has a schematic diagram showing how the switch operates.
-
Sometimes you can find an obsolete part available on eBay or other online sites.
-
Another possibility is to identify a compatible replacement switch. Consult the data sheet for the old part and confirm that the new part has the same specifications. I found a replacement switch on DigiKey.com for $5, with another $5 for shipping and handling.
-
-
-
By carefully prying along a seam, it is possible to gently pry open the microswitch (i.e. it snaps together and is not glued shut).
-
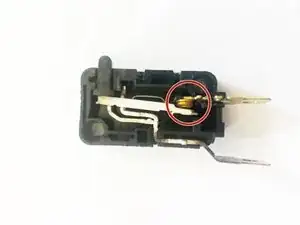
The switch contacts (circled in red) might be dirty from grit or oxidation, causing the switch to fail.
-
You can clean the switch contacts by inserting a pice of paper between the contacts, then pressing the tiny plastic switch activator while dragging the piece of paper through the switch contacts (see second photo).
-
If the contacts were dirty, you might see evidence of this on the paper you used to clean them, as shown in the third photo.
-
After cleaning the contacts, use your multimeter to see if the switch now works correctly. If it doesn't, the switch may be broken beyond repair.
-
Before giving up, you might try using some fine grit sandpaper instead of plain paper, to clean the switch contacts.
-
-
-
At this point you have either repaired the existing switch or purchased a compatible replacement switch. Install it in place and reattach the wires. Then replace the bottom cover of the rice cooker.
-
Test the rice cooker. If all has gone well, pressing the button causes the "Cook" light to light up, indicating that the rice cooker has been restored to normal operation.
-
If the Cook light comes on, make sure that it turns off when the rice is done cooking. If all is well, enjoy your meal.
You might well ask how I knew to replace the microswitch. The short answer is that at the beginning I didn't know that was the problem. It was pretty obvious to me that this internal switch played an important role in the device operation, and I knew from past experience that connectors and switches are often points of failure.
Once I got my multimeter probes on the switch and saw that it wasn't working, I knew that I was onto something. In theory there could be more than one thing wrong (one failure can cause another) but this rice cooker is so simple that I was confident that repairing the switch would fix the cooker.







Great tutorial and pictures. Saved my zojishuri from the garbage dump! Taking apart the switch, the little push button that pushes down on the lever was loose. The lever itself was jammed (stuck). After freeing it, the push button stayed in place and was now moving the lever. Cooking light back working and cooking rice. Thank you!
pkg -