Introduction
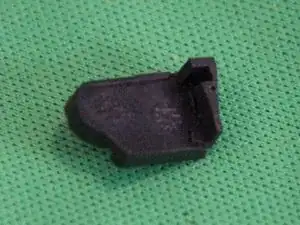
If you drop this mouse you may break a small plastic tab that holds the battery compartment closed, this guide will show you how to safely disassemble and repair the broken piece.
Tools
-
-
Remove the battery if it is still installed and leave the battery cover open.
-
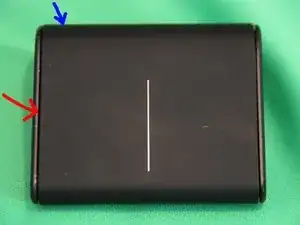
Holding the mouse in your right hand with your thumb at the narrow edge and your index finger near the spot indicated by the blue arrow.
-
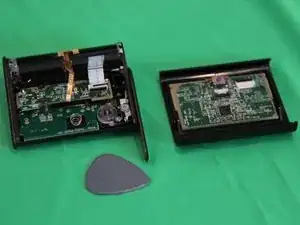
Insert one of the long edges of the guitar pick in the gap indicated by the red arrow and use it to push the top toward the battery cover, at the same time slip the finger nail of your index finder into the gap along the thick edge.
-
With a little fiddling the wide edge should lift a bit near the blue arrow and the top should pop out of a pin just above the red arrow.
-
You should now be able to lift the wide edge of the top a little away from the body of the mouse and downwards a bit toward the thin edge releasing the top.
-
There are two cables attached to the back of the top so just get it loose for now.
-
-
-
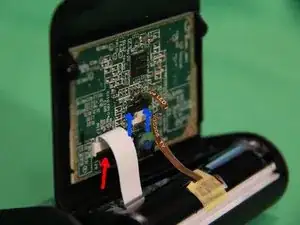
Two ribbon cables need to be disconnected, you can slowly, carefully and gently pull them out without releasing the retaining clips, it may make releasing the clips easier.
-
To release the clip indicated by the red arrow, slip the tip of a small flat blade screwdriver under the middle of the black part of the clip and rotate it to rotate the black part up a bit.
-
To release the clip indicated by the blue arrows you need to apply pressure to the black clip near both of the arrows at the same time and slide the black clip upwards a bit. This may be easier if the cable has already been removed.
-
-
-
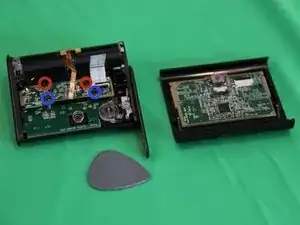
Now that the top has been removed, check for any loose bits of plastic, if the you find anything, shake it out and save it.
-
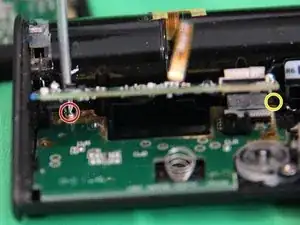
Remove the two phillips screws circled in red.
-
Removing the two phillips screws circled in blue may make the following steps easier but is not absolutely necessary.
-
You may also want to remove the white ribbon cable to get it out of the way but it is not absolutely necessary.
-
-
-
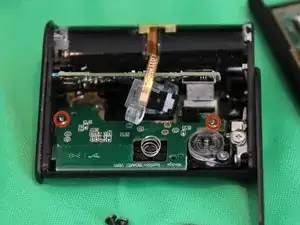
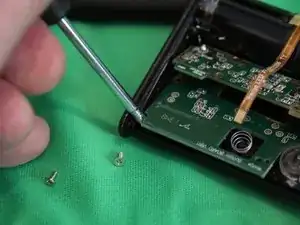
Rotate the upper board a little to expose the screws circled in red.
-
Remove the two phillips screws circled in red.
-
-
-
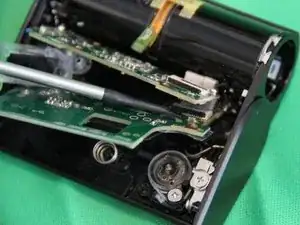
Slide a small phillips screwdriver between the upper PCB and the battery compartment to remove the screw circled in red.
-
There is a second screw hiding near the ribbon cable that connects the upper PCB to the Lower PCB, loosen but to not remove this screw, to make it easier to put back together later.
-
-
-
Insert a small flat blade screw driver as shown and gently pry the lower PCB out from under the plastic retaining clip.
-
-
-
Use a small flat blade screw driver to release the black retaining clip for the lower PCB ribbon cable.
-
Detach the ribbon cable from the Lower PCB
-
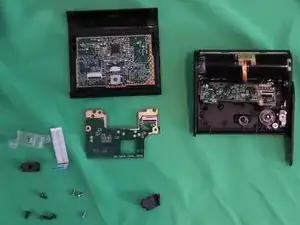
Lift the left edge of the lower PCB until it slides off of the plastic positioning guide on the left side of the case and releases the lower PCB, rotate the lower PCB and pull it toward the thin edge of the case until the board comes free
-
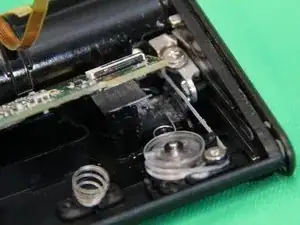
You should not be able to remove the remaining portion of the battery cover release for repair from the bottom of the casing.
-
-
-
Use Crazy Glue to glue the pieces of the battery cover release clip back together.
-
Make sure that you know how the pieces fit together before applying the glue and hold the pieces tightly together in the correct position for at least 30 seconds before trying to put the piece down.
-
Wait a few minutes for the glue to set and then remove any excess glue.
-
Test the strength of the bond, you may have to try gluing twice or try a different type of blue if you can't get a strong bond.
-
-
-
Start the reassembly, for the most part it involves reversing the disassembly steps but there are some things that need to be noted.
-
Drop the battery cover clip back into the bottom of the case in the orientation shown in the previous step.
-
Use a small flat blade screwdriver to pull the spring back and seat the tip of the spring behind the notch in the battery cover clip. Carefully close and open the battery cover a few times to make sure that it is now staying closed properly.
-
Reinsert the lower PCB, taking care to slide the back right corner in first, the screw that was loosened but not removed in step 5 holds a metal clip, the edge of the lower PCB has to slide into this clip.
-
Push the left side of the lower PCB back until is can slide down over the vertical plastic alignment guide on the left edge of the case.
-
Use a flat blade screw driver to get the lower PCB back under the retaining clip at the left front in a similar way to how the board was removed, don't try to just push down on the board, the fit is so tight the board might crack.
-
Make sure the lower PCB ribbon cable clip is in the up / released position, reinsert the lower PCB ribbon cable guiding it into position with a needle nose pliers, tweezers or forceps, be careful not to damage the cable and make sure that it is in far enough that only a tiny stripe of the ribbon contacts remains visible.
-
Rotate the black retaining clip down to lock the ribbon in position. Reinsert and tighten all of the silver screws that hold down the lower PCB.
-
-
-
Push down upper PCB, reinsert and tighten the 2 black screws, if you removed all 4 during disassembly, remember to put the lens and iris back under the upper PCB before pushing it down and tightening all 4 black screws.
-
Reinstall the narrow brown ribbon, starting with the retaining clip pulled loose, there is a darker brown reinforcing strip on the non contact side of the ribbon, the edge of this strip can be pushed on with your fingernail or a small flat blade screw driver or tweezers to push the cable in, the clip will push in as the cable is pushed in.
-
Reinstall the white ribbon into both the upper PCB and the PCB attached to the top cover and rotate the black clips into the flat locked position.
-
Hook the thin edge of the top cover over the thin edge of the main body of the mouse.
-
Start closing the case by slipping the plastic retaining pin on the left side into its hole first then push down the right side clip over the metal clip.
-
Reinstall the battery and close the battery cover.
-
3 comments
great job... i'll add more later.. almost done with the TEARDOWN
t est -
Thanks, great guide! I found that my wedge mouse wouldn't turn on after a long period of non use. I had no idea how to open it but following the first couple of steps I managed to. Turned out the negative battery contact (attached to the slider) had a thick layer of corrosion. Scraped off the gunk, now it works again.
Great info on how to disassemble. As with Andrew Mansell, I had a blob of corrosion on the terminal as well. Cleaned it off. Works great. If this happens again in the future, now knowing how the system works, I'll glue a small piece of emery cloth or 1000 grit paper to the battery. Install that battery. The grit paper will clean the terminal without having to disassemble. Most of the time.
Rich B -
