Introduction
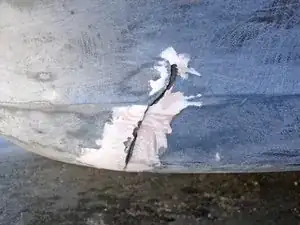
Bumper replacements can be expensive, but it isn't always necessary to replace the bumper. Gluing a cracked bumper probably isn't the way to go, but a fiberglass reinforcement is usually sufficient for isolated cases of mild to moderate damage. Use of fiberglass bonds the broken bumper pieces together and adds rigidity.
Use this guide to repair cracks in your bumper using fiberglass.
Tools
Parts
-
-
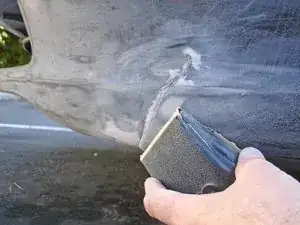
Use low-grit sand paper to sand off burs, debris and previous repair attempts so that the bumper piece can be manipulated back to its original shape.
-
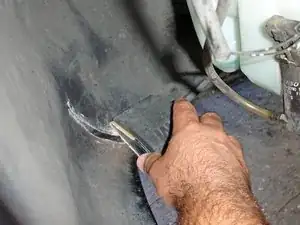
Clean off all sanding dust when you are done using water and if necessary, soap. Clean the area around the crack on the inside of the bumper especially well, as this is where the fiberglass will be laid.
-
-
-
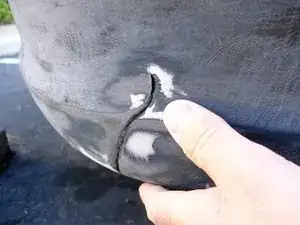
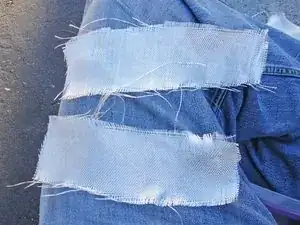
Cut out pieces of fiberglass large enough to cover the damaged area and extend at least 1" beyond the repair area. Multiple layers and wider cloth pieces can be used to add strength and rigidity.
-
-
-
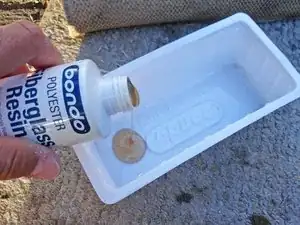
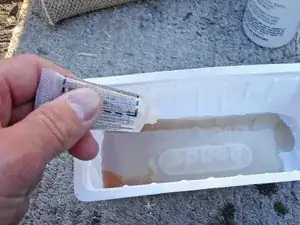
Pour the fiberglass epoxy resin and hardener into a disposable container at the ratio described by the epoxy's instructions.
-
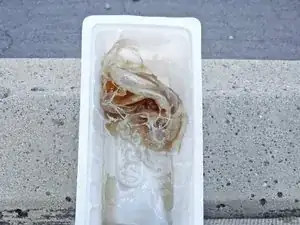
Thoroughly coat the fiberglass mats in the epoxy.
-
-
-
Lay the fiberglass mats over the crack on the inside of the bumper. Be sure the mats are pressed flat against the bumper insides and that there are no bubbles.
-
Allow the epoxy to dry as long as required by its instructions.
-
The repair is complete once the epoxy dries! If you wish to further conceal the damage, follow our Body Work Dents and Cracks guide and Hand Painting guide to make the bumper truly look like new!
-
To reassemble your device, follow these instructions in reverse order.