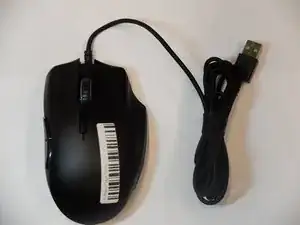
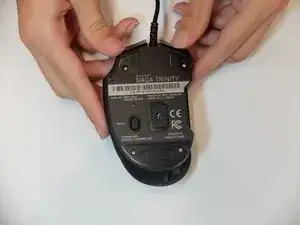
Introduction

If the LED on the mouse will not illuminate, the LED light ribbon cable might be disconnected or might need to be replaced. Reasons that the LED light ribbon may be non-functional is that the mouse drive could be out of date, there could be a physical issue with the ribbon cable, or there could be a connection issue. This guide will list all required steps to properly replace the LED light ribbon cable from the Razer Naga Trinity.
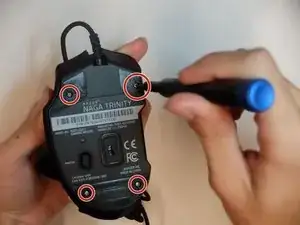
  1. 6upNCxhUNlRnNAoc
    6upNCxhUNlRnNAoc
    sWTAShWRBvq4UCtY
    • Remove the interchangeable side plate.

  2. orOjsRmCvWlyCppb
    orOjsRmCvWlyCppb
    tbQ2dVkNYFde3p4x
    • Remove the mouse's feet using the opening pick.

    Be aware that it’s possible to peel the feet from the glue layer.

    SteepPoppy0 -

  3. InHdBApOF6SDgVAH
    • Remove the four 6mm screws by using a JIS #1 screwdriver.

  4. 1RpIKkEgpOPBNYnZ
    1RpIKkEgpOPBNYnZ
    MXDm6KNnWSVQ3aUh
    • Separate the top mouse housing from the bottom mouse housing using the opening pick.

    • Be careful not to tug too hard on the ribbon connector.

  5. KQU2EAEMltumNpre
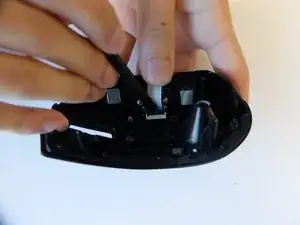
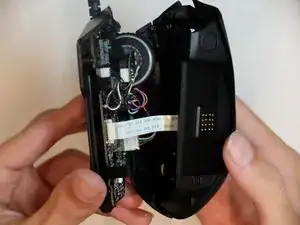
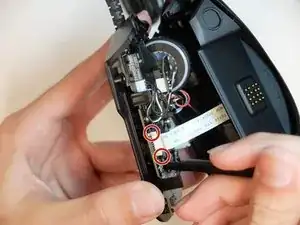
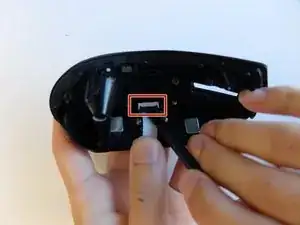
    • Unlock the ribbon connector that is held down by the main board clips using the spudger's pointed end.

  6. 6tHqsjrGrtlWIs1n
    • Remove the side housing using the opening pick.

  7. OVlMdXPLNtxWfxCt
    OVlMdXPLNtxWfxCt
    iYUABYcFqnBNGgIZ
    • Remove the top housing LED 3-Pin connector that is near the main board.

  8. TZLR3qKP14R6pBPf
    TZLR3qKP14R6pBPf
    5M6jvqXWfuuEamMy
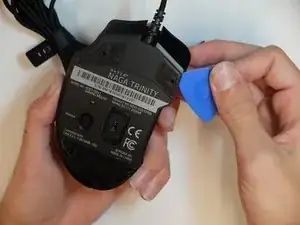
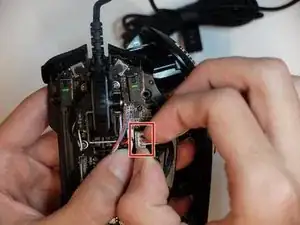
    • Using the flat end of a spudger, unlock the ribbon cable holding the clips.

    • Remove the ribbon cable.

Conclusion

To reassemble your device, follow these instructions in reverse order.

Alexandros Andreou

Member since: 16/09/19

700 Reputation

0 comments