Introduction

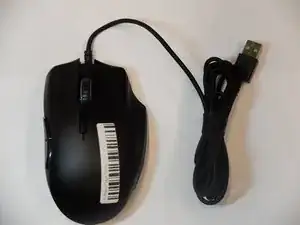
This prerequisite guide is to help users disassemble the mouse. The mouse needs to be mostly disassembled in order to complete most of the tasks needed to fix any issues.

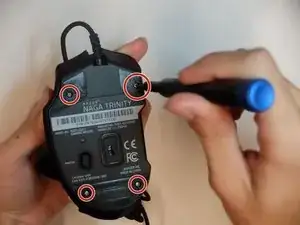
Put on the anti-static wrist strap to protect you from electrostatic discharges during your repair.

  1. 6upNCxhUNlRnNAoc
    6upNCxhUNlRnNAoc
    sWTAShWRBvq4UCtY
    • Remove the interchangeable side plate.

  2. orOjsRmCvWlyCppb
    orOjsRmCvWlyCppb
    tbQ2dVkNYFde3p4x
    • Remove the mouse's feet using the opening pick.

    Be aware that it’s possible to peel the feet from the glue layer.

    SteepPoppy0 -

  3. InHdBApOF6SDgVAH
    • Remove the four 6mm screws by using a JIS #1 screwdriver.

  4. 1RpIKkEgpOPBNYnZ
    1RpIKkEgpOPBNYnZ
    MXDm6KNnWSVQ3aUh
    • Separate the top mouse housing from the bottom mouse housing using the opening pick.

    • Be careful not to tug too hard on the ribbon connector.

  5. KQU2EAEMltumNpre
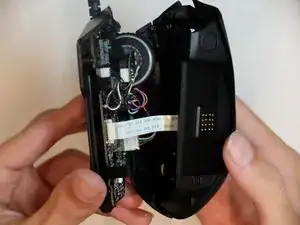
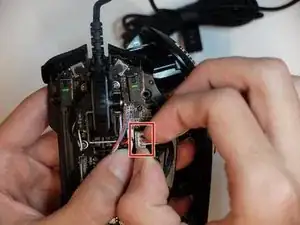
    • Unlock the ribbon connector that is held down by the main board clips using the spudger's pointed end.

  6. 6tHqsjrGrtlWIs1n
    • Remove the side housing using the opening pick.

  7. OVlMdXPLNtxWfxCt
    OVlMdXPLNtxWfxCt
    iYUABYcFqnBNGgIZ
    • Remove the top housing LED 3-Pin connector that is near the main board.

Conclusion

To reassemble your device, follow these instructions in reverse order.

Alexandros Andreou

Member since: 16/09/19

700 Reputation

11 comments

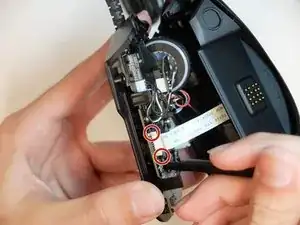
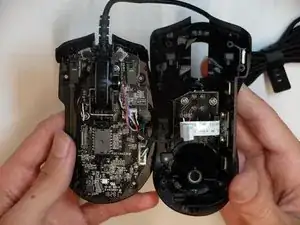
I would like to to point out that at step 7, second picture, the 3-pin connector is for the top 2 buttons. the RGB LED is actually in the board and can be seen in step 7 first picture, tiny white square at the bottom, top left where it says K7-D1.

Jaidee Sasaki -

The cable for the Naga2014 fits admirably and appears to work fully, BUT NOTE: the green and white wires need to be swapped around in the plug at the end that connects inside the mouse.

Chris Gravell -

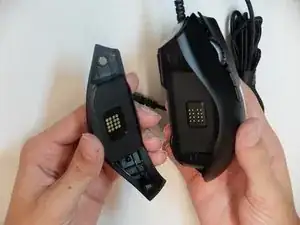
How do you open up the side plates so you can clean inside them?

Teach -

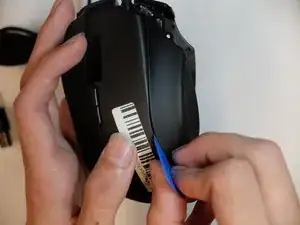
If you feel along the back, you'll notice that it is 'rougher' than the injection-molded plastic; this is a sticker that hides 4 Phillips #1 screws and two more magnets. Peel off the sticker and remove the screws--the plate should then lift right out. I... discovered this the hard way after destructively disassembling a broken 12-button part because the design LOOKS like it just clips on, and I wasn't sure if this was a heat glue situation or something else. Here's the 6-button part fully disassembled. https://i.imgur.com/xK7IPus.jpg

Warmachine (Warmachine) -

How do you remove the board so that you can replace the mouse buttons when they break?

kbenaca654 -

It’s held in by four screws - left of the bottom edge of the wheel’s rearward mounting bracket, just forward of the main cable connector on the right, and either side of the wheel’s forward mounting bracket.

To access the forward wheel mounting bracket screws, it’s easier if you first remove the wheel (it’s located by lugs/pins at front and back) by carefully bending the front mounting bracket forward to allow enough clearance for that lug/pin to be pulled clear.

Make a mental note of the arrangement of the front mounting parts for reassembly.

Chris Gravell -

How do you put the feet back on?

Andy Van -

I have this same Question did you ever find out or did you just buy new feet?

NMBR5 -

I was just able to fix my mouse after a drop, thank to your guide and some superglue drops, thanks.

Cazavid -

Is it possible to separate completely the plastic frame from the electronic components?

Tommaso Merlin -

is there how to of the disassembly of the button modules ?
thank you
I want to make refined version of the 7 and 12 button
since I have a larger hand that it was made more

resourceful.thought -