Introduction

  1. KHZl4VUPHKyBdeJp
    • Using a spudger, remove the teflon tape on the bottom of the mouse to reveal four screws.

  2. wdsw1WWWD4AUrRm6
    • Use a Phillips #00 screwdriver to remove the four screws.

  3. Z5rMm26lg5EjMi1l
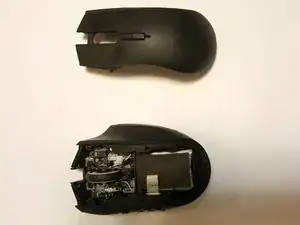
    • Gently pull on the top plastic plate of the device and carefully unplug the white cord from the circuit board.

    • When removing the chassis, carefully unplug the cord connecting to the top mouse buttons.

  4. FIKQJOMLoYZSvTNM
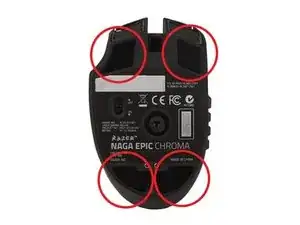
    • Gently pull up on the right plate on the mouse; separating it.

    • Carefully repeat this step for the left side.

    • Be wary of the cable connecting to the twelve mouse buttons located on the left plate. This can be disconnected if needed.

    Thank you for this guide! I was able to get my mouse from 2014 open and clean it out

    Spam Account -

  5. hNxNi5FWALwHHn3W
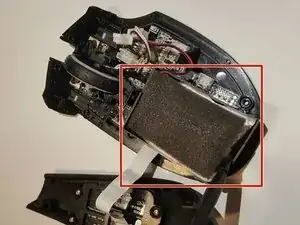
    • Take your nylon spudger to gently pry the battery pack from the device.

    • Remove the foam on the battery shell for your new battery.

    Also, you’ll want to carefully remove the foam from the battery for reuse.

    Dan Mergens -

  6. HcfRElBUCtWHRFsO
    • Unplug the power cord from the circuit board in the mouse.

    Did you find a replacement? Couldn't find a dealer for this battery

    Doc Brown -

    Reposting from below: https://www.amazon.com/gp/product/B0767K... - for this battery you’ll need to switch the battery leads to match the polarity.

    Dan Mergens -

    Also, you should remove the tape, or provide your own for the replacement battery.

    Dan Mergens -

  7. D6tUNijiVQVTKJln
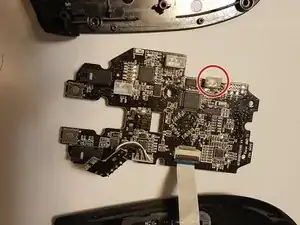
    • Plug the cord of the new battery into the socket found in the bottom right of the circuit board.

    • Insert the new battery into the battery socket.

    • Place the foam on the surface of the new battery (reference Step 5).

  8. h16T2RJSkKcXrBSP
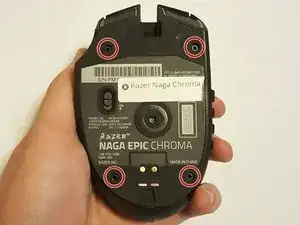
    • Remove the two screws holding the battery mount in place and remove the mount from the mouse.

    This photo should be between 5 and 7.

    Kamil -

  9. VvyHADDHfEFmMyIv
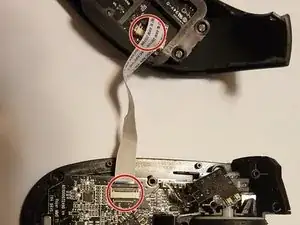
    • Disconnect the white connection strip from the white connection port on the circuit board.

    • Disconnect the USB cable (the cable is located on the right and center of the circuit board).

  10. lGNDDFefdOWE4gA1
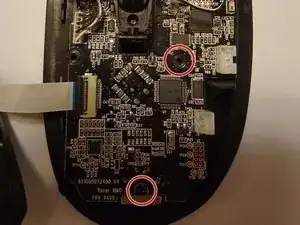
    • Remove the two screws that were on either side of the battery mount. This will allow the circuit board to be removed.

  11. 3NGIBGshbWLxbR5h
    • Remove the circuit board and turn it over to its underside.

  12. h1KYGRpBWrIsvQI3
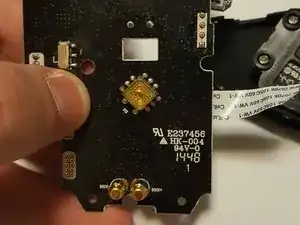
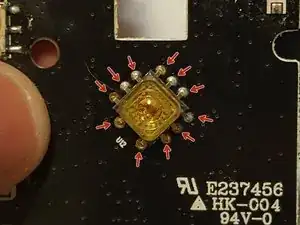
    • Around the yellow sensor, located in the middle of the back of the circuit board, locate the eleven "leads" (soldered connections) surrounding the yellow sensor.

  13. QGElAxLLEDTraLeH
    QGElAxLLEDTraLeH
    atTUxmIHvixJHCOF
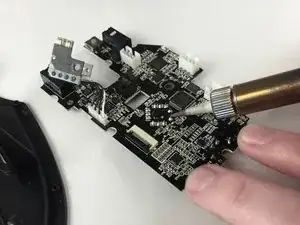
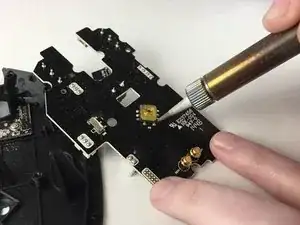
    • Re-solder all eleven leads to the connection points of the sensor.

    • This should fix the problem with the mouse sensor tracking issues.

    • For soldering tips, refer to this guide.

Conclusion

To reassemble your device, follow these instructions in reverse order from steps 1-5.

Jordan Morgan

Member since: 20/01/17

886 Reputation

7 comments

Hi i’m adrian in nz. R76 on my board has corroded off. Is there any chance you know or could measure this value?

Adrian Leighton -

It is just above the black chip above the top screw hole from step 10. Thanks!

Adrian Leighton -

where could i buy a tracking sensor?

mescaline86 -

The Philips PLN-2032 sensor on the Razer Naga Epic Chroma is purchased from the link.

https://www.aliexpress.com/item/1pc-mous...

Na Gyeongheum -

Worked on my regular chroma. Just a cold solder joint.

Yolo Swaggins -

Where can i buy the PLN-2032, sensor?

The link above is not longer avaiable :c

javier gutierrez -

Hi! Do you know where can I buy one sensor?

Diego Rojas Velandia -