Introduction

  1. KHZl4VUPHKyBdeJp
    • Using a spudger, remove the teflon tape on the bottom of the mouse to reveal four screws.

  2. wdsw1WWWD4AUrRm6
    • Use a Phillips #00 screwdriver to remove the four screws.

  3. Z5rMm26lg5EjMi1l
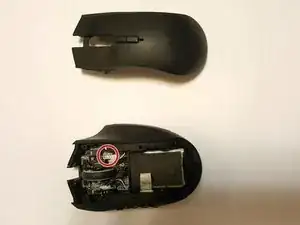
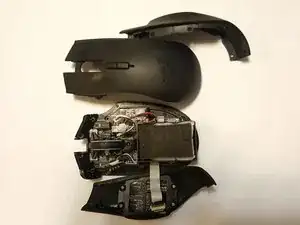
    • Gently pull on the top plastic plate of the device and carefully unplug the white cord from the circuit board.

    • When removing the chassis, carefully unplug the cord connecting to the top mouse buttons.

  4. FIKQJOMLoYZSvTNM
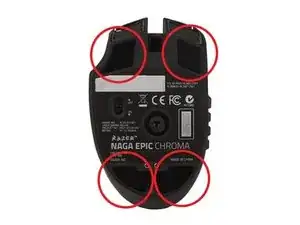
    • Gently pull up on the right plate on the mouse; separating it.

    • Carefully repeat this step for the left side.

    • Be wary of the cable connecting to the twelve mouse buttons located on the left plate. This can be disconnected if needed.

    Thank you for this guide! I was able to get my mouse from 2014 open and clean it out

    Spam Account -

  5. l5BupdZ5U5ehjb25
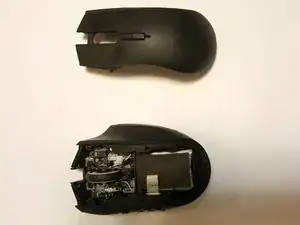
    • Plug the new top casing's cable back into the socket on the right side of the circuit board near the middle.

    • Reassemble the device.

    • Test device to make sure the connections function correctly.

Conclusion

To reassemble your device, follow these instructions in reverse order.

Jordan Morgan

Member since: 20/01/17

886 Reputation

0 comments