Introduction

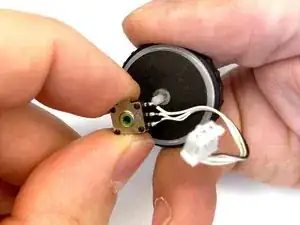
A faulty scroll wheel encoder chip will cause irregular scrolling. You can replace the chip and still preserve the stock wheel and lights if you follow this guide. Also make sure that the mouse is unplugged from the pc prior to beginning.

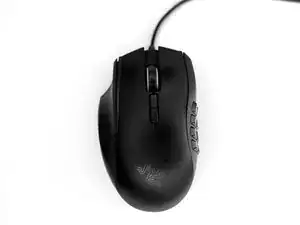
The Razer Naga 2014 (Left-Handed Edition) was discontinued from production shortly after it’s initial run. Unfortunately for many people, including myself, using a standard right handed mouse is not an option. So this guide will help people preserve their mouse and use it for years to come.

  1. h2JXK2lBw2dxqjRB
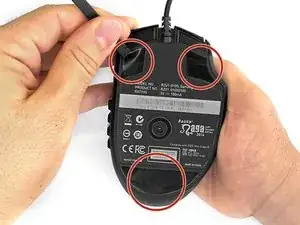
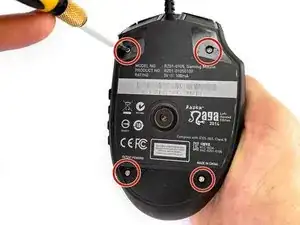
    • Peel back the two teflon pads from the top corners and the one larger one from the bottom with the help of a spudger.

    • You will find four 7 mm screws under the teflon pads.

  2. oLWy6yGs6gZIZFEA
    • Remove the four 7mm screws using a Phillips #00 screwdriver.

  3. 11N6ZKDxXnyjRE6Q
    11N6ZKDxXnyjRE6Q
    vtGWcrh2D2PfGLqQ
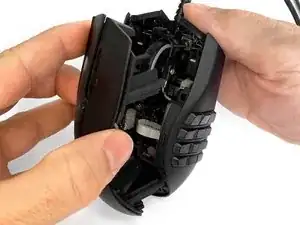
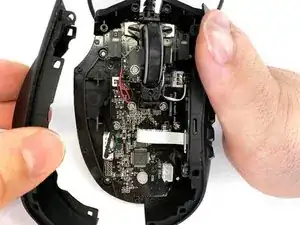
    • Gently remove the top plastic shell from the mouse.

    • Be careful when lifting the shell up to avoid damage to the cable connected to the board and shell.

    • The top shell is separate from the sides of the mouse.

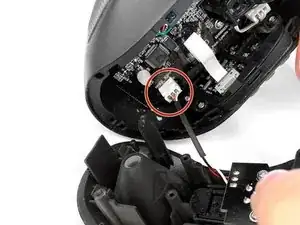
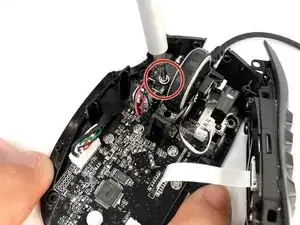
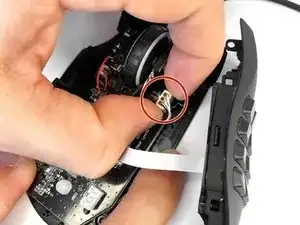
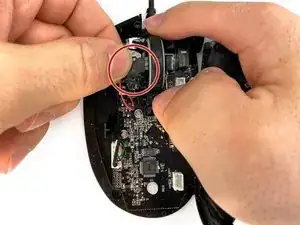
    • Unplug the cable coming from the top shell that connects to the board.

  4. IsE4NlrvEKmnbIHG
    • Gently pull the two plastic sides off the mouse.

    • Pry the sides off gently so you don't crack any of the plastic tabs that hold them in place.

  5. fAnLipZqKW1YaW6u
    • Use a Phillips #00 screwdriver to remove the 5 mm screw holding the scroll wheel in place.

    • This screw is different than the ones at the bottom of the mouse so keep it separate.

  6. HJqhFtjSiNTgywgn
    • Unplug the cord that connects the scroll wheel to the motherboard.

  7. Ek2BHRBeeHgXImjj
    • Gently slide the lighting chip up and out of the scroll wheel.

  8. 11FFId5srD1pFovG
    • Use a spudger to gently pry the scroll wheel assembly out from the plastic housing.

  9. 2RM2IYKeHKQ6OiYq
    • Remove the scroll wheel from the holder by pushing it up from underneath.

  10. LfAJJ2WHTsqLqD5u
    • Remove the old encoder chip and replace with the new one.

    • Make sure that the silver part of the encoder faces out and that the small square points down when reinstalling.

Conclusion

To reassemble your device, follow these instructions in reverse order.

Tony Di Folca

Member since: 13/05/19

231 Reputation

0 comments