Introduction
This guide shows how to replace the switch that controls the action of the key when it malfunctions or stops working completely in the Razer BlackWidow Chroma keyboard.
You will need to know how to solder in order to complete this guide. For more information on soldering, please visit the How to Solder and Desolder Connections guide.
Tools
-
-
Turn the keyboard over so that it is lying flat on its face.
-
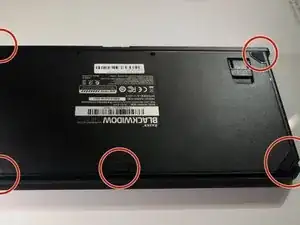
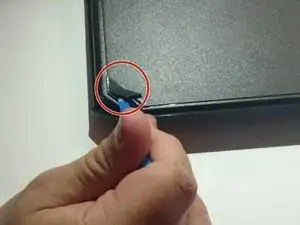
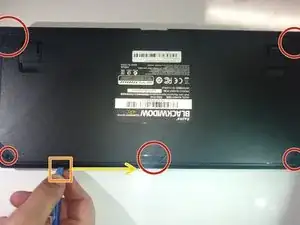
Use the iFixit opening tool to pry the rubber feet off the keyboard.
-
-
-
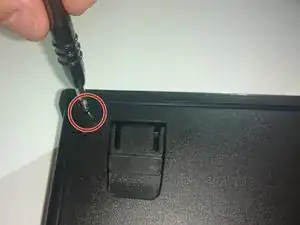
Use a Phillips #1 screwdriver to remove the six screws on the back of the keyboard.
-
Use an opening tool as a wedge between the front and back panel to pry open the front panel.
-
Instead, slide the opening tool across the keyboard in between the front and back panel. Go around the edges of the keyboard until the panels disconnect.
-
Flip the keyboard over so the keys are facing up.
-
Grabbing the left and right lips of the front panel, lift both ends up, removing the front panel.
-
-
-
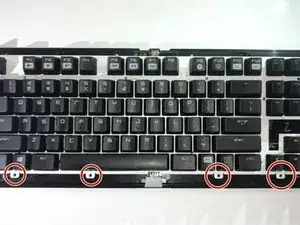
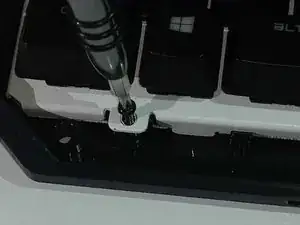
Use a Philips #1 Screwdriver to remove the four screws located below the keys.
-
Lift the main circuit board and flip it over, placing it on its top.
-
-
-
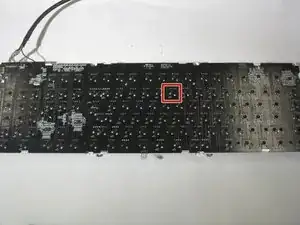
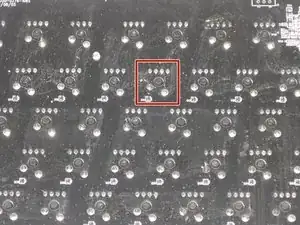
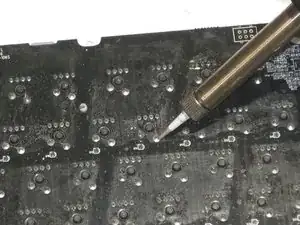
De-solder the anchor of each key that you desire to replace with a soldering iron.
-
For more information on soldering connections, please visit the How to Solder and Desolder Connections guide.
-
Remove the key switch once the de-soldering is complete.
-
To reassemble your device, follow these instructions in reverse order.
3 comments
hello where to buy the switches for this keyboard?
ninja636 -
I've seen Razer Green Switches (the ones for the Blackwidow) with RGB lighting available for sale on eBay.
I hope that helps!
Hi Annika, I have razer black widow chroma overwatch edition, Is gateron optical switch compatible with it?

Mine also had two clips on the left and right sides. Needed to run an opening tool over one side before I could open it
Justin -
In order to remove the keys at all you need to remove the led's as well, which have 4 pins and are awful to get out.. I would appreciate it if this guide had noted that before I started this repair..
David Cropp -