Introduction
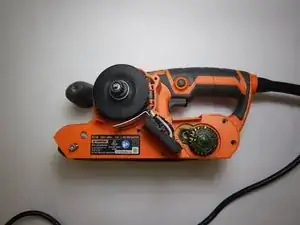
This guide is designed to walk you through step-by-step procedures on how to replace the motor on a RIDGID Belt Sander R2740. A broken or damaged motor will cause the motor driven drum not to rotate, therefore, causing the belt of the sander not to move or function properly. The belt may also be moving at a very slow speed if the motor is burning out.
Before working on the RIDGID Belt Sander make sure the the power tool is unplugged or disconnected from any power source. Failure to do so may result in electrocution or personal injury while removing the motor. Make sure to read through this guide for addition information before beginning the replacement of the RIDGID Belt Sander R2740 motor.
-
-
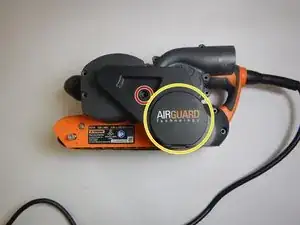
Orient the Ridgid Sander to where the Air Guard logo is facing upwards.
-
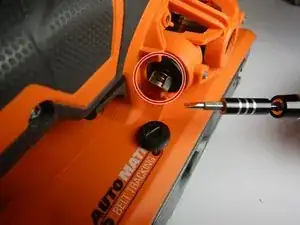
Unscrew the outlined screw in the figure with a Torx TR10 screw bit.
-
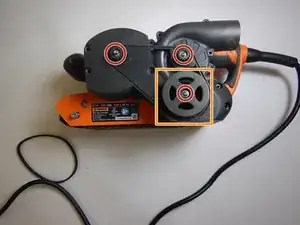
Remove the guard that is protecting the tread-line.
-
-
-
See attached diagram.
-
The guard below the wheels should be able to lift up out of place.
-
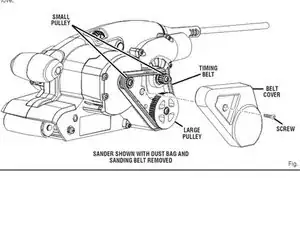
Remove the timing belt from the pulleys.
-
Unscrew the three screws with a Phillips #1 screwdriver.
-
Remove the large pulley after removing the screw.
-
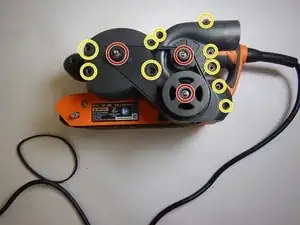
Using the Torx TR10 Bit, unscrew the 10 screws which hold the external casing in place.
-
-
-
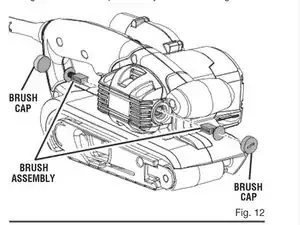
Remove the brush caps from either side using a flathead screwdriver (See attached diagram).
-
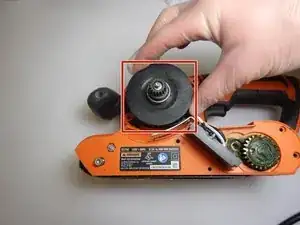
Remove the plastic cover with the Ridgid logo.
-
Remove the brush assembly (See attached diagram).
-
-
-
Now orient the Rigid Sander to the other side that shows the exposed motor.
-
The motor will be able to lift up out of place.
-


To reassemble your device, follow these instructions in reverse order.