Introduction
The RAM, or Random Access Memory, is an essential component in any computer system, as it provides temporary storage for data that the CPU needs to access quickly. Upgrading the RAM of your NAS can improve its performance, especially if you use resource-intensive applications or have multiple users accessing the NAS simultaneously.
The Qnap TS-431XeU NAS comes with a single DDR3 SO-DIMM RAM slot, which means you can only upgrade the RAM by replacing the existing module with a higher capacity one. This guide will take you through the steps required to safely remove the old RAM module and install a new one.
Before you begin, make sure you have a compatible DDR3 SO-DIMM RAM module. According to the user manual of the Qnap TS-431XeU NAS, the maximum RAM capacity for this device is 8GB. Therefore, when selecting a new DDR3 SO-DIMM RAM module for the upgrade, make sure it is no larger than 8GB in capacity. You should also back up your data and shut down your NAS before starting the upgrade process.
Tools
Parts
-
-
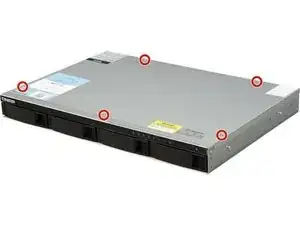
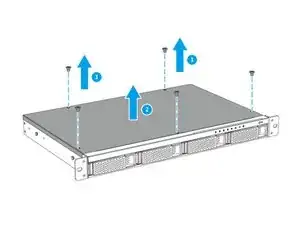
Use a PH1 screwdriver to unscrew the five screws that secure the case cover to the chassis.
-
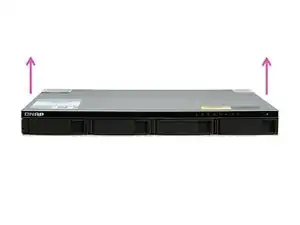
Pull the case cover up until it completely detaches from the chassis.
-
-
-
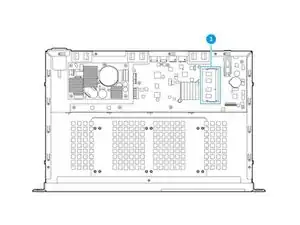
Locate the RAM module.
-
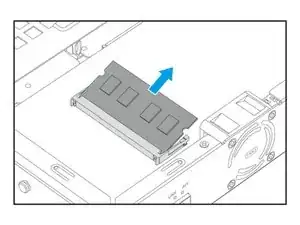
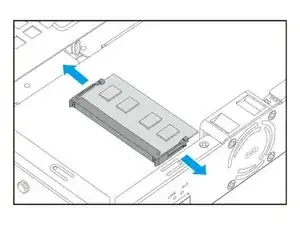
Push the retention clips outward simultaneously to release the module.
-
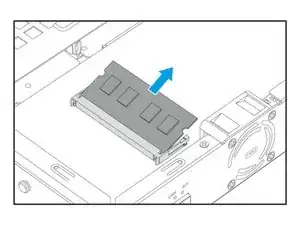
Hold the module by the edges and then carefully slide it out of the slot.
-
-
-
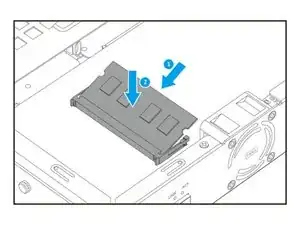
Align the notch of the new module with the ridge in the slot.
-
Insert the module into the slot.
-
Carefully press down on the module until the retention clips lock the module into place.
-
To reassemble your device, follow these instructions in reverse order.
