Introduction
This is a prerequisite only.
Tools
-
-
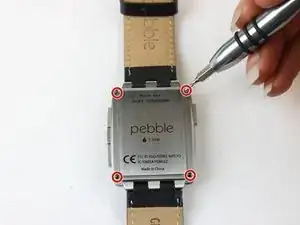
Use a Torx T3 screwdriver to unscrew the four 3.5 mm Torx T3 screws holding the back plate.
-
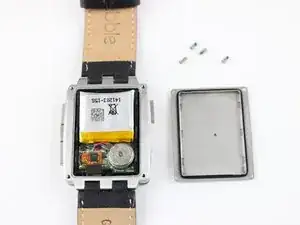
Remove the back plate.
-
-
-
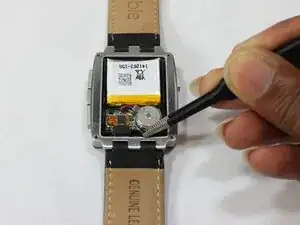
The plastic frame is clipped inside the steel body with four clips, two each on the left and the right side of the watch, near the corners. You can stick a small screwdriver into the cutouts right above the clips and gently lever the plastic frame up, corner by corner.
-
Once the clips are released, use a pair of tweezers to grab onto the black plastic frame and remove the internal hardware.
-
Use tweezers or a plastic opening tool to disconnect the ribbon cable from the motherboard.
-
Conclusion
To reassemble your device, follow these instructions in reverse order.
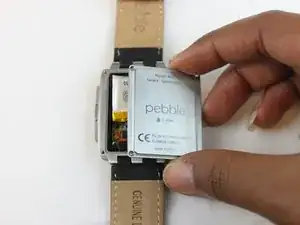
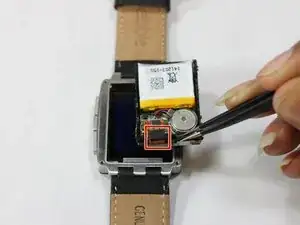

The vibration motor is glued to the back plate. So remove the back plate a little bit, and look, if the motor sticks to it. Then first use a plastic opening tool to remove the vibration motor from the back plate.
Gauner -
Same comment as Gauner: The vibration motor is glued to the back plate. DO NOT simply pull off the back plate as per the instructions else the two small wires that connect the motor will be damaged. I used a SIM tray pin tool to gently pry off the motor.
Steven Holbourne -
There’s no need to desolder the battery. Use wirecutters to clip the ribbon cable as close as possible to the motherboard, then use the old solder beads to attach the wires of the new battery. Cutting out the old battery reduces the amount of heat the motherboard is exposed to. Also, the polarity of the battery is indicated by two tiny symbols next to the solder pads. In case you can’t read them, the positive wire is soldered to the terminal closer to the center of the motherboard. Finally, be aware that leaving too high a bead of solder above the motherboard will cause pressure and bright dots on the backlight when the watch is reassembled. Check your solder before reassembly and either melt down, cut or file off the excess solder to save yourself a second teardown.
Rich Stillman -
After reassembly, the watch will sometimes need a little attention before the display works again. You may need to either press buttons or attach the charger to jump-start the watch. Also, even if the display fully works, the backlight may not function immediately after reassembly. This is almost always fixed by shutting down and restarting the watch. You will almost never need to disassemble the watch again to get the display working, unless you forgot to reinsert the zebra strip or reconnect the ribbon cable connector.
Rich Stillman -