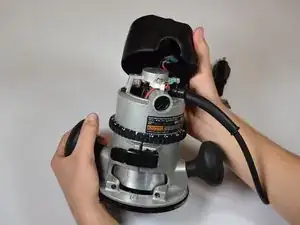
Introduction

This guide will require you to use some force. You can refer to the disassembly in this video for further demonstration.

  1. 3RNYhbGKKQArQMND
    3RNYhbGKKQArQMND
    nEQ12xaW6S2ShHmY
    • Use a Torx screwdriver to unscrew the 25.4 mm screws found at the top of the model.

  2. haWnGdOIqVFmYkvL
    haWnGdOIqVFmYkvL
    jUOkadRHxMDlvCnX
    • Remove the top by gently lifting the cover from router body.

    • Be careful when pulling the top from its place; wires connect the switch to the electrical cord and could be pulled loose or damaged.

  3. YPqgCIWHAqJK4UK5
    • Use a spudger to pull off the plastic covering of the power switch.

    • Don’t be afraid to really pry underneath the plastic (no components of the router will be damaged if you do so).

  4. ZkwOGTA6FSwuU1mK
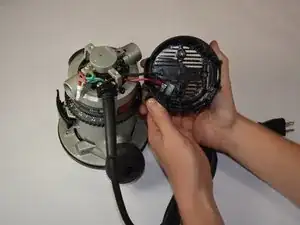
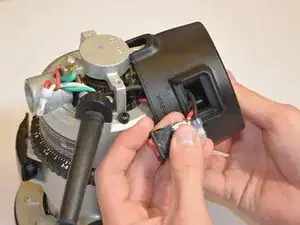
    • Push the power switch through the top of the router. The power switch should now be completely detached from the router (besides the wire connections).

  5. dcIBoGCbQtpYcEeE
    dcIBoGCbQtpYcEeE
    ljqkKLtGwxenRMiy
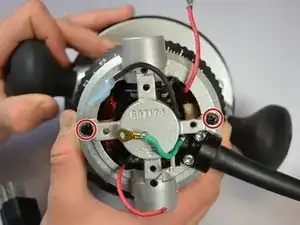
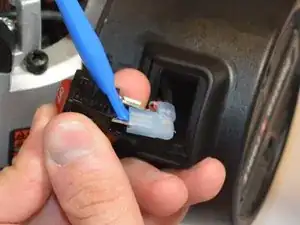
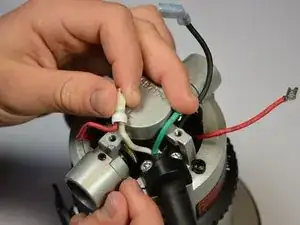
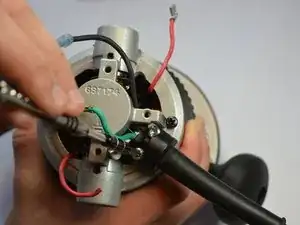
    • Find the wire plugs which are attached to the power switch. These connections are located at the back of the plastic box that houses the switch.

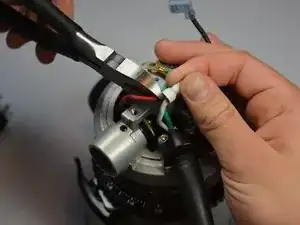
    • Use the spudger to carefully loosen the metal and rubber coverings, and detach the connections from the switch.

    • While some force is needed in order to successfully pull the connections free, have care in making sure that you don’t damage any of the metal components. If needed you may carefully use a metal spudger instead of a plastic opening tool.

  6. SKQUYPvTa32qLPLo
    • Use a pentalobe screwdriver to unscrew the 11 mm screw.

  7. is3adg4RBMTKKGTP
    is3adg4RBMTKKGTP
    BZelpVJFpdYlVwxE
    mwxraIUPRluUmEMo
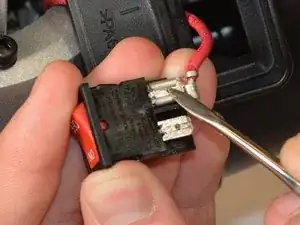
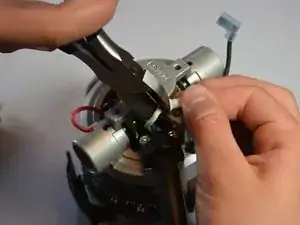
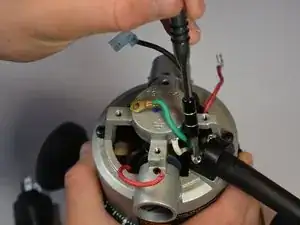
    • Use a pair of pliers to cut the white and red wires where they are crimped and the white wire connector.

    • Reminder: When following the guide in reverse order, you will need to remove a small section of the rubber insulation to reveal the wire. The wires will then have to be twisted together and covered with a new plastic housing. This process will shorten the wires every time the power cord is replaced.

  8. vVPcMejhNWkr4kdQ
    vVPcMejhNWkr4kdQ
    anytvouBEVdPPBZN
    i5uGTDEfTiMVug3h
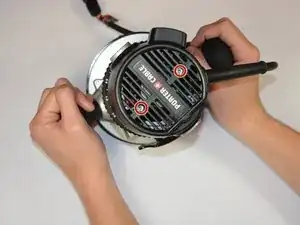
    • Locate the two 20 mm screws on the base of the power cord.

    • Use a pentalobe screwdriver to unscrew the screws.

  9. IrMvoV2WsVw2HVO4
    • Use a phillips screwdriver to unscrew the two black 50 mm screws.

  10. VTOZA2yXFxgwPq4V
  11. SBFbIqlQHqVly6Wo
    SBFbIqlQHqVly6Wo
    AMYOV4HtmiuVTy1C
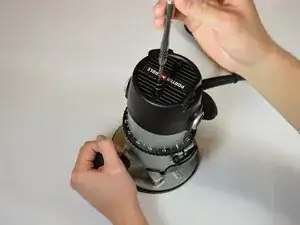
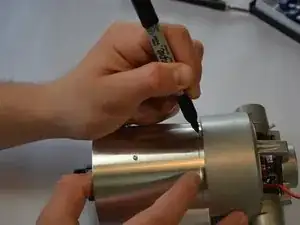
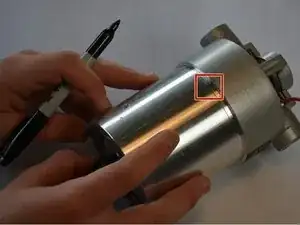
    • Use a sharpie to mark where the base and the cap meet. This will allow you to make sure that you have all the alignment correct during reassembly.

  12. PF6rMcjmDT64hDoP
    PF6rMcjmDT64hDoP
    uvpCGyutZPbMHZfL
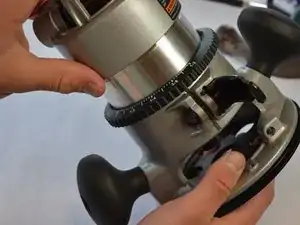
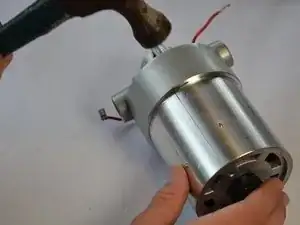
    • Use a hammer or mallet to hit the base of the cap a couple times. The cap should pull away freely from the base.

    • Don't be afraid to use force, the cap may be tightly lodged in its housing.

  13. ZWASyTuZBp2PdfJt
    ZWASyTuZBp2PdfJt
    bocUxiRNr2kVIHxl
    umxadbvtnlDJ2DEq
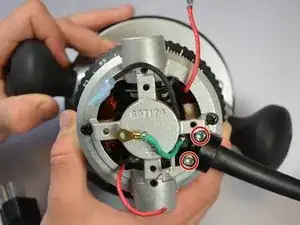
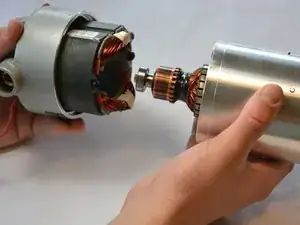
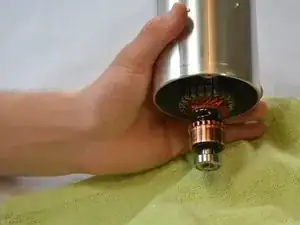
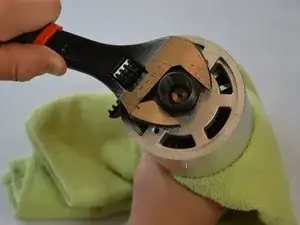
    • With a rag in hand, hold the back of the motor tightly.

    • Locate the black hexagon chuck at the bottom of the router

    • Using a wrench, unscrew the chuck. The motor and the chuck will pull free from opposite ends of the base and can be replaced at your leisure.

    • Depending on how tight the chuck is fastened, an impact screw gun may be required.

Conclusion

To reassemble your device, follow these instructions in reverse order.

Conor J

Member since: 06/10/16

101 Reputation

One comment

Is there a guide for disassembly of an ELU router??

haynes.ian -