Introduction
If your Lumix has a damaged back casing, or if there is an issue with your internal components (such as your flash, lens, motherboard, LCD screen, and more), it’ll be necessary to either briefly remove or replace the Lumix’s back casing.
Before beginning, make sure to turn off your camera completely and remove its battery.
-
-
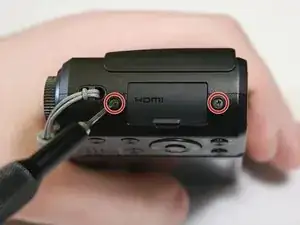
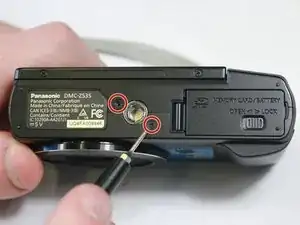
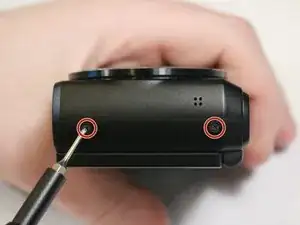
Remove the six 4mm screws located on the side and bottom of the camera casing using a Phillips #000 screwdriver.
-
-
-
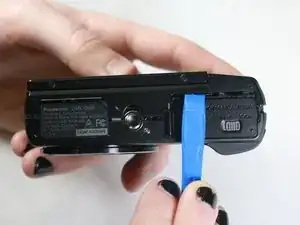
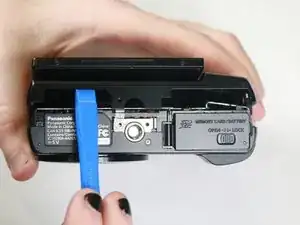
Use a plastic opening tool to carefully separate the back casing from the main body of the camera. It's advised to run along the entire "seam" of the casing and the camera with the tool to ensure full separation.
-
-
-
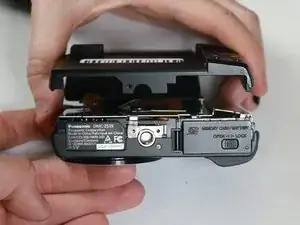
Gently pry apart the back casing from the body of the camera. It's recommended to apply as minimal force as is necessary to prevent unintended damage to the camera or the casing.
-
To reassemble your device, follow these instructions in reverse order.

Here’s a helpful tip: Rotate the back screen up 180 degrees. The back cover will come off easily if you do this, not so much if you don’t.
Mark U -