Introduction

Replacing the front case of your camera.

  1. WNHhIFlmaHfWZZvv
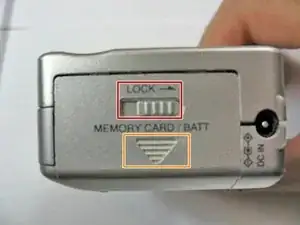
    • Slide the lock switch to the right so that it is in the unlocked position.

    • Use your finger to slide the battery hatch in the direction of the downward arrow so that the hatch is open.

    • Both battery and memory card should now be visible.

  2. IQNIPF5XEPjtPFVq
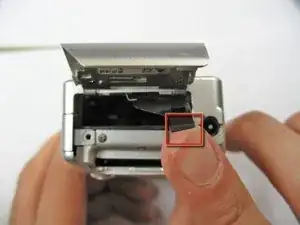
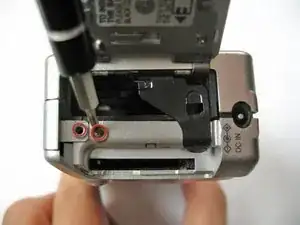
    • Open the battery hatch and then the black cover to expose the battery compartment.

    • The camera used to create these repair guides did not have a battery and memory card.

    • Remove the battery.

    • When installing the new battery, ensure it is in the same orientation as before.

  3. XU6okq46f4XJZyHm
    • Using the Phillips #00 screwdriver, remove the two 2.8 mm screws located under the hatch.

  4. YAQmPSmBHXZaXVDp
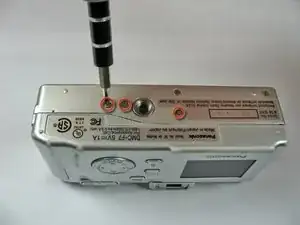
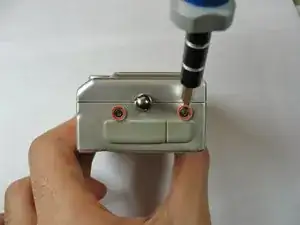
    • Use the Phillips #00 screwdriver to remove the three 2.8 mm screws on the bottom of the camera.

  5. HtubX3mlchUpVyDs
    • Use the Phillips #00 screwdriver to remove the two 2.8 mm screws on the side of the camera.

  6. eK44c46mJXruCNOC
    eK44c46mJXruCNOC
    XsSLY2GIhFixfyY6
    • Use a spudger to pry open the case at all sides.

  7. CJfu6sQswJ6cw5eC
    CJfu6sQswJ6cw5eC
    QetLZjIdShSfFaVT
    • Be careful not to damage the ribbon cable when opening. Ensure it is still attached.

    • Use your fingers to carefully remove the back casing from the front of the camera.

  8. EMPVxiXnkHQZkcU1
    • Place the camera on a flat surface with the front side facing down.

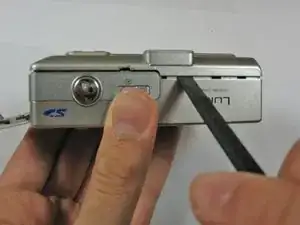
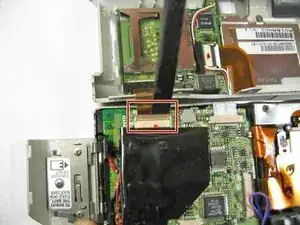
    • Use the spudger to flip up the retaining flap and slide the ribbon cable out of the connector.

    • Hold down on the camera's metal casing with one hand. Using your other hand, remove the back case from the rest of the camera.

  9. kgvE3I3CKjuvbrtb
    • Remove the last two 2.8 mm Phillips #00 screws from the bottom of the camera.

  10. oOIgiNcHPNUKKZqV
    oOIgiNcHPNUKKZqV
    UwERkUZwEYKM1EGE
    uADHIr53RKsflZy4
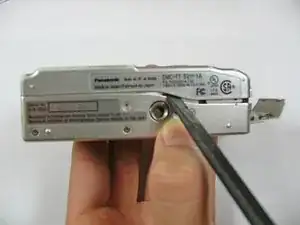
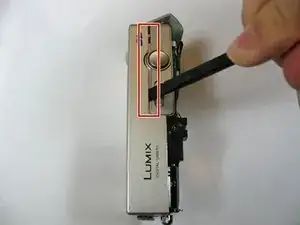
    • Using the spudger, pry the front case away from the camera's components.

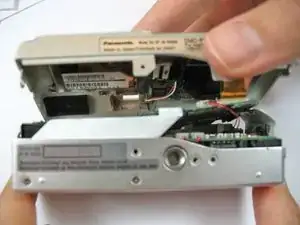
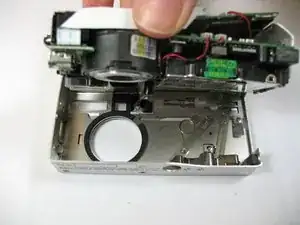
    • Use your fingers to carefully pull the back case from the front case.

    • Cut the black and red wires connecting front case to the body of the camera.

    • Be careful to ensure that internal materials won't be caught.

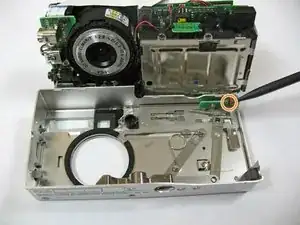
    • Separate the front of the case from the camera.

    • To reinstall the front case, solder the wires of the new case to the components of the camera.

Conclusion

To reassemble your device, follow these instructions in reverse order.

Alex Penman

Member since: 28/01/11

463 Reputation

0 comments