
Introduction
We pick up where we left off after removing the joysticks. To reach the D-Pad, we will first remove the motherboard.
-
-
Turn the controller over to reveal the battery cover.
-
Use the J000 screwdriver to remove the screw that secures the battery cover.
-
-
-
Remove the battery from the controller by inserting the plastic spudger into the small gap on the bottom right of the battery.
-
Use the spudger as a lever to pry up and remove the battery from the compartment.
-
-
-
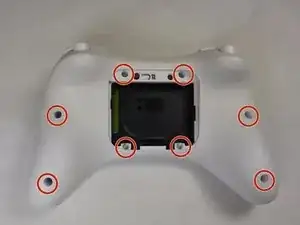
Now that you have removed all of the screws, carefully separate and remove the bottom half of the controller shell from the top half.
-
If you feel any resistance when pulling the shells apart, use a spudger to separate the left and right trigger contact assemblies from the bottom shell.
-
-
-
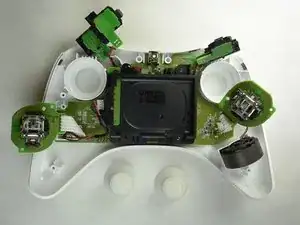
Carefully pull the rubber thumbsticks off of the electronic bearings to remove the joysticks.
-
-
-
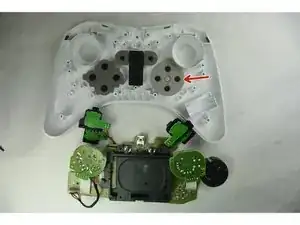
Remove the motherboard and connected components. The rubber pad of the D-Pad is indicated in the image by the red arrow.
-
-
-
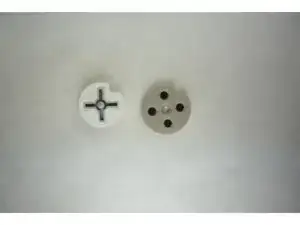
Remove the rubber pad and D-Pad button. The D-Pad can be replaced by the new D-Pad or be cleaned to improve condition.
-


To reassemble your device, follow these instructions in reverse order.
