Introduction
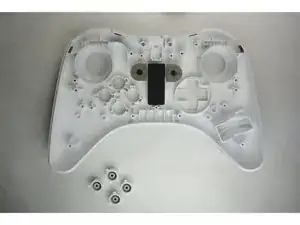
Working ABXY buttons are important elements needed to ensure smooth gameplay for any gaming system. For the Wii U Pro Controller, debris and residue is likely to build up underneath the buttons, which can slow down the responsiveness of the buttons and even cause them to stick. In this guide, one will learn how to break down the controller in order to access the underside of the buttons, where cleaning will take place to restore the buttons back to their original functionality. In order to get to this point, it is recommended that you take a look at the two previous guides regarding the controller’s battery replacement and joystick replacement.
Tools
-
-
Turn the controller over to reveal the battery cover.
-
Use the J000 screwdriver to remove the screw that secures the battery cover.
-
-
-
Remove the battery from the controller by inserting the plastic spudger into the small gap on the bottom right of the battery.
-
Use the spudger as a lever to pry up and remove the battery from the compartment.
-
-
-
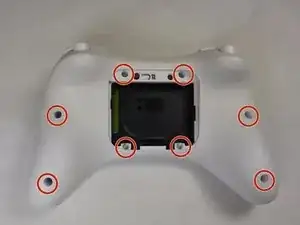
Now that you have removed all of the screws, carefully separate and remove the bottom half of the controller shell from the top half.
-
If you feel any resistance when pulling the shells apart, use a spudger to separate the left and right trigger contact assemblies from the bottom shell.
-
-
-
Carefully pull the rubber thumbsticks off of the electronic bearings to remove the joysticks.
-
-
-
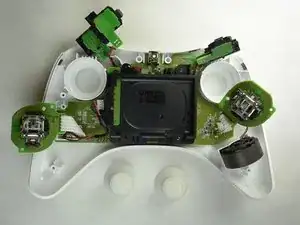
Now that the joysticks are removed, locate the screws on the left and right side of the controller (highlighted in the photos) and use the J0 bit to remove these 4 mm screws. This will allow you to pull out the controller board
-
-
-
Once these two screws have been removed, you may go ahead and remove the board from the controller housing. Now, direct your attention to the front panel of the controller. Remove the buttons and wipe them down completely with rubbing alcohol and a q-tip. Set them aside to dry for several minutes.
-
-
-
Remove the rubber covers (circled in the photo) from the ABXY sensors from the control board that was removed from the housing.
-
-
-
Wipe down the rubber cover pad completely with rubbing alcohol and a q-tip. Use compressed air to clean off the contact sensors (highlighted by the red circle).
-
To reassemble your device, carefully follow these instructions in reverse order.
One comment
Thanks so much! I spilt milk on my controller and got the buttons all gummed up but this guide helped me clean them up, including dust and the gunk inside of it, you saved me a ton of money!


