Introduction

Use this guide to replace the directional pad buttons on your Nintendo Wii U GamePad.

  1. mqcXxTcpkCsUCEUC
    mqcXxTcpkCsUCEUC
    KouXoDYfgoKjGHim
    AckGF6GfFXbPSdJn
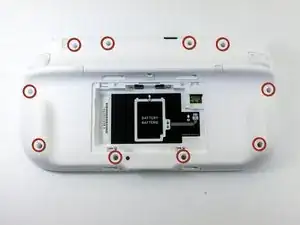
    • Remove the ten 8.9mm Tri-wing Y1 screws hidden underneath square stickers.

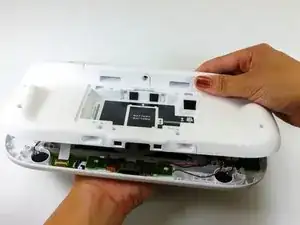
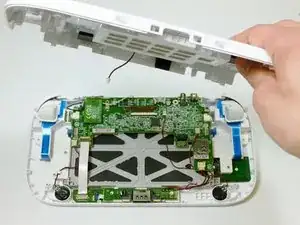
    • Lift up the back plate.

    • The back plate is still connected by a cable to the motherboard.

    how do i replace the whole front and back casing?

    enbodylin -

    bruh the ifix it screwdriver dont reach down the whole way

    Michael -

    I feel like it’s important to mention how deep some of these holes are. Your screwdriver might not reach. Mine sure didn’t.

    greatshadowdude -

    I had to shove some tissue into the screwdriver bit holder to get it to reach

    Andrew Walker -

  2. RSCLrkAAAJfPYL2i
    RSCLrkAAAJfPYL2i
    MpWZHBviKJl1AWqN
    • Unplug the connector that connects the back plate to the motherboard.

    • Remove the back plate.

    You don't have to remove just be careful

    Heather Sheppard -

    I tried to remove like at least 6 times but I wasn’t able to. Using tweezer, my nails, long nose pliers. There could be a lock but I gave up since I’m afraid if I put more force I might accidentally pull the wires. I’m able to remove the left and right analog stick with the back plate plugged, as mentioned, just be careful.

    Royce Remulla -

    I was stuck on this step for a while - note that you’re only removing the little white plastic bit. The beige or yellowish plastic bit is attached to the board. I needed to use pliers to carefully grab just the white plastic bit and wiggle it side to side.

    Nova H -

  3. RW2jcJ2HiRfcPkik
    RW2jcJ2HiRfcPkik
    3Gb3vqfPlgiirnaH
    • Take out the left and right shoulder buttons in the upper corners.

    • Remove the ZR and ZL trigger buttons by lifting up and sliding outward.

  4. OR2KOQPPJo3l3lEe
    OR2KOQPPJo3l3lEe
    3LF2LArH6CCvWWn5
    • Remove the top rubber cover by pulling it off of its mounts to access one of the mounting screws.

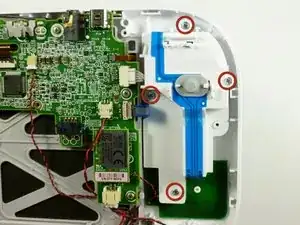
    • Remove the four 5.2mm Phillips #0 screws.

  5. 4xn4DENDe24wdT31
    4xn4DENDe24wdT31
    JSggifceLSxVnaX3
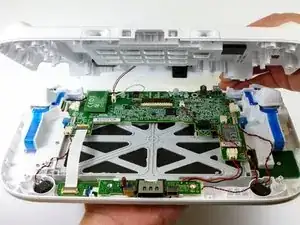
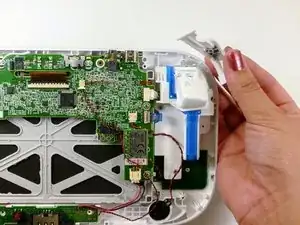
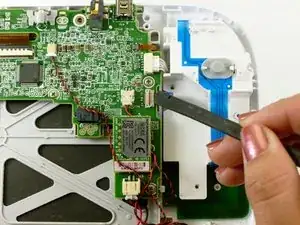
    • Use a spudger to lift the tab which releases the blue ribbon cable.

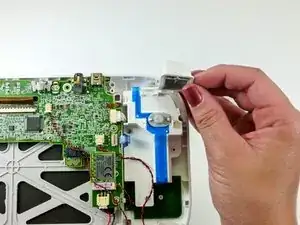
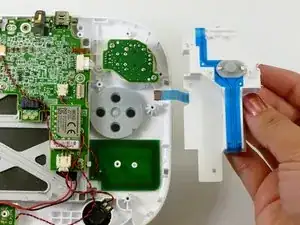
    • Remove the analog stick and button cover.

  6. sJqjKd2cSHkxh4Jh
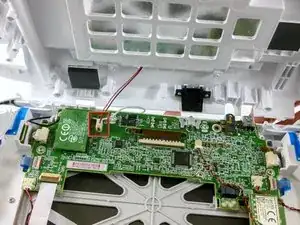
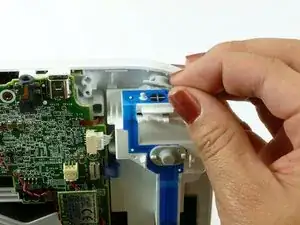
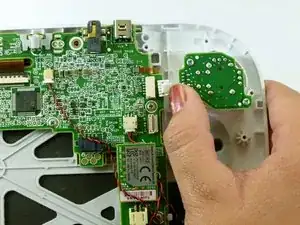
    • Use your thumb and push the connector towards the rightmost edge to disconnect the analog stick cable connector.

  7. c6u3IjrGxb3ApcSO
    c6u3IjrGxb3ApcSO
    ne3O1DQxyGGwmrxm
    • Remove the two 9.0mm Tri-wing Y0 screws.

    • Lift out the analog stick.

    Easy peasy. Thanks!

    Elizabeth Fowler -

    Hi there, I tried to replace the joystick following these instructions but I couldn't remove the connector cable from the old joystick as it is wired into the board. Does anyone know what the connector is called so I can buy one please!

    Spider Gin -

    @Spider Gin The joystick and the tiny little control board (the pcb between the red circles in the picture of step 9) are purchased together (or at least that’s how I got mine). The only thing you need to disconnect on the analog stick assembly is the connector shown at the end of the thumb in the picture on step 8. If you are trying to disconnect the stick itself from the control board you are not looking at the right instructions for that.

    Mike South -

    It seems to me that Nintendo changed the design after a while some had the wires on a connector some were soldered in. I can't find much information about this. Going to have to disassemble what I have to find out what I need

    Blue Player -

    The volume slider came out when I turned the assembly upside down to retrieve a dropped screw. You need to pay attention when putting it back in to make sure you line up the groove on the slider with the tiny little square bump that fits into the groove and allows you to actually control the volume. It’s easy to get it aligned if you know that’s what you trying to do, but at first I didn’t even realize what it was.

    Anyway—it worked, thank you!

    Mike South -

  8. SPVMIASD3qk1cOJY
    SPVMIASD3qk1cOJY
    EWCqc1fBw2IrkCO4
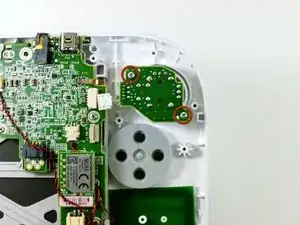
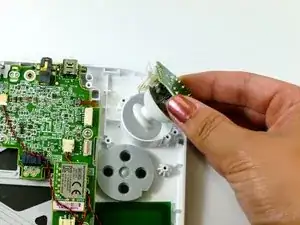
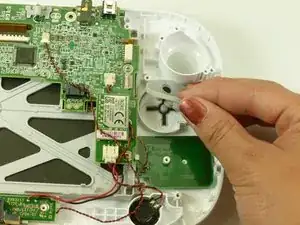
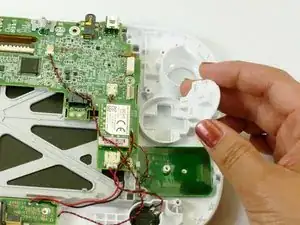
    • Lift up and remove the rubber cover for the directional pad.

    • Remove the directional pad buttons.

Conclusion

To reassemble your device, follow these instructions in reverse order.

Kim Arre

Member since: 11/01/13

4888 Reputation

One comment

Where can you find the blue ribbon mentioned in step 5, for the buttons at?

Eric -