Introduction

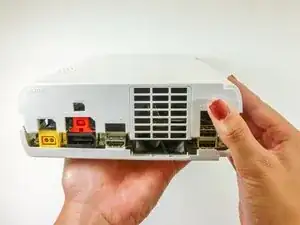
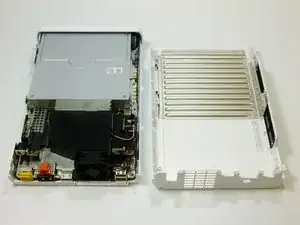
Use this guide to remove the outer case of the Nintendo Wii U and gain access to the DVD drive.

  1. JCHLhn5MYdDxfPrg
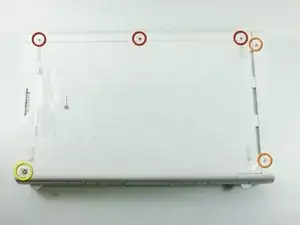
    • With the bottom of the console facing up, remove the following 6 screws hidden underneath the white square stickers:

    • Three 5.1mm Phillips #000 screws

    • Two 6.1mm Tri-wing Y0 screws

    • One 13.2mm Tri-wing Y1 screw

  2. aigP65yoJHPSGAir
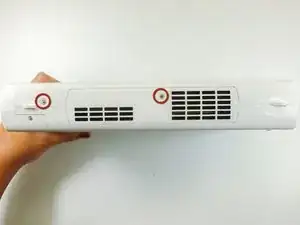
    • Rotate the console 180 degrees so that the exhaust vents are facing you.

    • Remove the two 7.1mm Phillips #00 screws.

    Both screws are not “7.1mm” in length, only the one to the right is (center of the console’s side). The left one (towards the front of the console) is 5.1mm.

    LogicalMadman -

    There’s a third screw to remove bottom-left corner of this picture. On step 9 it’s already been removed, and you need it to be removed in order to remove the metal casing in step 13.

    Pascal Dagenais -

  3. 1Iyrqx4nOFBdCJ2h
    1Iyrqx4nOFBdCJ2h
    2NCIyw2H2DATp1Mk
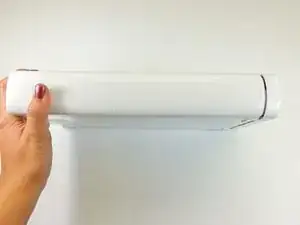
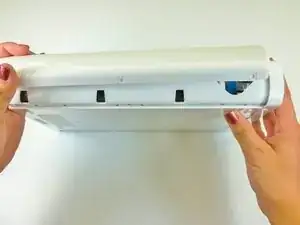
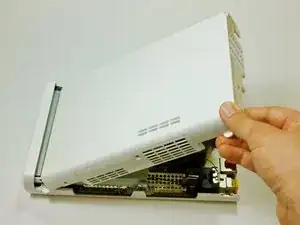
    • On the side opposite of the exhaust vents, slide the cover faceplate towards the back of the console and pull upwards to release it.

  4. BgtQWjfJFCI2Obtg
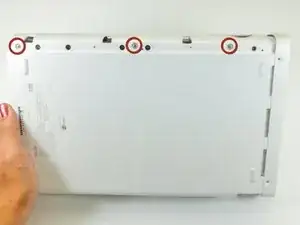
    • On the bottom of the console beneath the previously removed faceplate, remove the three 13.2mm Tri-wing Y1 screws.

  5. SFXFKigB4FgwXNHW
    SFXFKigB4FgwXNHW
    emE6ahHlKSKLyLVG
    XXLXP25j5OJr3Cu5
    • On the back of the console, lift up and release the main top cover.

    The front portion of the side of the cover with the vents was kind of stuck on mine. There’s a little rubber piece in there that was the cause of this. But that same rubber piece also makes up the little handle-shaped nub that sticks out of the side there. (There’s also one at the back of the same side, but that one didn’t stick for me.) Lifting also using the little handle made it easy to remove the cover.

    Nicholas Halderman -

Conclusion

To reassemble your device, follow these instructions in reverse order.

Kim Arre

Member since: 11/01/13

4888 Reputation

0 comments