Introduction

This guide aims to walk you through the steps required in replacing the face buttons on the right Joy-Con for the Nintendo Switch. This repair is slightly more difficult than the left Joy-Con as there are more components built into the right than there are in the left. Additional components to be aware of include the Infrared Sensor, Bluetooth Antenna, and NFC Antenna.

  1. tU1Yg1rIIZHkNpdo
    tU1Yg1rIIZHkNpdo
    wvDdoQqMOJHHkmTU
    ZYSUWSFXjIDrp6NZ
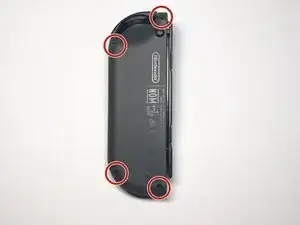
    • Use a Tri-wing Y00 screwdriver to remove the four 5mm screws holding the back panel in place.

  2. yQLtwbBIZPGrJOql
    yQLtwbBIZPGrJOql
    IBiLeYxhXCWHHAYM
    Qq1O4UImF5ZXer1r
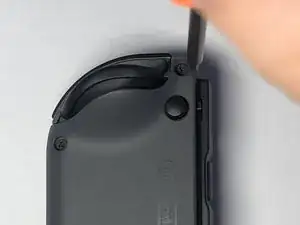
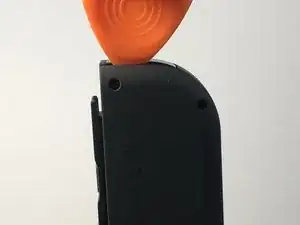
    • Insert the end of a plastic opening pick between the IR sensor and the back panel.

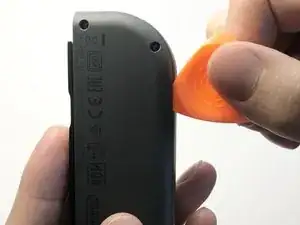
    • Run the tool along the edge, gently applying pressure downwards, to release the back panel from the clips holding it in place.

    • Do not use any metal tools for this step as you will risk damaging the plastic clips holding the back panel in place.

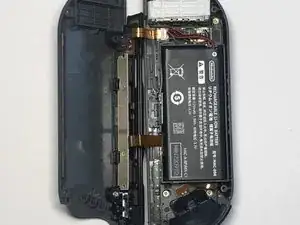
    • Open the Joy-Con as if it was a book, rotating around the black guide rail.

  3. tOWtAvUoiRihsEEw
    tOWtAvUoiRihsEEw
    BROFiaJZtPKYWEHA
    DCdlGn3QL6J2GdRh
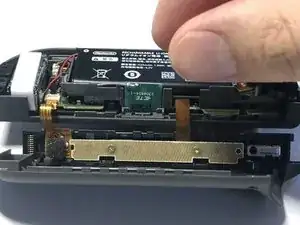
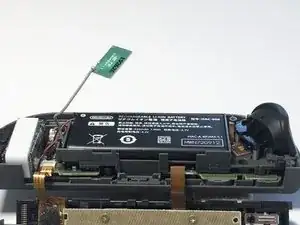
    • Pull the Bluetooth antenna out of its compartment and out of the way of the battery.

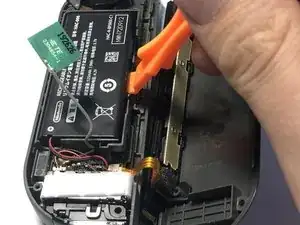
    • Using a plastic opening tool, lift the battery up and out of its compartment from the right edge.

    • The battery is held in place by adhesive tape and may take a bit of force to remove.

    • Be careful not to pull the battery or antenna out completely as they are still connected to the motherboard.

  4. JI1lNTPsPZb5K3Ox
    JI1lNTPsPZb5K3Ox
    r2VtdBDu2fsRGwQP
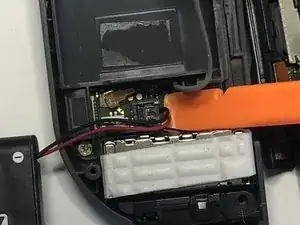
    • Disconnect the battery by using a plastic spudger to gently apply pressure upwards to the base of the connector.

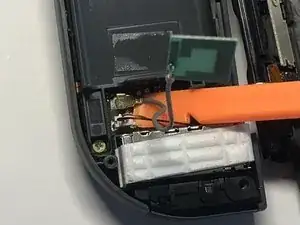
    • Repeat the same process with the Bluetooth antenna connector.

  5. vruuUaTL2QrAvYnF
    vruuUaTL2QrAvYnF
    s1L1rZ5qRmnj62I5
    QkOMNxvXPEeMOlbt
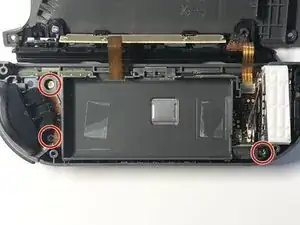
    • Using a Phillips #00 screwdriver, remove the three 2mm screws holding the battery compartment in place.

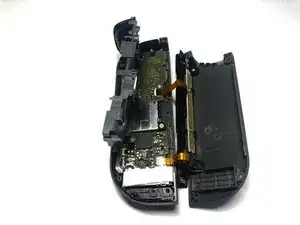
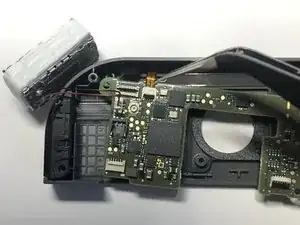
    • Lift and rotate the battery compartment away from the motherboard.

    • Be very cautious of the fragile ribbon cable that connects the compartment to the motherboard.

  6. gU1XUHMGXpSI1qNC
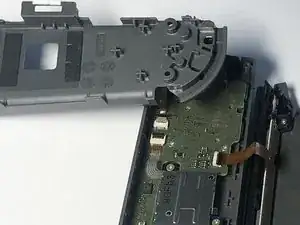
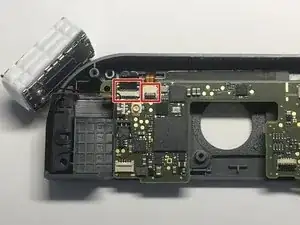
    • Using a pair of tweezers, gently lift the grey clasp holding down the ribbon cable and slide it out from its connector.

    Connecting this ribbon cable back was the hardest part for me :) I think it's worth mentioning that this ribbon cable's contact points should be facing the bottom when connecting it.

    Tomasz Telepko -

    This is the hardest part during reassemble. The gold contacts need to face "down" with a half-twist of the ribbon cable. It's very easy to break. I got it upside down the first time and broke it the second time requiring replacement of the ZR button assembly.

    mkeehnel -

  7. t3XICIh3ymYPDioV
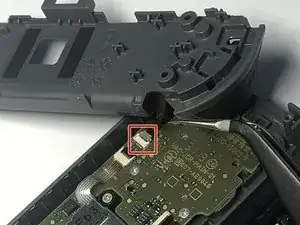
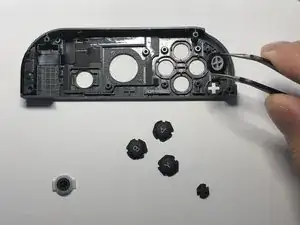
    • Using tweezers, gently lift the black and white clasps holding the two ribbon cables.

    • Slide the two ribbon cables out from their connectors to release the back panel and guide rail assembly.

    This really isn't a necessary step and it's be nice if you could mention so. Might make things easier for some people but for others harder.

    Anrei -

  8. lnQC1TMXSuHvcPog
    lnQC1TMXSuHvcPog
    tvEF3gvNxpNkBTlv
    EUDMkmkWmkkQneXY
    • Using tweezers, gently lift the black clasp holding the joystick ribbon cable in place.

    • Slide the ribbon cable out from its connector.

    • Using a Phillips #00 screwdriver, remove the two screws holding the joystick assembly in place.

  9. BhJiZ61J1HuLxs3X
    • Gently lift the joystick up and out of its holder.

  10. cvUGCwPmJtL46bcY
    • Remove the right shoulder button from its holder.

    • Note that the button has a spring attached which will need to be fitted back into place when reinstalling.

    Le bouton R est racher

    Denis Jean films et series -

  11. YtejIFus6ndic6sB
    YtejIFus6ndic6sB
    6QZpiFllXJb31N1N
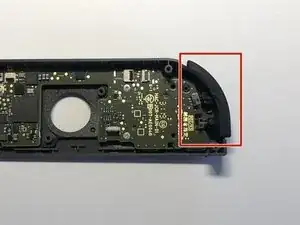
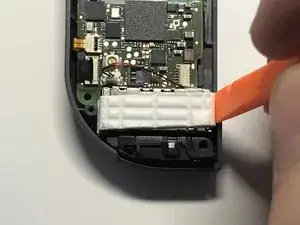
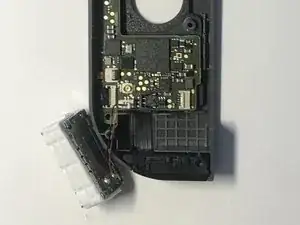
    • Using a spudger, gently pry upwards on both the left and right sides of the vibrator.

    • The vibrator is held in place with adhesive so it may take a bit of force to remove.

    • Once the vibrator is removed from its holder do not disconnect the cable. Instead, just move it to the side.

  12. Av4mnxmIjiDhKiND
    Av4mnxmIjiDhKiND
    GALcGhOwIlYT1tCX
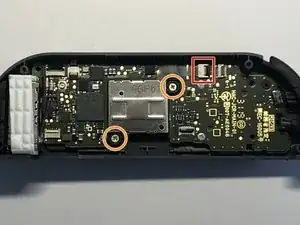
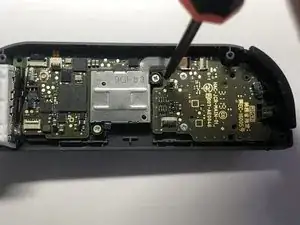
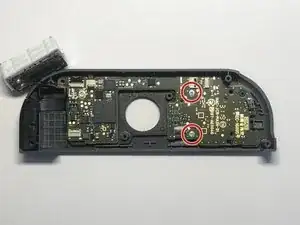
    • Using a Phillips #2 screwdriver, remove the two 1.5 mm screws holding the motherboard in place.

    • Be careful as this is the only thing holding the buttons down and they will become loose once the screws are removed.

  13. qgjlsw5DhHrPBiwS
    qgjlsw5DhHrPBiwS
    pKIkkQCfa4mXMx45
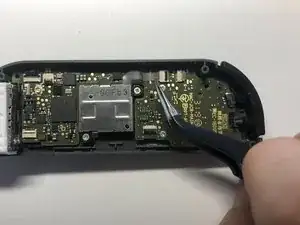
    • Carefully lift the motherboard up and away from the casing.

    • Be cautious of the two remaining ribbon cables. If you pull too hard you will risk damaging the cables.

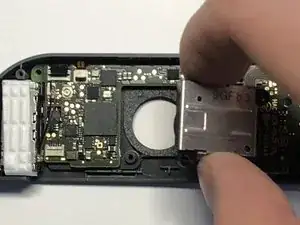
    • Using tweezers, gently lift the clasps holding the ribbon cables in place.

    • Slide the ribbon cables out of their connectors to release the motherboard from the casing.

  14. L6afofV1Pcc6supG
    • Remove the rubber covers from the buttons.

  15. AyZY6WYZZDHMdUAn
    • Using tweezers, lift the buttons out from their holders.

    • Note that the buttons have notches to ensure the right orientation when replacing. If you do not line up the notches properly the buttons may be unresponsive.

Conclusion

To reassemble your device, follow these instructions in reverse order. Be sure not to screw the motherboard in too tight as this may affect the responsiveness of the buttons. Always apply even pressure to screws when reinstalling the components; one side should not be tighter than the other.

Michael Lowden

Member since: 12/05/20

1285 Reputation

7 comments

Thank you. The guide from the company I bought the replacement buttons from on Amazon was extremely lacking. This was on point.

Drew B -

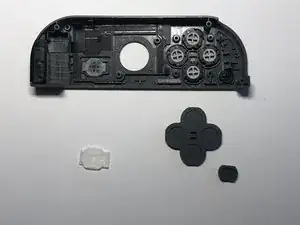
How do I take the black inner part of the home button out of it’s holding thing?

Martin Drkoš -

I need help with this as well. In the last picture you can see how the home button sits in a clear plastic ring and I cant get it out of there to place my new colorful home button

Zachary Reeves -

Doesn’t include how to change the trigger button…. :/

Harmony Petersen -

Super guide as always. Succesfully replaced the sl and sr buttons. Thanks!!

Richard Kroon -

Thanks, I had a problem with the A button sometimes not registering, but after following this guide and simply cleaning both contact points and rubber pad, the button works as new again :)

Tomasz Telepko -

Would it be possible for a lot more of these steps to have before and after pictures to better clarify with the layout of the covers and rubber bits are before taking them apart? I find myself coming to these guides for more visual indicators and many of them brush over what it's supposed to look like removing certain wires and connectors and such which I imagine is very important when you're dealing with very delicate and potentially costly to replace parts if disconnected improperly.

Jeffrey Logan Keenhold -