Introduction
Prerequistite guide for motherboard removal.
-
-
Use the flat edge of a spudger to pry the microphone connector straight up from its socket on the motherboard.
-
-
-
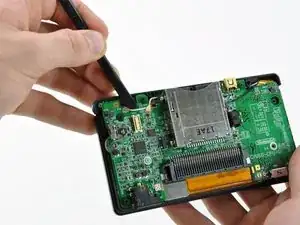
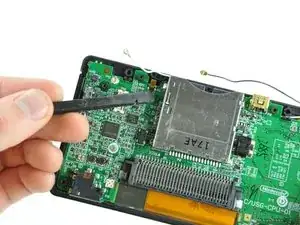
Position the antenna cable with its connector facing up and away from the motherboard using a spudger to hold it down lightly in the gap between chips on the motherboard.
-
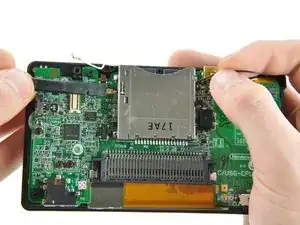
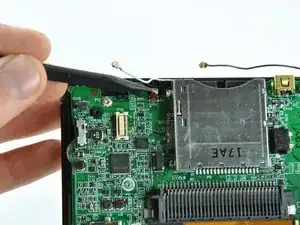
Slowly and carefully pull the antenna cable until the cable connector is under the DS Lite game cartridge reader.
-
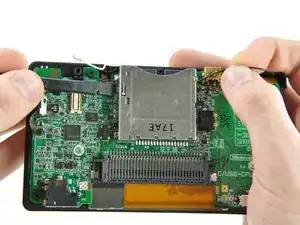
Continue pulling the cable until the cable connector comes out from under the game cartridge reader on the right side.
-
-
-
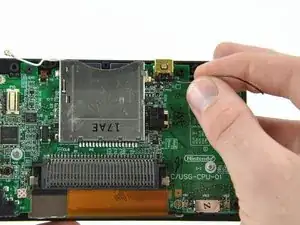
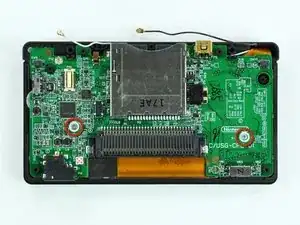
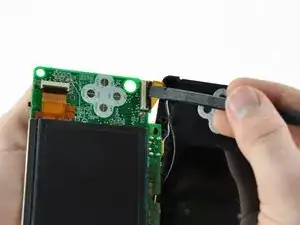
Use your fingernail or the edge of a spudger to carefully flip up the touchscreen ribbon cable retaining flap.
-
Use the tip of a spudger to pull the touchscreen ribbon cable straight out of its socket.
-
-
-
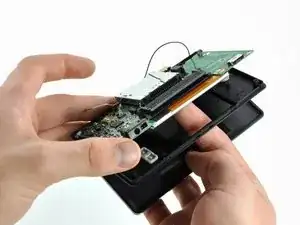
Open the display enough to use your finger to push the front edge of the motherboard up and away from the upper case.
-
-
-
Use your fingernail or the flat edge of a spudger to carefully flip up the upper LCD ribbon cable retaining flap.
-
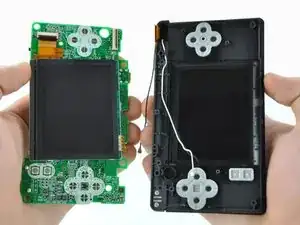
Pull the motherboard away from the DS Lite to separate the upper LCD ribbon cable from its socket on the motherboard.
-
Remove the motherboard from the DS Lite.
-
Now you may open the retaining flap for the lower LCD screen in the same way and separate the lower LCD screen from the motherboard.
-
To reassemble your device, follow these instructions in reverse order.
I can't for the life of me get this freaking antenna cable back when putting everything together, it keeps getting stuck under slot-1 ... how do you aid it through? I'm just pushing it through using the cable itself, but the connector gets stuck somewhere close to the other side and the cable pushing won't do anything but flex the cable.
Peter Marquardt -
I had some .015" solder that I fed through the other side and wrapped around the antenna cable to help guide it when I was feeding it back through.
Josh McBroom -
Fantastic guide, although you !@#$%^&* :P forgot to add that you need a Soldiering Kit at the LAST step, thanks..
Nate River -
I did mine without have to soldier, but then again I was cannibalizing the upper screen from one DS to another.
Christopher Till -
Tried to add this but unsure if it will stay but here is my advice for the cable feeding.
When reassembling and attempting to feed the antenna cable back under the DS Lite game cartridge reader the cable will likely kink and be difficult to feed through.
Therefore tie a piece of white cotton (or another visible colour) thread tightly around the cable, just below the connector. Then feed the cotton under the DS Lite game cartridge reader and through to the other side. Then gently guide the connector back through by pulling on the white thread and moving either up or down to clear obstacles.
Joel Spencer -
Attach a thread to the antenna wire BEFORE removing the antenna. Pull the antenna throught with the thread attached. After you get the antenna out, cut the thread from the antenna but LEAVE THE THREAD threaded thru the cartridge slot. Tape it to the cartridge slot so it doesn't fall out while you're working on the DS. After repairing, re-tie the thread to the antenna and use the thread to pull the antenna back thru to where it belongs. PULL GENTLY!
J S -
If u remove a bit material from the cover its actually possible to rout this cable over the game card slot.
yKekS Yzz -
Cable went right back thru for me! LOL!
Kayla -
What I do is run the antenna cable between my fingers to get it as straight as possible. Then I gently feed it under the cartridge slot slowly with the connector facing up. I stop at the slightest resistance and jiggle it back and forth to get it going again. Works every time.
Deepak -
it was ez until i tried to put it back >:(
RealUmbreon440 -
If the black connector is face down (circle down) it has just enough clearance between all the bits under the card slot. You'll notice if you peek through that you have more width to play with closer to the slot than the board.
Fine Line -