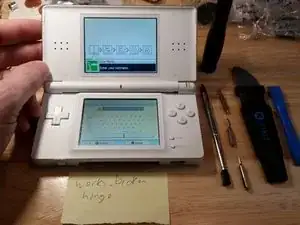
Introduction
I decided to teach myself how to repair Nintendo DS Lites, because broken units were available cheaply on eBay in 2017. After working on a few dozen units, I have seen the mistakes that people have made and I offer you this guide to make sure that you don't damage the unit that you're repairing (especially if you're fixing it for yourself). All of the problems I've seen with the DS Lite can be fixed for between $2 if you only need a new digitizer to about $10 if you need to obtain a used motherboard from an otherwise scrapped unit (2017 prices). Prices have risen since 2017 but repairing DS Lites is still reasonably economical.
Once you've learned how to disassemble the DS Lite, you should be able to tackle any Nintendo handheld, including the GameBoy, GameBoy Color, GameBoy Advance, DS, DSi, DSi XL, 3DS, 3DS XL, New 3DS XL, Switch, and Switch Lite. I have personally used these techniques to tear down all of these consoles with great success, and occasionally run an eBay store where I resell my repaired consoles.
WARNING: Do not attempt to disassemble any electronics device while the battery is connected (should be impossible for the DS Lite) or a power cable is connected.
-
-
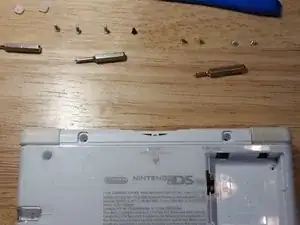
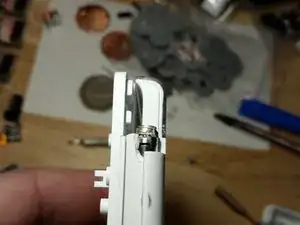
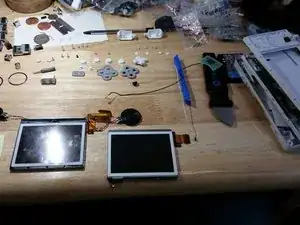
The most common problem with the Nintendo DS Lite is a broken latch. You can buy a new shell for under $10 directly from China (2017 prices).
-
-
-
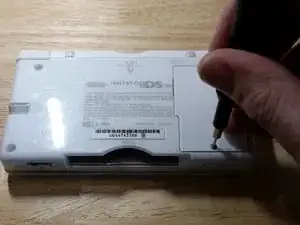
Unscrew the battery case with a PH000 bit. You will probably need to pry open the battery case as the cover becomes sticky with age. The battery compartment is often quite tight so you might need to gently pry out the battery with the plastic spudger.
-
-
-
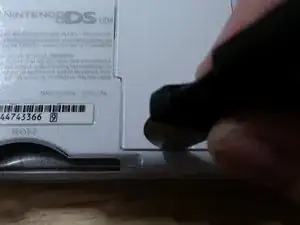
Quite commonly I see this part of the DS Lite damaged. Follow these steps to remove the feet without damaging anything.
-
-
-
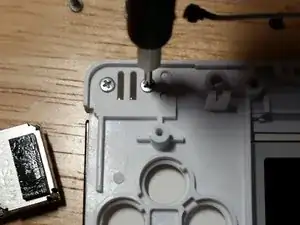
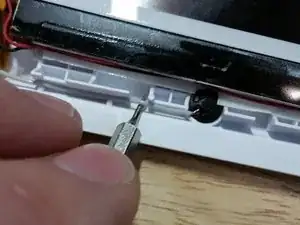
Now remove the two gold colored screws under the rubber feet and the two silver colored screws in the battery compartment with the PH000 bit. Then remove the three silver screws and the small black screw with the Y00 bit. Set the Y00 bit aside as you are done using it.
-
-
-
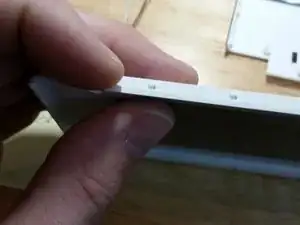
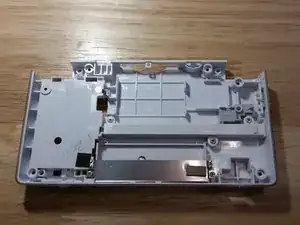
I see a lot of damage caused by carelessly removing the bottom cover, so take your time and carefully move the plastic spudger around the perimeter. If the bottom cover seems glued on, remove the cover with the unit closed. This may help prevent scratching the digitizer.
-
-
-
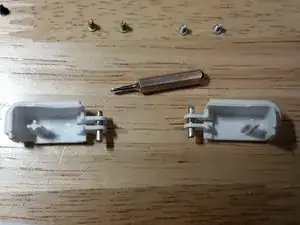
Carefully grasp and remove the shoulder buttons. Try to hold the spring assembly together so that you don't lose any pieces. The spring wire can puncture your skin so exercise caution. Wear safety glasses to avoid any rogue springs!
-
-
-
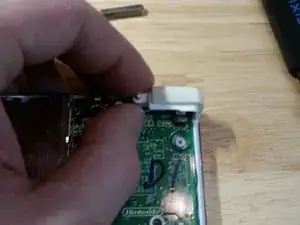
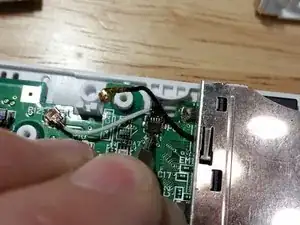
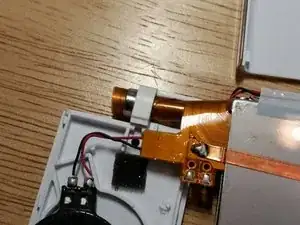
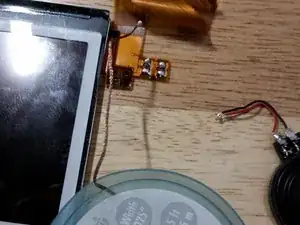
You must remove the Wi-Fi daughterboard at this stage or you risk damaging the digitizer. I learned this the hard way. You will need to pull hard on the daughterboard as the adhesive is very strong. You can try using heat or alcohol could to loosen the daughterboard, but that could risk damage to the components and I've never needed to do it.
-
-
-
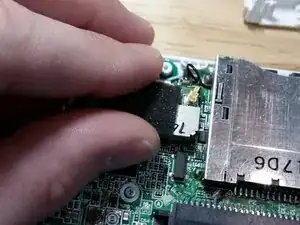
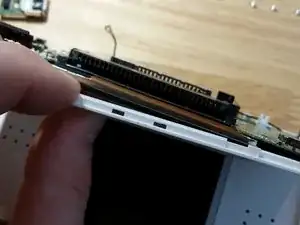
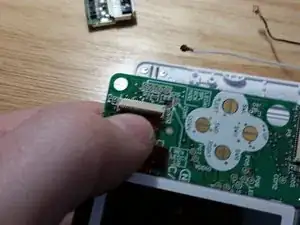
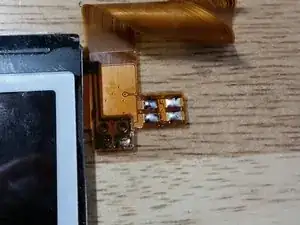
Gently lift the digitizer flex connector from this side with a small flathead bit. Take your time and be gentle as this connector is easily broken. Replacing the digitizer is an extremely common repair for this console so I highly recommend learning how to do this.
-
-
-
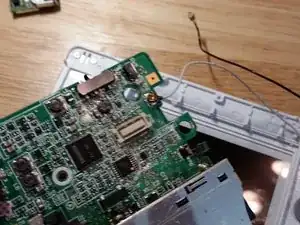
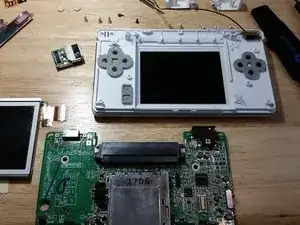
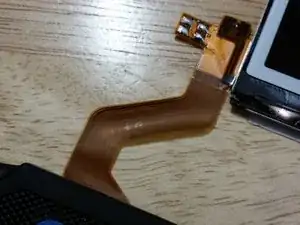
Flip the motherboard around as shown. Be gentle as the flex cable is fragile. Note the Chinese writing on the console made at the Nintendo factory.
-
-
-
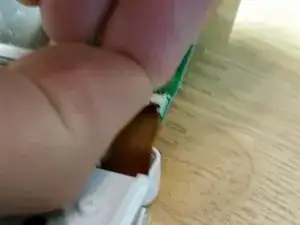
Remove the flex cable with your fingernail. Do not use a flathead bit, as it may damage the connector. Sorry about the blurry picture, but this step will be obvious if you've been following along with a real unit. See the previous step for a clearer picture.
-
-
-
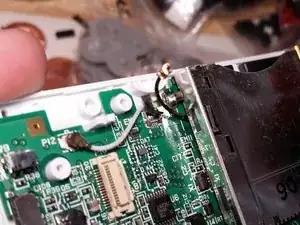
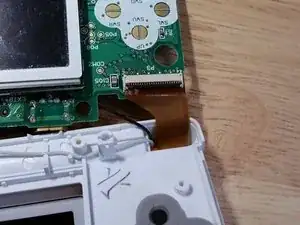
Remove this black wire. You will have to wiggle it out. One of the stupidest design decisions on the DS Lite besides the latch problem, the black wire is even harder to put back in. Do not attempt to mess with the DS cartridge port in any way. With persistence, the black wire will come out and it will go back in when the time comes.
-
-
-
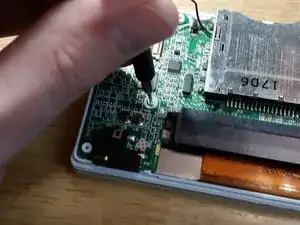
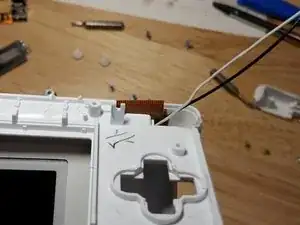
Make note of how the white wire is routed. You will need to replicate this routing for the reassembly. Now remove the white wire. Make sure that the digitizer flex cable was detached earlier. If not, go back and perform this step.
-
-
-
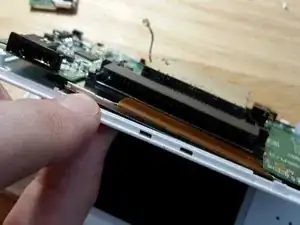
Remove the lower display flex connector. Pry the clip up with your fingernail, as you did with the upper display.
-
-
-
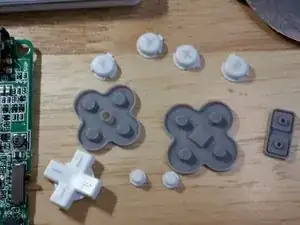
Remove the rubber and plastic button assemblies. This step is pretty easy, but don't lose any pieces. Every plastic and rubber piece can immediately go into hot, soapy water. Replace any rubber piece that is torn or excessively damaged.
-
-
-
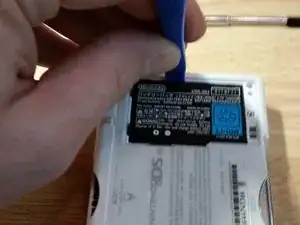
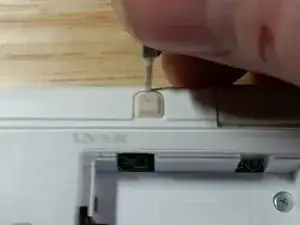
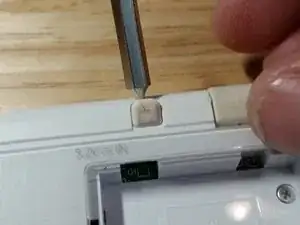
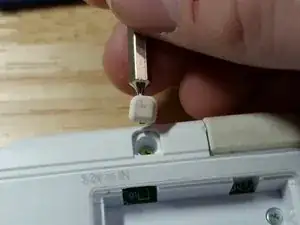
This is the chief design flaw of the Nintendo DS Lite. The latch assembly is much too fragile. Save the screws and the metal and plastic piece if you're replacing the shell.
-
-
-
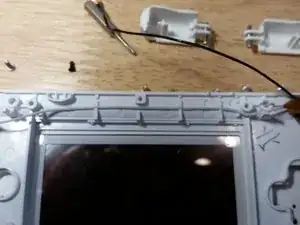
The most common reason why DS Lites don't go together properly is that this white wire is not routed properly. When reassembling, follow this routing scheme and the finished product will feel like it is fresh off the factory floor.
-
-
-
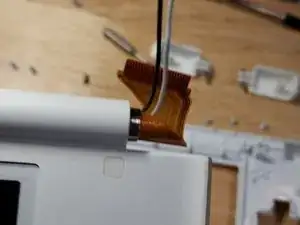
Make sure that both wires are routed through the center of the flex cable and carefully route the flex cable through the slit. The flex cable is incredibly fragile, and it was strengthened in later models. Take your time on this step. If it takes you ten minutes to avoid damaging the flex cable, so be it.
-
-
-
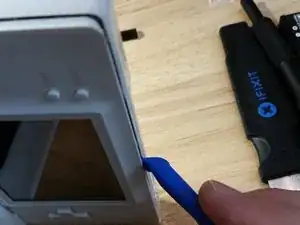
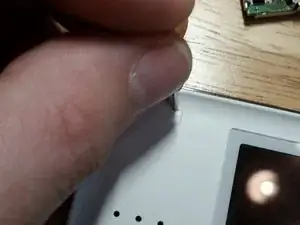
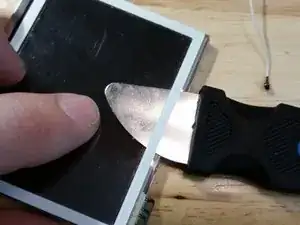
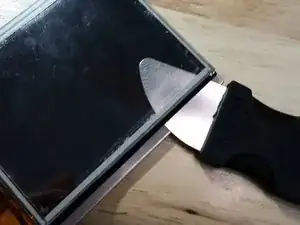
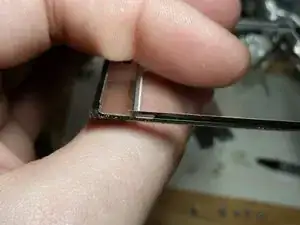
With the smallest flathead bit you can find, work the bit under the sticker to avoid damaging the unit as much as possible. Slightly marring the ABS plastic is nearly impossible. I've had luck more recently using a plastic razor blade.
-
-
-
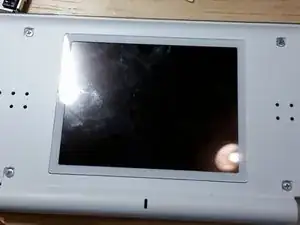
With the plastic spudger, pry the top cover loose. Do not remove or otherwise mess with the rubber pieces on the side. You never need to touch those, and I've seen them unnecessarily damaged and missing countless times. As noted in the comments, the screen will slide down a millimeter or two, allowing the pieces to separate easily.
-
-
-
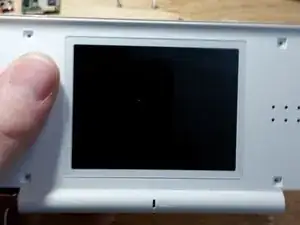
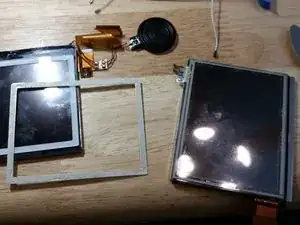
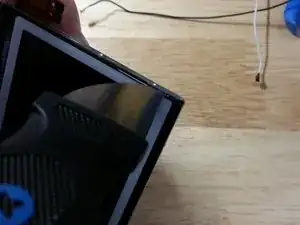
Begin pressing on the top screen as show here and work your way around. Be fairly gentle but note that the actual LCD is protected by a plastic shield in front and a metal shield in back.
-
-
-
Noting the routing of the black and white wires for later reassembly, remove the microphone and Wi-Fi antenna, carefully pulling the wires through the center of the flex cable so as not to cause any damage.
-
-
-
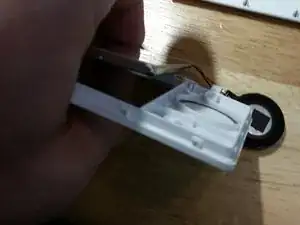
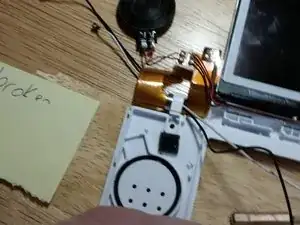
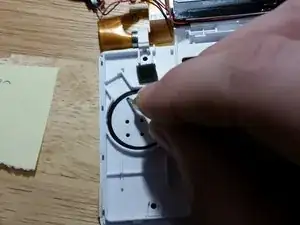
These should be removed and replaced shiny side up. They may be attached here or attached to the speakers.
-
-
-
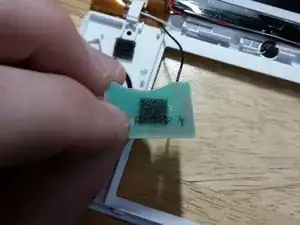
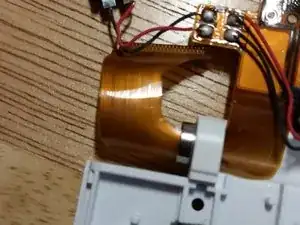
If the flex cable is damaged, then you're out about $8 as of this writing. Exercise extreme caution with this fragile piece, carefully rolling it into a tight cylinder. If the flex cable is damaged, there is no way to repair the LCD, and the entire module must be scrapped. Remove and set aside the metal piece.
-
-
-
Remove three gold screws from the stylus retainer and two gold screws from the metal shield. Disassemble. You will need to gently pry loose the power switch and volume control. Wash all shell plastic pieces shown in hot, soapy water. Alcohol may be required to remove decals and other grime.
-
-
-
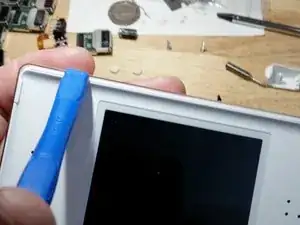
If you're replacing the shell with a different color, you definitely need to remove the sticker. With the iFixit metal spudger, this step is easy.
-
-
-
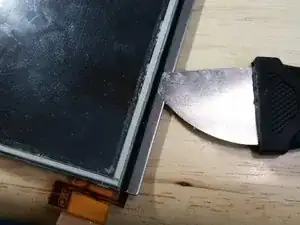
Slide the metal spudger under the black sticker and carefully work your way around the assembly, avoiding the flex cables. This step is easier than it looks, but only perform this step if the screen or the digitizer needs to be replaced. If both are functional, this step is unnecessary. Thoroughly clean both pieces with alcohol afterwards.
-
-
-
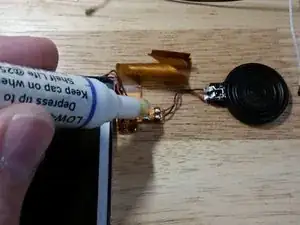
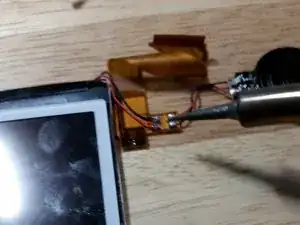
This step is only necessary if your upper LCD is bad. Unfortunately, this is a common problem. First, wet the contacts with flux. Then melt the solder and remove all four wires, noting their positions for reassembly. It might help to use leaded solder, but be sure to obey all local laws.
-
-
-
Clean up the contacts as you prefer. I use a tiny American-made solder wick and I've applied some fresh lead-based solder.
-
-
-
The plastic cover is wedged underneath the back metal cover and is held on by a few different schemes, depending upon how old the DS Lite is. One method is two tabs on each side. Gently work the tabs loose without removing the back metal cover. This step is unnecessary unless you're changing the color of the shell.
-
-
-
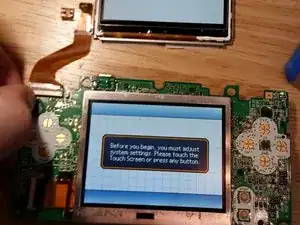
Optional: Test the disassembled unit. First, connect the Wi-Fi daughterboard. Connect the two screens, excluding the digitizer. While holding the battery in place, turn on the unit. Be cautious if you have removed any insulating material and there is new exposed metal. It is possible to blow a fuse or cause worse damage.
-


To reassemble your device:
1) Insure that the white wire is properly routed before remounting the motherboard.
2) Carefully reassemble the shoulder buttons. This takes practice.
3) Insure that the alignment of the power switch and volume controls are correct before replacing the bottom case. Incorrect alignment will damage the motherboard and you won't be able to turn on the unit anymore.

14 comments
Great work pal! Congratulations.
The best guide online for fixing the DS lite. Thanks a lot!
JohnJD -
I find this very specific and helpful! I will favorite this guide, once i have every materials required… especially the soldering part in this guide. Far from what i know… The guide deserved the best credits as the author included the soldering heat meter! However, i do not understand why the 2nd/middle picture (from right to left) at Step 28…
Step 28; Removing the Speaker things.
Pictures: links, the picture on the machine says… 402, not 400. - Picture is from step 28.
This step is only necessary if your upper LCD is bad. Unfortunately, this is a common problem. First, wet the contacts with flux. Then, with your iron at 400 degrees C, melt the solder and remove all four wires. It might help to add fresh solder with lead. The lead-free solder used by Nintendo sucks.
I usually do my soldering between 300 and 350C. If you do a fair amount of soldering, pick up a knockoff Hakko FG-100 tip thermometer and then get the official sensors. This will set you back around $50 total on Amazon, but considering that the official FG-100 is over $200, it’s a steal. Anyway…check your iron for accuracy. The key here is heat transfer. Use the largest tip that fits in/on the pad. A larger tip will retain heat better and will heat a larger area at once. Now as posted above, add some fresh leaded solder to the joint. This will help to lower the melting temperature of the rest of the solder. Final tip is: Don’t forget the flux. Flux is your friend. You can never have too much flux. Flux will save you from bad joints, burned parts, and a lot of swearing. Get yourself some flux in liquid and paste form. Clean up the excess when you’re done with the highest concentration isopropyl alcohol you can find.
I am new to soldering, so i can’t say i am fair to soldering, but i am going to give it a try especially since my Nintendo DS Lite is way old and in need of fixs and therefore cant spend alot for the time being… but ill still buy it either way! Thanks for the help! reasons i am in need of it is good materials and parts is because i want it to be completely like new for myself.
I removed the solder temperature. What settings you should use will vary depending upon your situation. Desoldering the speakers is not very difficult at all, provided that you use flux, and many different techniques should work.