Introduction

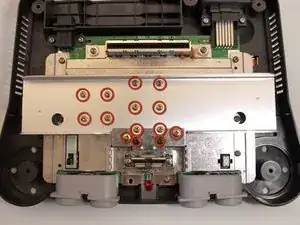
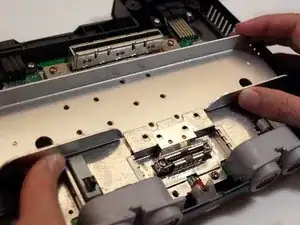
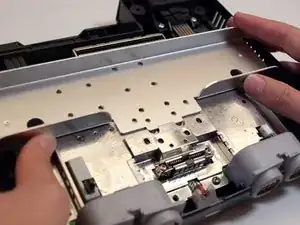
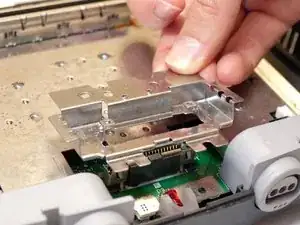
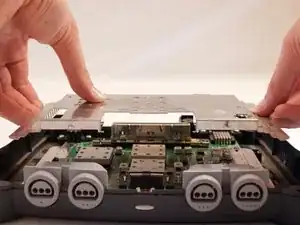
This guide shows how to remove the metal plate that covers the motherboard.

  1. 2Ih1yBMRhFX6oJXL
    • Remove the expansion pack cover by pushing in the tab and pulling out.

  2. MgfU6iWKEtQAW2Ua
    • If your system uses a jumper pack, the same procedure applies to remove it.

    • A small spoon can be used in place of a spudger.

    • Lever the expansion pack out using a metal spudger.

  3. PFLKcDxe1FkJIJSa
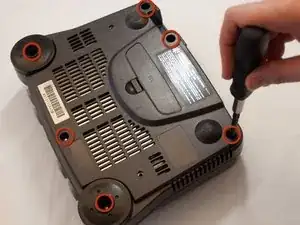
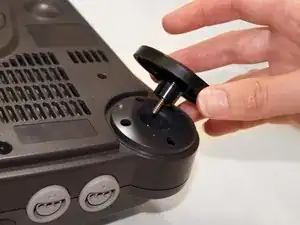
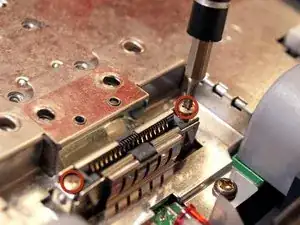
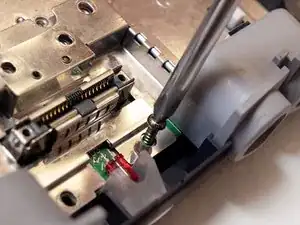
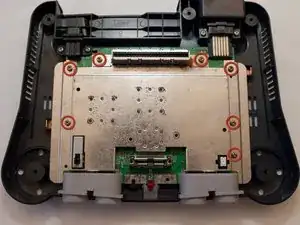
    • Remove the six screws on the bottom side indicated in the example with a gamebit head or screwdriver.

  4. 24Bj6JSZV2eId5oE
    • Remove the two front feet of the N64.

  5. wmroNcWfbILLSvRR
    • Rotate to top side up and lift off top cover.

  6. Ar2HSxGjjgP3wv1O
    Ar2HSxGjjgP3wv1O
    GMwFA6oQurIZTZpT
    • Remove the fourteen screws indicated in the example using the larger Phillips screwdriver.

    I’m not entirely certain if it's a common difference, but my nintendo 64 doesn’t have fourteen screws, but rather, 8 screws, and instead of 3 heat sinks, it only has the one separate heat sink on the chip close to the memory expansion pack. additionally, aside from the 6 screws closest to the expansion pack, the two other screws are held on by nuts under the metal piece.

    Avery Duncan -

  7. tWP1loiHU6hPACi4
    tWP1loiHU6hPACi4
    IuyXVNcHru2H4IHp
    • Remove the metal plate indicated in the example by sliding it back and then lifting it up.

  8. eFHZYoeECwusTJYN
    • Remove the two screws indicated in the example using the smaller Phillips screwdriver.

  9. HL1DQqbF2xRtFrWR
    • Remove the screw to the right of the LED light using the larger Phillips screwdriver.

  10. SrkMnmLGNgKpVqk4
    • Remove the small metal bracket from the back of the expansion pack slot.

  11. ZkVUXFGIeBjmJRid
    ZkVUXFGIeBjmJRid
    uUH41shDZeJXHSqG
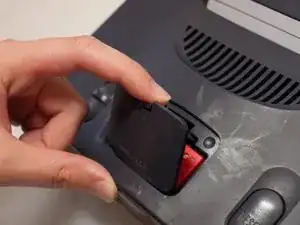
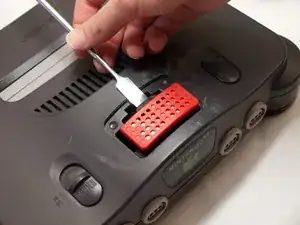
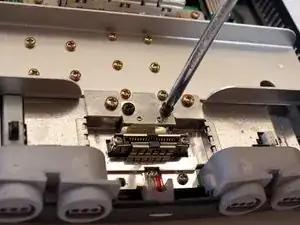
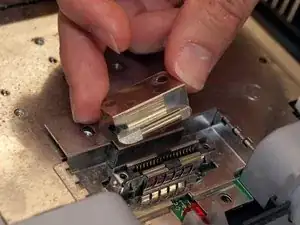
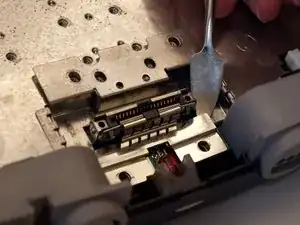
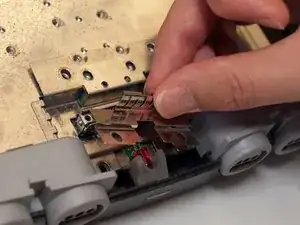
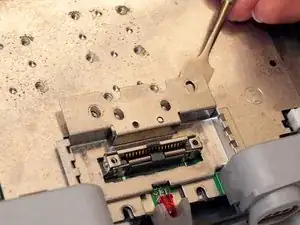
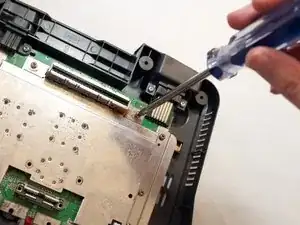
    • Remove the small metal bracket from the front of the expansion pack slot with the metal spudger.

    I have noticed this is not in Australian Pal versions of the N64.

    at First i thought i was missing a bit on my N64 and now have looked a second one and its also not there.

    Darren Welch -

  12. LdHXTieRRDQxOUjF
    LdHXTieRRDQxOUjF
    nVGCrIJHbiF1biJq
    • Remove the small metal bracket behind the expansion slot using the spudger.

  13. QQBSEEYu2KMBa1bq
    QQBSEEYu2KMBa1bq
    kihF2wHDtnKeNwqi
    • Remove the seven screws indicated in the example using the larger Phillips screwdriver.

    The two screws next to the cartridge slot are longer

    Michael -

  14. JXPSWmtJmqKOdXt2
    • Lift off and remove the metal plate as indicated in the example.

Conclusion

To reassemble your device, follow these instructions in reverse order.

LisaF818

Member since: 29/11/09

143 Reputation

0 comments