Introduction

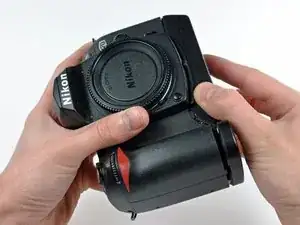
Use this guide to replace a cosmetically damaged port cover or to install a new rubber port seal.

  1. nGyLXbYAyfAxYqVM
    • Use your finger tip to pull the battery release tab toward the center of the D70.

    • Open the battery door and rotate it away from the bottom cover.

  2. gP1L62ZOQKCETigP
    • Pull the battery out of the D70.

    • It may be necessary to wiggle the battery while pulling to free it from its pocket in the case.

  3. OnWdSq1ef45PHFXB
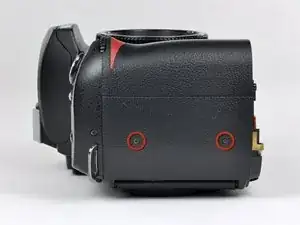
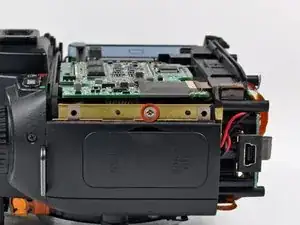
    • Remove the following eight screws securing the bottom cover to the D70:

    • Six 5.8 mm Phillips screws

    • One 10.7 mm Phillips screws

    • One 8.2 mm Phillips screws

  4. lQJ4MJE1bgjaNMlH
    lQJ4MJE1bgjaNMlH
    R4dLwLMcU1p52DrR
    • Carefully pull the bottom cover to separate it from the body of the D70.

    • Remove the bottom cover from the D70.

  5. r1e5PuGaIhXloVrr
    • Remove the two 4.8 mm Phillips screws securing the battery side of the rear cover to the D70.

  6. y3CG2CXlKiPBUOXd
    • Remove the two 4.8 mm Phillips screws securing the port side of the rear cover to the D70.

  7. QyvbtBNrhmpvNV4n
    QyvbtBNrhmpvNV4n
    iMZNE3iEHhNiYuFm
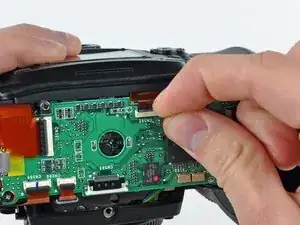
    • Use your fingernail to flip up the ZIF locking flap on the LCD ribbon cable socket.

    • Be sure you are opening the locking tab, not pulling against the socket mounted to the board.

    • Pull the LCD board ribbon cable out of its socket.

  8. SCAjimU2aiLyFVYi
    SCAjimU2aiLyFVYi
    bueQ4q4Ce1SeDNxw
    • Carefully pull the sides of the rear cover away from the body of the D70.

  9. 61CUc3sTwxgAT2AR
    61CUc3sTwxgAT2AR
    dVvSvYmSrKQSpXgV
    • Pull the rear cover off the body of the D70, minding the LCD board ribbon cable that may get caught.

    • At this point, the capacitor is visible and its exposed contacts are boxed in red in the second picture. Even though they are recessed, be careful not to touch the contacts to avoid shocking yourself.

  10. OIRKWgDDCaXfNOuC
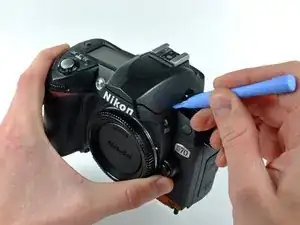
    • Use a plastic opening tool to carefully pry up the flash unit at the point shown in the picture.

  11. XrMwvrKkBNTKLvGK
    • Remove the two 4.3 mm Phillips screws securing the top edge of the front cover to the top cover.

  12. EEZR2m6DWPp1PwvG
    • Remove the two 4.3 mm Phillips screws on the face of the front cover.

  13. ev3ru2PBuiujCCIa
    • Use the sharp end of a metal spudger or a razor blade to peel the sticker out of the center of the automatic/manual focus switch.

  14. Xsm5Z2AkIQwkFjPt
    Xsm5Z2AkIQwkFjPt
    VlDedMRARDC4pVQI
    • Remove the 6.3 mm shouldered Phillips screw from the center of the automatic/manual focus switch.

    • Pull the automatic/manual focus switch away from the front cover.

  15. UH2VJ2q6vH5Lkm5a
    • If present, remove the plastic cover from the lens mount.

  16. 3dDkvdkDanaPEnZW
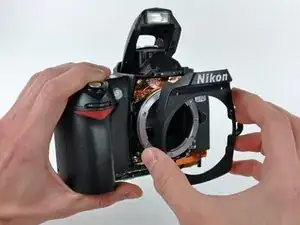
    • Pull the front cover away from the D70.

  17. ZvVGbbVKWhuDVyWO
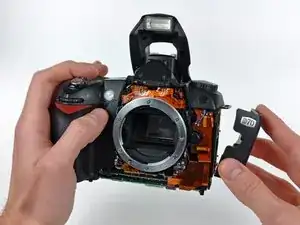
    • Remove the 3.8 mm silver Phillips screw securing the port cover to the side of the D70.

  18. 4uyJqXKlsXNwZKRL
    • Remove the port cover from the D70.

Conclusion

To reassemble your device, follow these instructions in reverse order.
Andrew Bookholt

585795 Reputation

0 comments