Introduction
Extracting the lens or CMOS chip from a Nikon S8200 camera is not very difficult, and an easy way to make a broken camera start working just like new! Naturally, before beginning, remove the battery, SD card, and lanyard (otherwise it'll get in the way).
In the guide, I refer to the various sides of the camera. This assumes you're looking at the camera from the perspective that you would normally be taking photos from. Therefore, the front of the camera contains the shutter, the back/rear has the screen, the right side has the IO, etc.
-
-
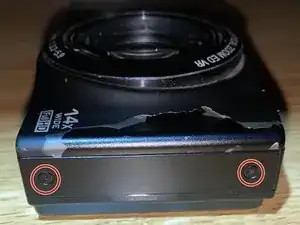
Using a Phillips #00 screwdriver, remove the outer two screws and panel.
-
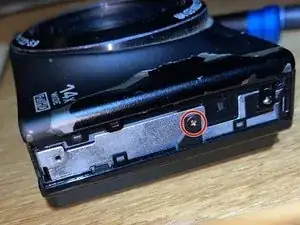
Remove the inner silver screw.
-
-
-
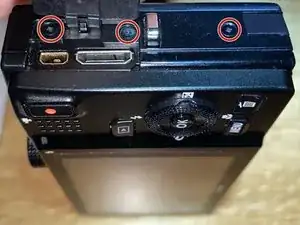
Remove the three outer screws, two hiding under the IO cover. If the lanyard is connected, remove it first.
-
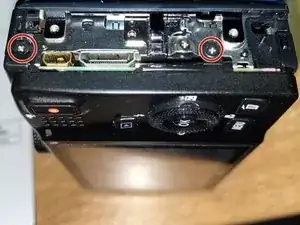
Remove the inner two silver screws closer to the screen side of the camera. Do not remove the third screw directly next to the lanyard connector!
-
-
-
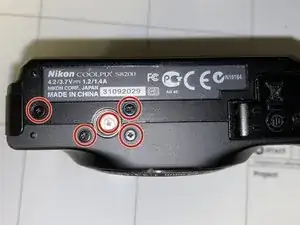
Remove the five screws on the bottom of the camera, including the one inside of the tripod mount.
-
-
-
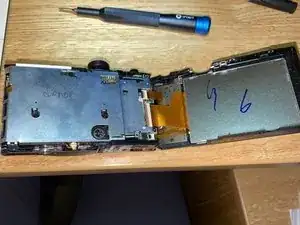
Swing the screen assembly to the right to open the camera.
-
To disconnect the ribbon cables, use a spudger (or a fingernail) to flip up the small plastic or rubber piece on the connector that's on the side opposite of the cable. Then, they should slide out easily. Force is not required!
-
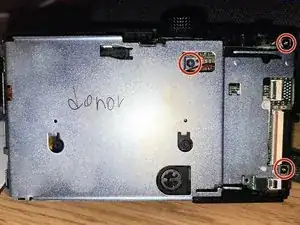
Remove the three screws holding the shielding in place.
-
Gently pull the shielding away from the camera. It may catch on the top of the left side, and some wiggling may be necessary to get it loose. It is lightly adhered to the circuit board, so some force may be required on the initial tug.
-
-
-
Remove the front panel of the camera. Having removed all screws, it should easily come off.
-
Pull the cover directly forward away from the camera. Light wiggling may be required.
-
Now that the front and back panels have been removed, the tripod mount should now be removable. Take it out.
-
-
-
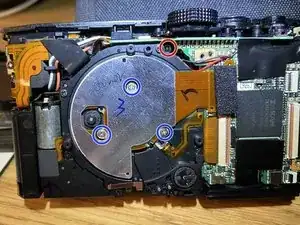
Remove the recessed screw that holds the lens in place (red).
-
Remove the CMOS's motherboard connection. It's connected via a LEGO-style connector under a foam insulator - use a thin spudger or a well-placed fingernail to gently pop it off.
-
If you are swapping the CMOS from one camera to another, remove it at this step.
-
Only for those swapping CMOS: remove the three blue encircled screws. The CMOS chip, cable, and shielding are all one module that lifts out. If you just want to remove the CMOS and keep the lens in place, you're done!
-
-
-
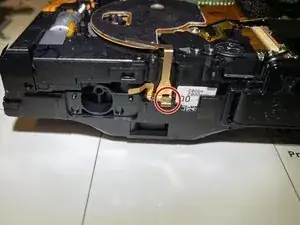
Now that the tripod mount has been removed, this screw on the bottom of the camera can be removed.
-
Also remove the copper conductor held in place with the screw. Ensure that it is reattached in the same way when reassembling.
-
-
-
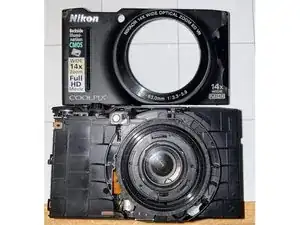
Carefully pull the lens assembly out through the back of the camera.
-
Disconnect the large ribbon cable as detailed in step 4.
-
To reassemble your device, follow these instructions in reverse order.
To reconnect ribbon cables, ensure the plastic piece on the side of the connector is flipped up. Then, insert the ribbon cable into the connector as far as it will go, ensuring it's aligned. Then flip the connector down to lock in the cable.
To reconnect the CMOS, simply align the two parts of the connector and push down. You may hear a small click.