Introduction
To replace the LCD screen of your camera, you'll need to go through a few steps of disassembly including the steps from the Back Cover replacement guide.
Parts
-
-
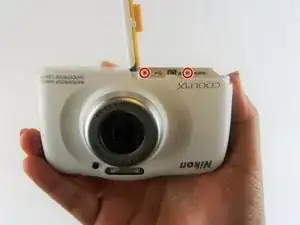
Remove all four T5 Torx screws from the exterior of the camera.
-
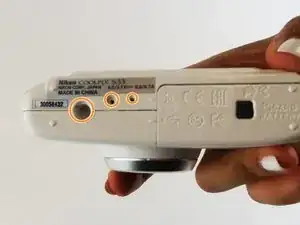
Remove all three T5 Torx screws located at the bottom of the camera next to the battery compartment.
-
-
-
Remove the two screws located above the HDMI and USB logos that are inside the camera's battery compartment using a JIS000 screwdriver.
-
-
-
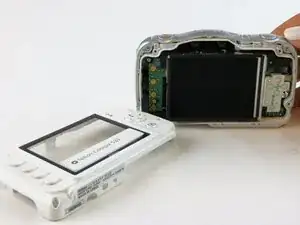
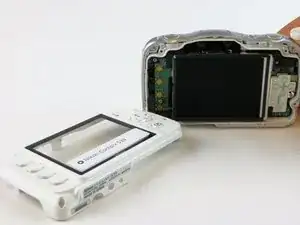
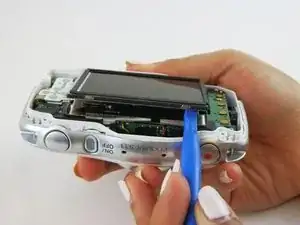
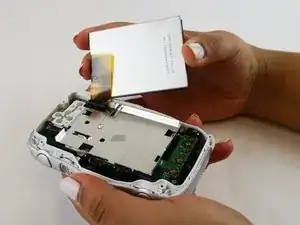
Before pulling the LCD Screen out of the camera, you will need to disconnect the ribbon connector that attaches the screen to the camera.
-
Gently pull the ribbon connector out of it's slot. You should be able to remove it without the need of any tools.
-


To reassemble your device, follow these instructions in reverse order.
One comment
Good evening
the LCD of the COOLPIX S33 is the same as S3300? I broke in S33 of my son but I can not find the parts.
Thank you
Francesco
Buona sera
l'LCD della coolpix S33 è lo stesso della S3300? mi si è rotto nella S33 di mio figlio ma non trovo il ricambio.
Grazie
Francesco
fenchi71 -
Der große Kreis an der Unterseite ist keine Schraube. Hier gehört einfach das Stativ festgeschraubt;-)
Lolos Allerlei -