Introduction

This guide uses the lens assembly guide to get the camera apart. Once you have finished with the lens assembly, getting to the casing is fairly easy.

  1. hHwd6kDcFWEBeRHI
    hHwd6kDcFWEBeRHI
    UpfEyjcZbuFKjeZn
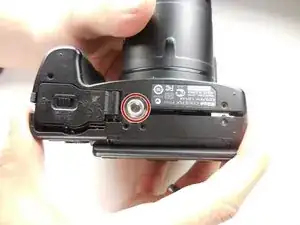
    • Flip the camera upside down and remove six 3mm PH00 Philips screws with a Philips screwdriver.

    • On the thumb grip, remove the one 4mm PH00 Philips screw.

  2. rOQ3CT2yryFLIZXI
    • With the camera upside down, remove the three 3mm PH00 Philips screws on the left side.

    • One of the screws are under the HDMI and A/V Out cover.

  3. vSGlBN6JOg1uxMME
    • On the opposite side of the camera, remove the two 3mm PH00 Philips screws.

  4. qwVcpDHSlmOhMGHk
    qwVcpDHSlmOhMGHk
    PeCFWCrKUDn4hwLJ
    G5KMgtM2naumX252
    • Open the flash and use a plastic opening tool to pop the tab under it as shown.

    • Now pull the casing apart.

    • The tripod attachment may fall out on its own, or you will need to pull it out.

  5. VmDt3bX3UeYfEVl3
    VmDt3bX3UeYfEVl3
    ifeFW6hPt3EI22rD
    • Unplug the two ribbon cables to completely detach the back.

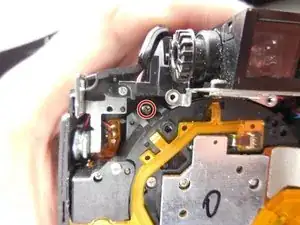
    At this stage (or even before unplugging the ribbon cables if you're careful), you can remove the silver screw next to the mode selector, and ease out the button assembly. Having done that, I was able to fix an intermittent shutter release by giving it a blast with switch cleaner.

    mikecdraper -

  6. 2LlM14bIO26TlQmG
    2LlM14bIO26TlQmG
    u5ZTfPlEEUsJNw6C
    joNhrgnw3eAI1PfQ
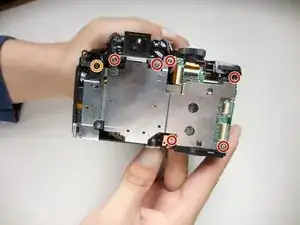
    • With the back separated, you need to remove six 3mm PH000 Philips screws with a Philips screwdriver.

    • Remove one 5mm PH00 Philips screw

    • To remove the top right corner screw, you may need to lift the corner of the case to gain access to it.

    • With all the screws out, the metal plate should simply lift off.

  7. TCrHFDWGTOCDEqAH
    TCrHFDWGTOCDEqAH
    AtOvUyVW6GGQaRGu
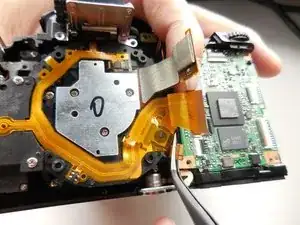
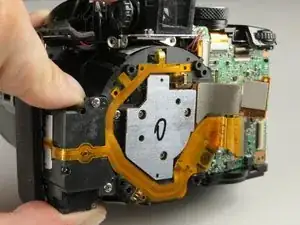
    • With the metal plate off, unplug this ribbon cable from the motherboard.

    • To remove the flat-topped connector, you simply lift it up to unplug it.

  8. hfpBKgpVXboNGCoL
    hfpBKgpVXboNGCoL
    51UL12drUoV3edSM
    UyQaMqmKRyYoSfHM
    • To get the lens assembly out, you need to remove four 6mm PH00 Philips screws

  9. IpyMccRp1hqSbJYl
    IpyMccRp1hqSbJYl
    U1SfJIUQOtXEUIUR
    • With the support screws out, you can simply slide the assembly out of the casing.

  10. bWNRRl1JAgMpCvPs
    bWNRRl1JAgMpCvPs
    QvwOpOxGsFsLy6v5
    UEdxGslm3UUVdSd3
    • If you are moving on to take the lens casing off, you do not need to do this step.

    • With the assembly out we need to take of this last piece by removing the three 3mm PH000 Philips screws.

  11. XcZHvgnavXFaZdlF
    XcZHvgnavXFaZdlF
    B2rZfXhNDKH12vO3
    • Remove five PH00 Philips screws with a Philips screwdriver.

  12. jYRhEA1uW42gVLLA
    • Separate the lens casing from the front.

    • The switch on the side simply slides off of the front casing.

Conclusion

To reassemble your device, follow these instructions in reverse order.

Brian Hulsey

Member since: 01/04/15

1461 Reputation

0 comments