Introduction
If the battery cover on your Nikon Coolpix L830 is broken, replacement is necessary. Following these steps will allow you to replace the broken battery cover with a new one to allow your camera to stay powered and prevent the environment from affecting their performance.
-
-
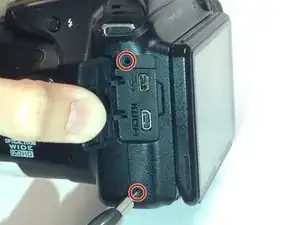
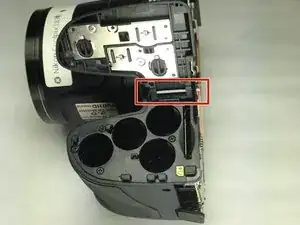
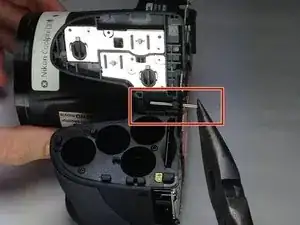
Use a Phillips #000 screwdriver to unscrew the two 3.0mm Phillips screws located on the side of the camera with the HDMI port.
-
-
-
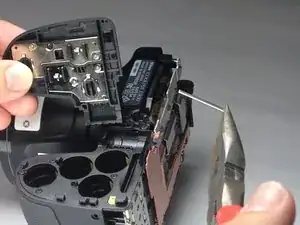
Unscrew the five 3.0mm Phillips #000 screws that are located on the bottom side of the camera.
-
-
-
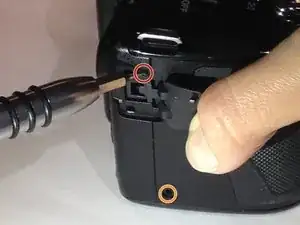
Unscrew the 4.0mm Phillips #000 screw located underneath the grey flap on the side of the camera with the "DC IN 5.0 V" marker.
-
Unscrew the exposed 3.0mm Phillips #000 screw on the same side.
-
-
-
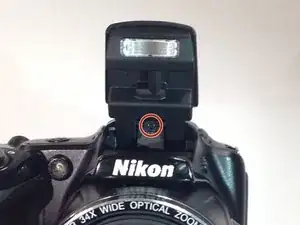
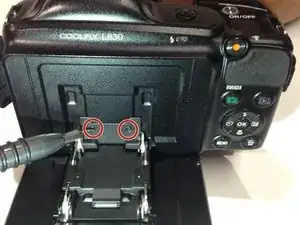
Press the flash button to open the flash component.
-
Remove the 3.0mm Phillips #000 screw located directly in-between the two arms.
-
-
-
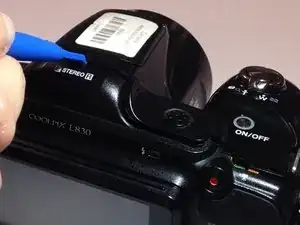
Open the LCD monitor to reveal two 2.0mm Phillips screws.
-
Remove the 2.0mm Phillips #000 screws.
-
-
-
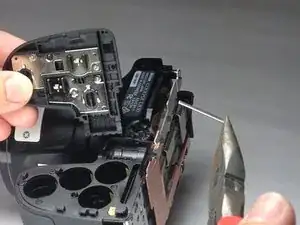
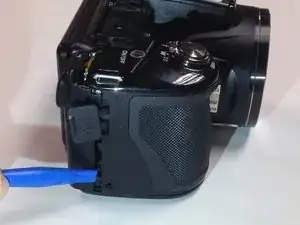
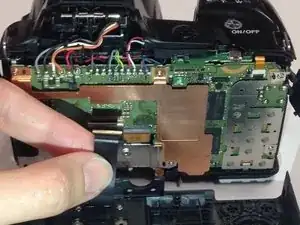
Insert a plastic opening tool between the back and front surface components of the camera.
-
Wiggle the plastic opening tool backwards and forwards along the top edge until the back surface comes off.
-

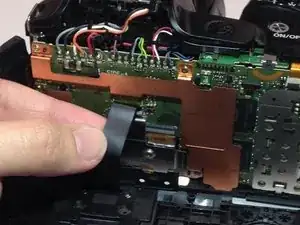
To reassemble your device, follow these instructions in reverse order.

4 comments
I did it!!! Sweat bullets, nearly damaged the LCD ribbon connector (a really difficult task pulling this up, be careful!!) but now camera is back in 1 piece and works. Thank you for your tutorial. I know I will NOT start a career changing these for others. Too nerve racking !!
I have a messed up usb port. I’m sure I could change it out . Where could I find a replacement usb/HDMI assembly?
How can you remove the battery compartment? Mine has battery leakage and the center battery tube is full of electrolyte. I need to get that housing out and the center contact clean. Any ideas?
I just disassembled an L310 last night and it was a major pain in the ***. I can't speak to the 830, but they look like similar design. To get at the battery compartment on the 310, I had to remove essentially everything, the front and back housing pieces, the screen, multiple circuit boards, the lens, the flash compartment, etc... It's like the camera was literally built around the battery compartment. The 830 looks like it's built the same way, with 100+ screws with several that will want to strip on you.
You could try using cotton swabs with vinegar on them. Distilled white vinegar will chemically eat the corrosion. Just take your time and do it slow. Don't get impatient and pour a large amount of vinegar into the battery compartment, it'll go everywhere inside the camera and ultimately cause liquid corrosion...been there done that. Best of luck with it!
Daniel -