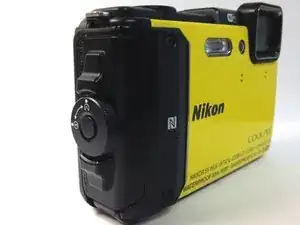
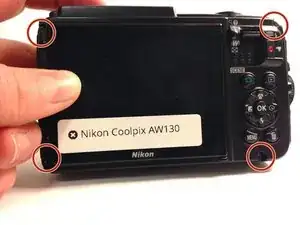
Introduction

Without the LCD screen, you cannot preview your nifty vacation photos. If this screen is cracked, the waterproof qualities of the Nikon may be sacrificed. Allowing water to infiltrate into the body can cause for additional problems.

  1. umDn1gRfdGucQY2K
    umDn1gRfdGucQY2K
    NxSNFhVAn11yLI4h
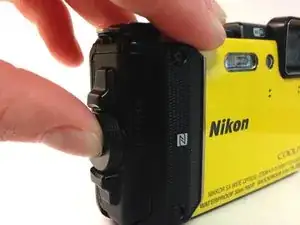
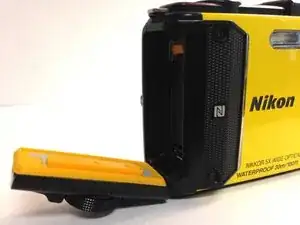
    • Using your thumb and pointer finger, open the card/battery hatch by pressing the center button of the wheel and turning the entire wheel to the left.

    • When reassembling, you must turn this wheel to the right until it clicks.

  2. cI6sfrYbWBmSqwTv
    cI6sfrYbWBmSqwTv
    j5KCm6vri5qU6OYN
    • You should feel the door begin to loosen. Carefully pull the hatch open.

  3. JJcpmE4malbmhh3x
    • Push the yellow battery/charger compartment tab up using your thumb nail.

    This yellow tab spring broken, how I can repair

    Surendra kumar -

    From where I can get this yellow tab, and how I can replace

    Surendra kumar -

  4. uImQZfV6vxeMJoGr
    uImQZfV6vxeMJoGr
    E6yLMH3WYoQehFcD
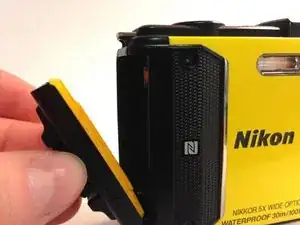
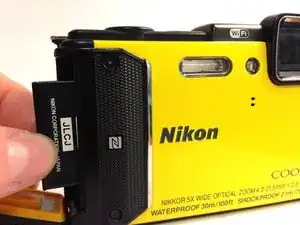
    • After pressing the yellow tab, the battery should loosen.

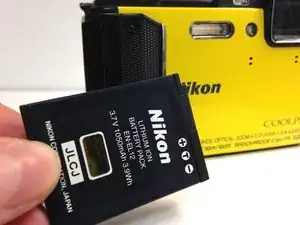
    • Slowly pull the battery completely out.

  5. LF5niWbeqItXW2XC
    LF5niWbeqItXW2XC
    GULvofyIyQVWLiCg
    • Using the T5 Torx screwdriver, remove all four 4mm screws.

    It's a T4 on both my cameras

    Daniel Bardua -

  6. 1IaPr5luTOabhcxE
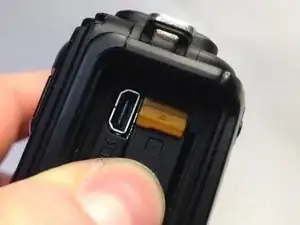
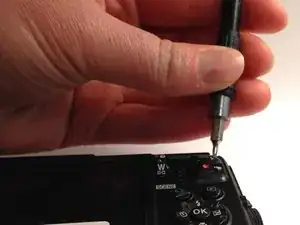
    • Using a Phillips #000 screwdriver, remove the single 3mm screw found inside the battery/charging compartment.

  7. voGAvcCWBdwmD1HH
    • Remove the upper cover (connected by glue) and unscrew the single Philips screw.

    Start with a metal spuge from the buckle on the lens-side and work your way from there.

    Its not necessary to remove the whole thing - cause the side on the other buckle tends to break.

    Daniel Bardua -

  8. X6sC5KRvYQYqnuro
    X6sC5KRvYQYqnuro
    fnoh3J4NvsGad3xn
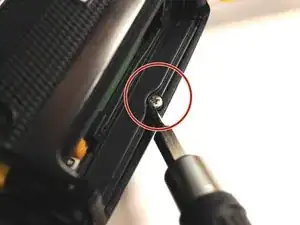
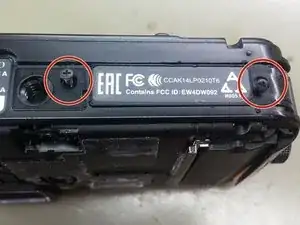
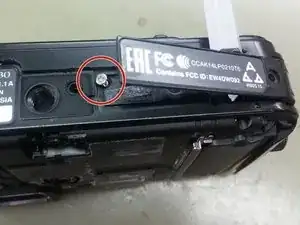
    • Remove two Philips screws from the bottom cover, lift gently the cover and remove the single Philips screw under it.

    In the case of my camera, I had to move the plat that says “EAC…” to the side. Underneath was another small Philips screw that I had to remove before I could take off the back panel

    marcelzarrouk -

  9. agWMJUCIqbfNAFWi
    • Carefully remove the back cover from the camera body.

    Hi, do you have a photo of the back panel but inside, my camera it's cracked in the GPS. Pleaseeeeee

    Gon -

    Merci Tutoriel parfait

    Patrick M

    Patrick Malot -

    The back cover is connected to the main board with two flexible flat cables (FFC). The connectors on the board have lids that lock the cables, so first lift the lids with a plastic tip, then tear the cable with no force aut of the connector.

    Christoph Kunz -

    bonjour , pour ma part le capot ne se retire pas , il semble encore retenu au niveau de la vis centrale du capot inferieur alors que j'ai retiré toute les vis !!! merci de m'eclairer

    gregory bernard -

  10. KHv42T6tHdxObd5p
    KHv42T6tHdxObd5p
    5IiUjQtaeZVgGbei
    KMvMgOqVdSrXnZVX
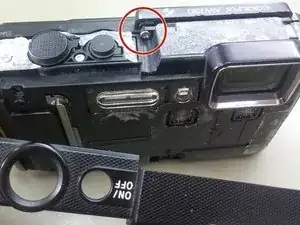
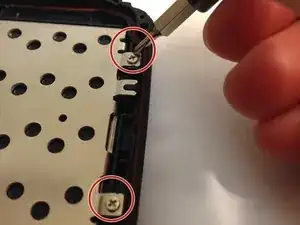
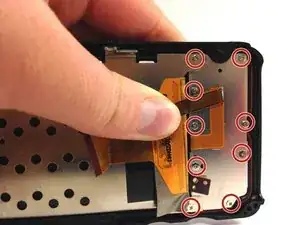
    • Using a Phillips #000 screwdriver, remove all 11, 4mm screws on the LCD screen cover.

    • Two screws are located on the right.

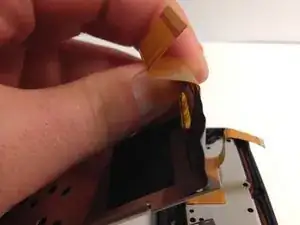
    • The remaining screws are hidden behind a connector ribbon on the left.

  11. MyDXMRyFIRQZTvll
    MyDXMRyFIRQZTvll
    OxSdbA5VcLbeQLV6
    • Pull the LCD screen from the plastic frame after removing all of the screws.

  12. TMVHOOsRWmHIZb3C
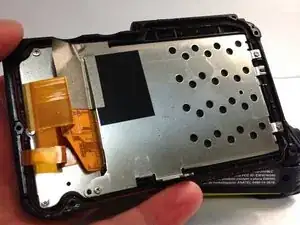
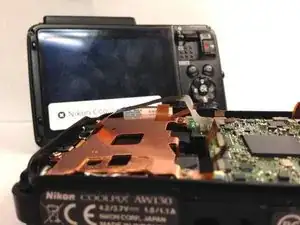
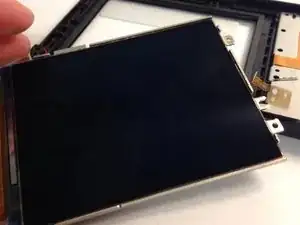
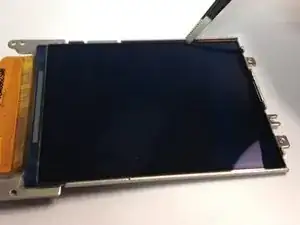
    • Using a pair of tweezers from the precision tweezer set, carefully remove the screen from the metal frame.

    • Since the tweezers could shatter the screen, causing for broken glass, exercise extreme caution.

Conclusion

To reassemble your device, follow these instructions in reverse order.

Lauren Stepp

Member since: 29/01/16

1251 Reputation

8 comments

Hi.

Where can you buy a replacement screen?

Ben -

Hi.

Where can you buy a replacement screen?

my contact is josem6073@gmail.com

Thank you .

Jose Martins -

Please add Torx T5 screwdriver at the tool needed, required at step 5

macreateur -

Hi.

Where can you buy a replacement screen?

my contact is cpapacon@gmail.com

Thank you .

Costis Papaconstantinou -

Hi.

Where can you buy a replacement screen?

my contact is Keithdurkan@gmail.com

Thank you .

Keith Durkan -

What appears to be the most difficult step —Step 7 —has its critical parts skipped over: how to carefully remove the top cover from its glued surfaces without breaking it. What tool is used? Where does one start the process? Are there particularly vulnerable sections where caution should be used to avoid breaking the cover?

Also not included are the instructions for replacing the top cover and making sure it stays in place. If it is re-glued, what type of glue is used?

Other than that, the instructions are clear and beautifully illustrated.

Peter Jursik -

Mas falta vocês dizerem onde se compra uma tela nova , ou usada e outras peças , seja do que for

Cari -

Mesmo assim obrigado por tudo

Cari -