Introduction
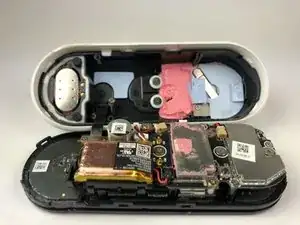
This guide will show how to remove the faceplate and casing from the Nest Hello.
Tools
-
-
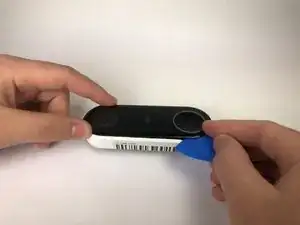
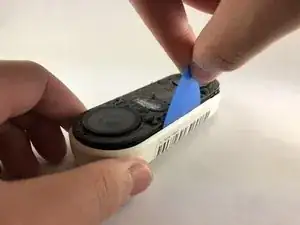
Insert the pick between the black faceplate and white casing of the Nest Hello.
-
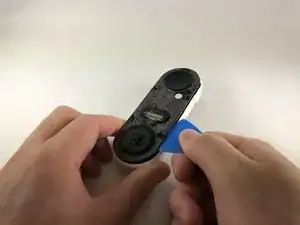
Pry the faceplate away from the device with the opening pick.
-
Completely remove the faceplate from the device, do not be afraid to pull hard.
-
-
-
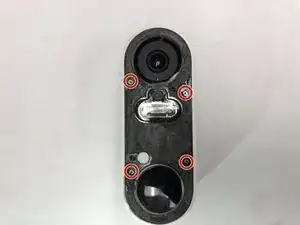
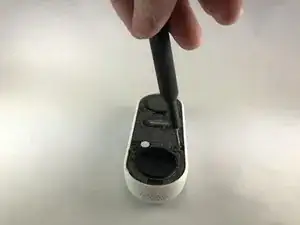
Peel back the cover stickers and use the Phillips #000 screwdriver to remove the four screws.
-
-
-
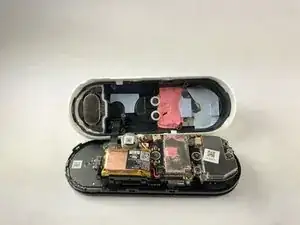
Insert opening pick between the white casing and the black internal circuitry and pry it out.
-
To reassemble your device, follow these instructions in reverse order.
2 comments
Are Replacement parts available anywhere? Can’t seem to find anything… thanks!
Aside from fine grit sanding and spray painting or using a silicone cover, has anyone found a creative way to fix the delaminated an existing Gen 1 Google Nest wired / Nest Hello doorbell faceplate (remove the rest of the flaking off laminate)?

I had to use a metal spudger tool to start and then used guitar picks.
Joel Lundi -
Be afraid to pull hard. The faceplate will break in two.
B Bremer -
I did the JerryRigEverything method and slipped a razor under the faceplate to separate it carefully from the body. Worked perfectly and nothing was damaged
There I Fixed It -
Be careful with the wiring and the heater element. I must have shorted something together when it put it back together and now it will no longer power up. It is probably best to cut the wires to the heater and deal with the consequences in the cold temperatures.
Joe I. Fabritz -