Introduction

Follow this guide to replace a cracked or damaged screen on the Motorola Moto E5.

Before you begin, download the Rescue and Smart Assistant app to backup your device and diagnose whether your problem is software or hardware related.

This guide requires the removal of the battery. We recommend not re-using the old battery, as removing it can deform it slightly and potentially cause safety issues if you re-use it. Replace the battery along with the screen.

For your safety, discharge the battery below 25% before disassembling your phone. This reduces the risk of a dangerous thermal event if the battery is accidentally damaged during the repair.

  1. qSiEiQUrS53ZE3yZ
    qSiEiQUrS53ZE3yZ
    Hw3noeRJ2Ms3xwvs
    MdNy5AFW2clvRCyA
    • Be sure to power off your phone before you begin.

    • Use a SIM eject bit, SIM eject tool, or paper clip to remove the SIM card from the phone.

  2. BH2RgdpmUIT5Op1Y
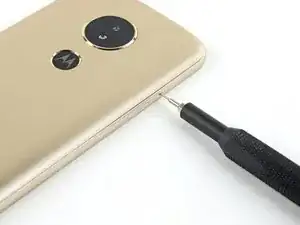
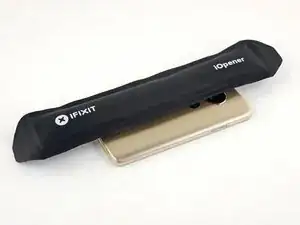
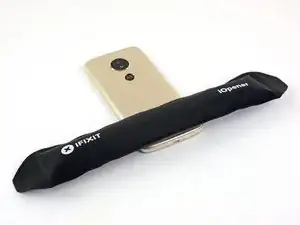
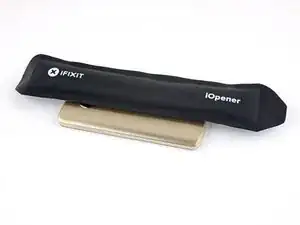
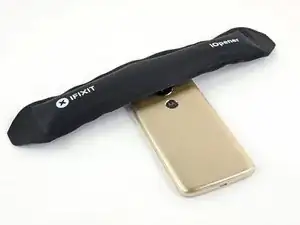
    • Prepare an iOpener and heat the back of the phone along one edge for about two minutes, or until it's slightly too hot to touch. This will help soften the adhesive securing the back cover to the phone.

    • You may need to reheat and reapply the iOpener several times to get the phone warm enough to cut the adhesive. Follow the iOpener instructions to avoid overheating.

    • A hair dryer, heat gun, or hot plate may also be used, but be careful not to overheat the phone—the internal battery is susceptible to heat damage.

    So what is the temperature Fahrenheit or Celsius that is too hot for the battery? There must be a maximum degree temp. in place… wouldn't you think? please speak/txt. in specific terms. That would be a great help. thank you

    m. callo -

    Hello! When you heat the device with the iOpener, the iOpener is designed to never get hot enough to damage the battery. Anything above 200°F is too hot for a lithium-ion battery and will heavily damage it in a very short amount of time. You can often set the phone on a heat pad at 170°F (~80°C) for a few minutes without issue.

    Arthur Shi -

  3. T1lBgw5PLOCTJVrD
    T1lBgw5PLOCTJVrD
    QsTC263GVOIfLZUY
    hfeYYTPDds2vWKIH
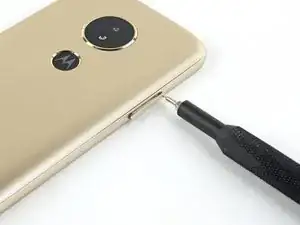
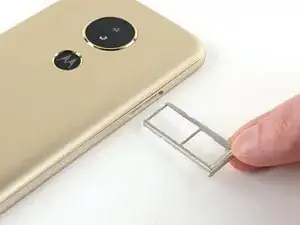
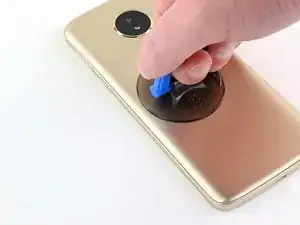
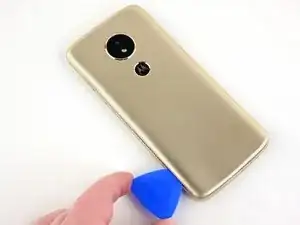
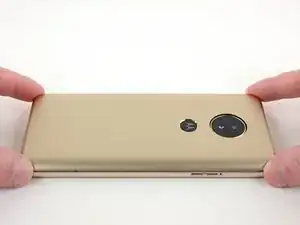
    • Apply a suction handle to the back cover, near the middle of the edge you heated up.

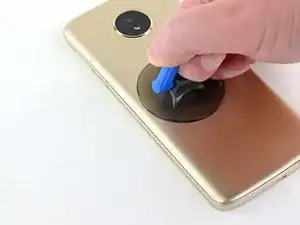
    • Pull the suction cup with firm, constant pressure to create a slight gap between the phone's frame and the back cover.

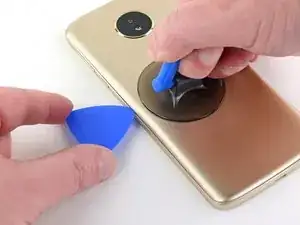
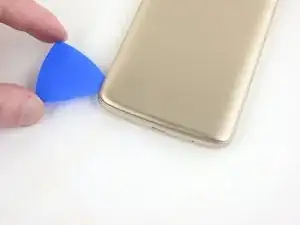
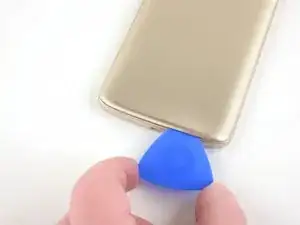
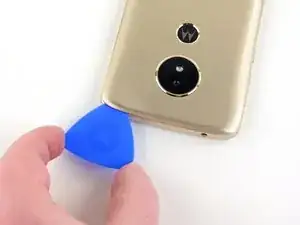
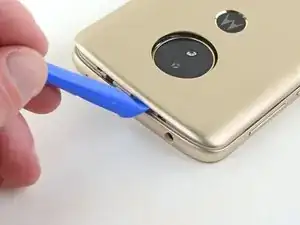
    • Insert an opening pick into the gap.

    ….and how deeply, do I insert this opening pick into the phone ? a quarter inch, 16th? eight they're ought to be specifics for this type of performance on this repair. No?

    m. callo -

    For this phone, there are no cables near the perimeter, so you can insert the pick as deeply as you desire. If there are fragile cables that can be damaged near the perimeter, our guides will state how deep you can insert the pick (example).

    Arthur Shi -

  4. 5gR4E1LW64ZXT3xR
    5gR4E1LW64ZXT3xR
    nOEksJVdCXV2eTK1
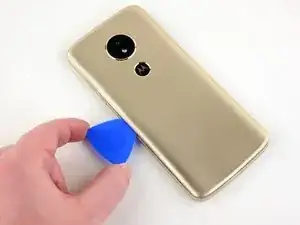
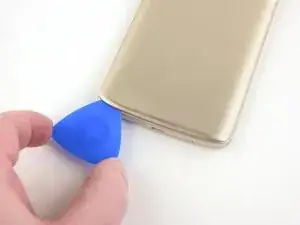
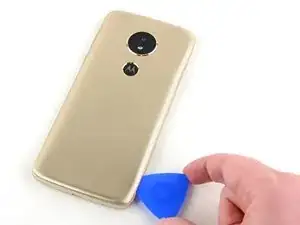
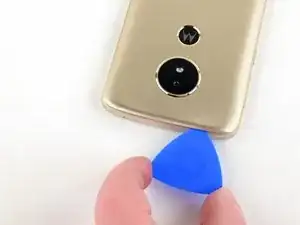
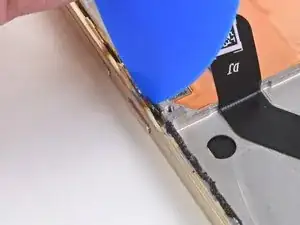
    • Slide the opening pick along the edge of the phone, cutting through the adhesive securing the back cover to the phone's frame.

    • As you move on to cutting the adhesive around the rest of the phone, it may help to leave an opening pick in place here and grab another for the following steps.

  5. bPvIWIBW41Mf3hVL
    • Use the iOpener to heat the back of the phone along its bottom edge for about two minutes, or until it's slightly too hot to touch.

    Again..temp. please?

    m. callo -

  6. nprDJSTUwVhWREbe
    nprDJSTUwVhWREbe
    NKUyU4i2ivFqw4IO
    JoFXyFAXgCEYNius
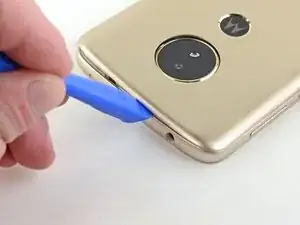
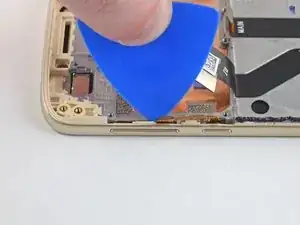
    • Continuing sliding the opening pick down and cut the adhesive around the bottom of the phone.

    • If the adhesive is too tough to slice, continue to heat it until it softens enough to slice through it fairly easily.

  7. IEirgUdpvHa4j24k
    IEirgUdpvHa4j24k
    6EwCKsTfNOAClPRh
    vW5RAssEepOpog1e
    • Use the iOpener to heat the back of the phone along the other edge for about two minutes, or until it's slightly too hot to touch.

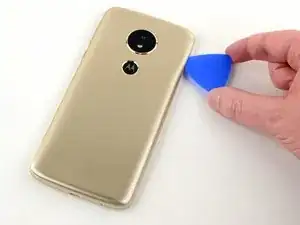
    • Continue cutting through the adhesive along the side of the phone.

  8. eOqOEfOAhipdQqJp
    eOqOEfOAhipdQqJp
    DNQVgvyMGJOQZKWy
    OmnofYRcoA1rOTEh
    • Use the iOpener to heat the back of the phone along its top edge for about two minutes, or until it's slightly too hot to touch.

    • Continue cutting through the adhesive along the top edge of the phone.

  9. tRvBTrOQAPv52Zbm
    tRvBTrOQAPv52Zbm
    c3vodfaSFbrRQS5R
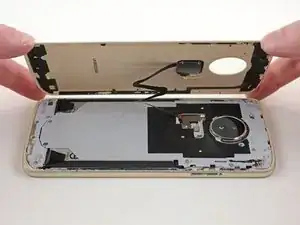
    • There are some areas around the edge that are held down with plastic clips. The opening pick should detach most of the clips. If not, insert an opening tool into the gap and pry the back cover up to release the clips.

  10. icBCpnqCLXtJLFXd
    icBCpnqCLXtJLFXd
    ewGP2fdmRVtC2ZmK
    • Once all the adhesive is cut, carefully lift the back cover off the back of the phone.

    • Don't fully remove the back cover yet. The fingerprint sensor cable is still connected to the phone, and it can rip easily with too much tension.

  11. W1gLO1IWCxRQVKGk
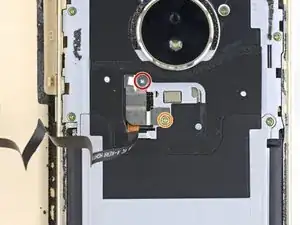
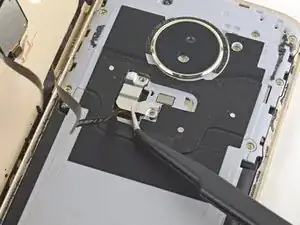
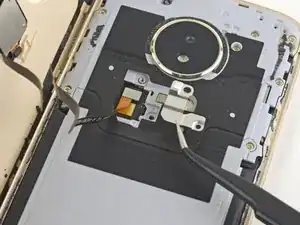
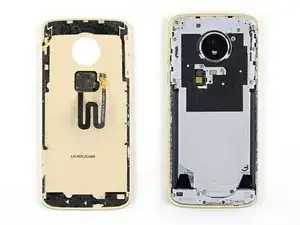
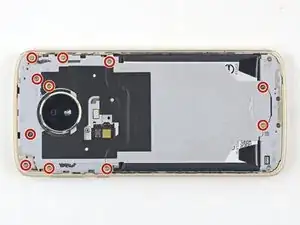
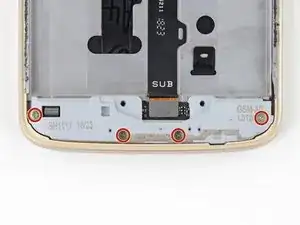
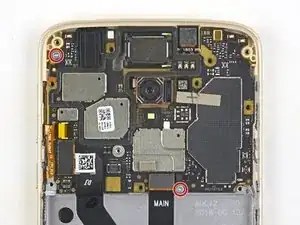
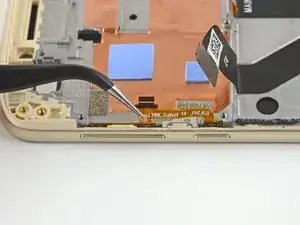
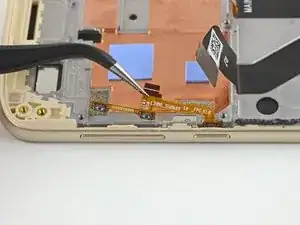
    • Remove the following Phillips screws securing the fingerprint sensor cable cover:

    • One 1.6 mm screw.

    • One 3.8 mm screw.

    • Throughout the repair, keep track of each screw and make sure it goes back exactly where it came from to avoid damaging your phone.

  12. GgUGFnagKQhATToe
    GgUGFnagKQhATToe
    olp2wshNt3yLlGDA
    • Use a pair of tweezers to remove the fingerprint sensor cable cover.

  13. BYNoGfQCd23ZFvc5
    BYNoGfQCd23ZFvc5
    aWxRMGophGwAJCuS
    • Use a spudger to pry up and disconnect the fingerprint sensor cable connector.

  14. UaaY2LMuTCnB2qHo
    • Remove the back cover.

    • Since the back cover is held down with clips, replacing the adhesive around the perimeter of the back cover is optional. Replacement adhesive comes in a pre-cut sheet to match the contours of the back cover.

  15. hE5JryIP1SKGZ4NX
    hE5JryIP1SKGZ4NX
    hiVcQ4Myqtbb4YSM
    • Remove the eleven 3.8 mm-long Phillips screws securing the midframe.

    • A couple of screws are hidden under "S" stickers. It may help to remove these stickers with a pair of tweezers before removing the screws.

  16. ZjLHHFhvLYyhw1Re
    ZjLHHFhvLYyhw1Re
    SkpTt2opVGOeW3Nv
    uwyUIeWASHmFiWG4
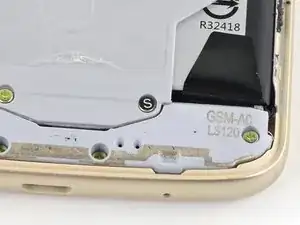
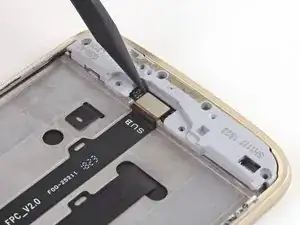
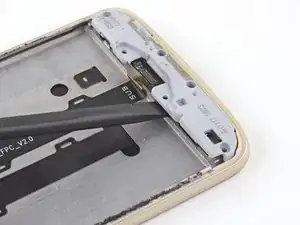
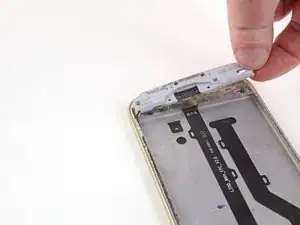
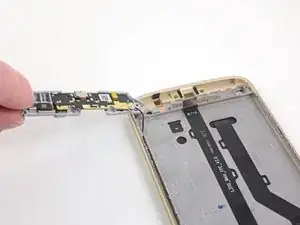
    • Insert your fingernail or the flat end of a spudger into the notch at the bottom of the midframe.

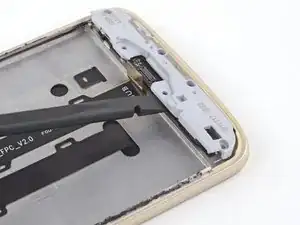
    • Pry up with your fingernail or the spudger to loosen the midframe and remove it.

  17. OKVBvZypJihRKnfl
    OKVBvZypJihRKnfl
    1rBVvEAOChDLdJP4
    • Use the point of a spudger to pry up and disconnect the battery connector.

  18. PIRN1O4XxqQE5eO3
    PIRN1O4XxqQE5eO3
    TRFPIxTvhUsUSnHp
    NKD1w3qMbUpAxlxi
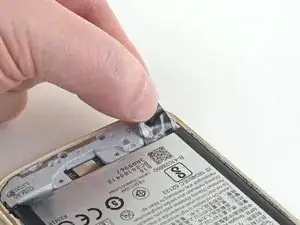
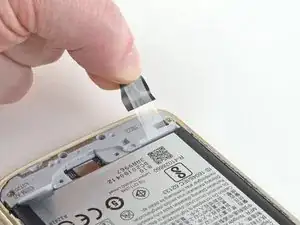
    • Use a pair of tweezers to peel up the two battery adhesive tabs at the bottom of the battery.

    • Be careful not to jab the battery with any sharp tools. A punctured battery may leak dangerous chemicals or catch fire.

  19. gLAWY5SaRDM41LNk
    gLAWY5SaRDM41LNk
    LEHAKY2PCPgmVIiq
    • Slowly pull the battery adhesive tabs to release them from the bottom of the battery.

    • Be sure to pull very slowly, giving the strips time to stretch and separate.

    • Pull at about a 45-degree angle to prevent the strips from dragging too much on the battery or the phone's frame.

    • If the adhesive strips break off, move on to the next step for an alternative battery removal method.

  20. WMYMIgvQUBvnXBMb
    WMYMIgvQUBvnXBMb
    DHvAi4uoDSh1JvQN
    hWxSyWBIJ2TaCJK3
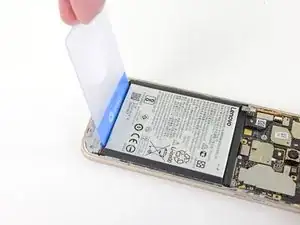
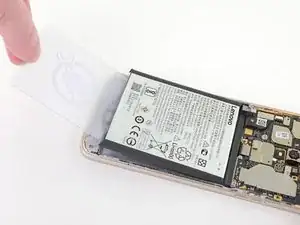
    • If the adhesive strips broke and you can no longer access them, insert a plastic card in between the bottom of the battery and the phone's frame.

    • Carefully push the card down and inward to wedge it underneath the battery and pry it up.

    • Avoid bending the battery while you perform this step. Go slowly and be patient with the remaining adhesive.

  21. U4pweyUHRjUOfUmS
    U4pweyUHRjUOfUmS
    seaQ2ZMZ2UN2TMSP
    w3OaNvVWMOBJNBIy
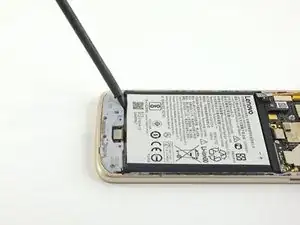
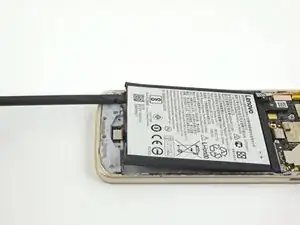
    • If you successfully removed the adhesive strips, insert the flat end of a spudger in between the bottom of the battery and the phone's frame.

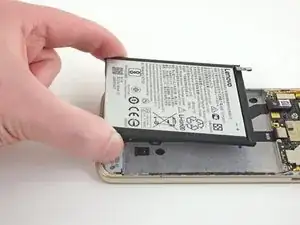
    • Lift up the battery to free it from its recess and remove it.

  22. 6byCFJgZV6WCNtDd
    • Before installing the new battery, be sure to remove any broken adhesive strips that were left behind.

  23. pA6ZOnMUNBJFZRKC
    • Remove the four 3.8 mm-long Phillips screws securing the daughterboard.

  24. VCcctAGQeTZSKXA6
    VCcctAGQeTZSKXA6
    6iACeIMG44YpMKlM
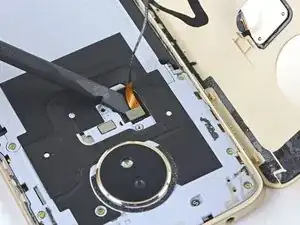
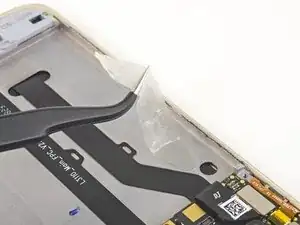
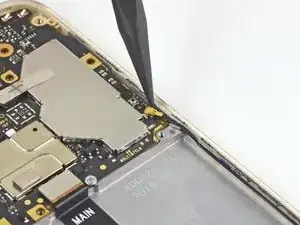
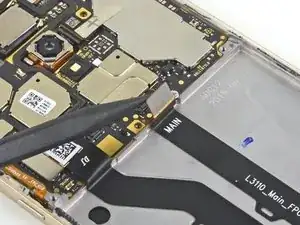
    • Use a spudger to pry up and disconnect the daughterboard cable connector from the daughterboard.

  25. Au21nYSFSg2jC3JV
    Au21nYSFSg2jC3JV
    JgsK32NexX6OCQY3
    • Use the flat end of a spudger to pry up the daughterboard and free it from its recess.

  26. xvQlOhBXyiSWRtRm
    xvQlOhBXyiSWRtRm
    VDndNRXnURWQXPUd
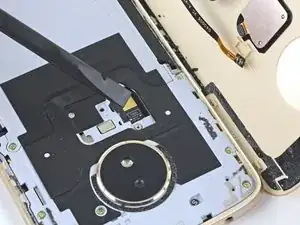
    • The daughterboard is still attached to an antenna cable, so lift the daughterboard up from the left side of the phone and flip it over its right side to prevent ripping the antenna cable out.

  27. FQGYiUbY6kIuoyyU
    FQGYiUbY6kIuoyyU
    tUH3sG4FLUc52WwJ
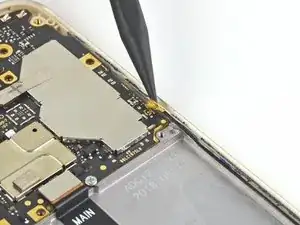
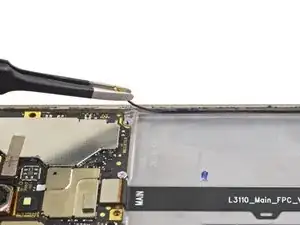
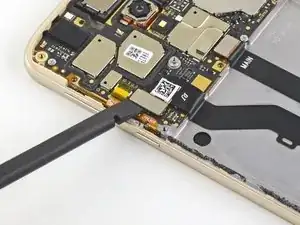
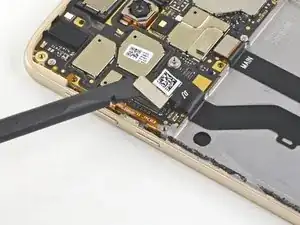
    • Use the point of a spudger to pry up and disconnect the antenna cable connector on the motherboard.

  28. vr2aNEAGbrWZXoJI
    vr2aNEAGbrWZXoJI
    HGkdRN4e4UohOG2k
    3NmYN4fSLNKFPhYh
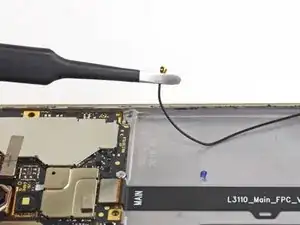
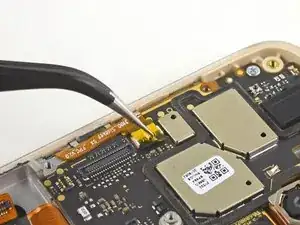
    • Use your fingers or a pair of tweezers to detach the antenna cable from its groove along the side of the phone.

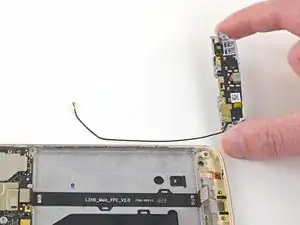
    • Remove the daughterboard and antenna cable.

  29. HslGFJM1iGbmUgYc
    HslGFJM1iGbmUgYc
    hqXEB11F2PHqMIUK
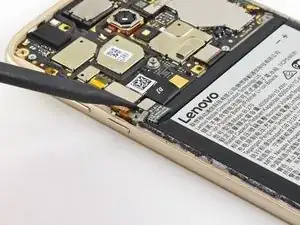
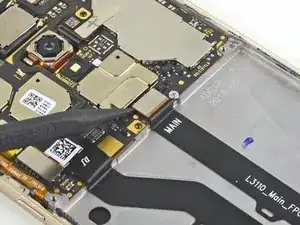
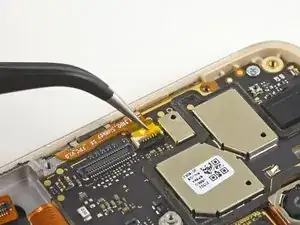
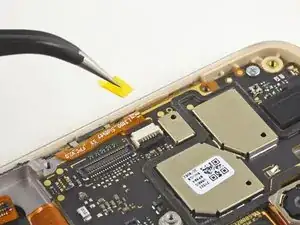
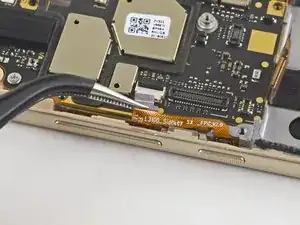
    • Use the point of a spudger to pry up and disconnect the daughterboard cable from the motherboard.

  30. VKCb1nr5lOus6nFa
    VKCb1nr5lOus6nFa
    waJuUAWjHrFp2dgQ
    • Use a spudger to pry up and disconnect the display cable from the motherboard.

  31. V5LEYsVdnVe3HnA6
    V5LEYsVdnVe3HnA6
    1CZAHPZrQCdFFjPI
    IPpsEpT5OFk3jfM4
    • Use a pair of tweezers to peel up and remove the tape covering the volume button connector.

  32. 3Mo23Fad2K2cVqdQ
    3Mo23Fad2K2cVqdQ
    vgpCK1jrobLb3Xqt
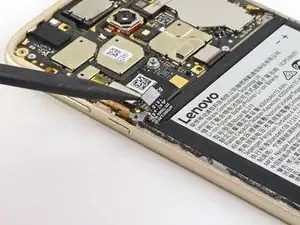
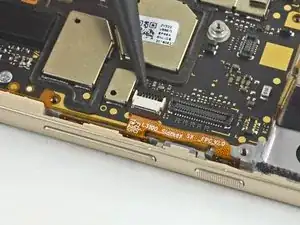
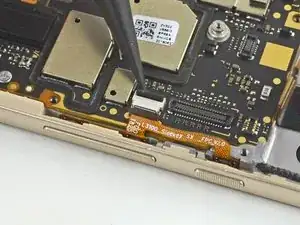
    • Use the point of a spudger to flip up the black locking lever on the volume button connector.

  33. Z44paTWf4CEdeZZn
    Z44paTWf4CEdeZZn
    sD3DHUYruMTmplyJ
    ecwoWPNyIOCZv1XO
    • Use a pair of tweezers to pull the volume button cable straight out of its connector.

  34. hWaqZVBPXFsuJKCK
    hWaqZVBPXFsuJKCK
    PUXFH6BA2iQgHZeI
    sjb54w3OTNWbk1KR
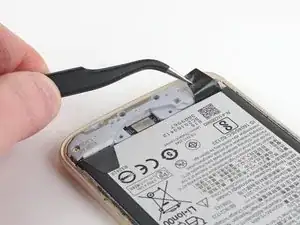
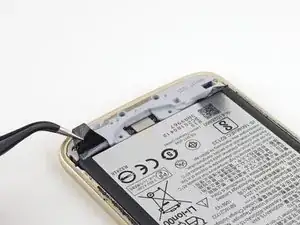
    • Slide an opening pick along the underside of the volume button cable to cut the adhesive and free it from the motherboard.

  35. reMDESC12Whyc4P2
    • Remove the two 2.9 mm-long Phillips screws securing the motherboard.

  36. KvJIInEwKkfRBwBQ
    KvJIInEwKkfRBwBQ
    VXB2XTdQNVrqbeES
    eUuPFsMiNrmHTGLr
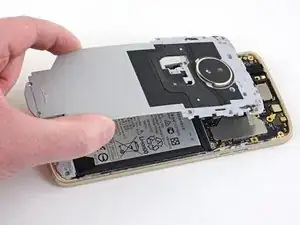
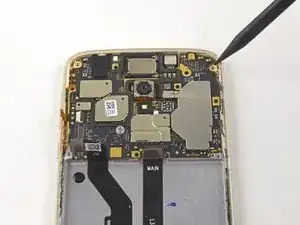
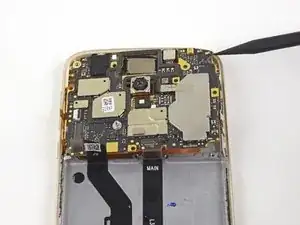
    • Insert the point of a spudger anywhere in between the motherboard and the phone's frame.

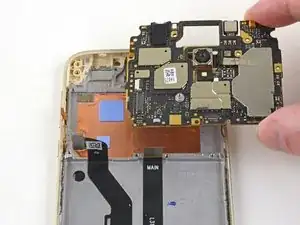
    • Pry the motherboard up to free it from its recess and remove it, making sure it doesn't snag on any of the cables and connectors.

  37. JflURJYywOW2gckk
    JflURJYywOW2gckk
    mYeGcTv6yBdEMCPu
    WT1ZJcioOSNWWHkp
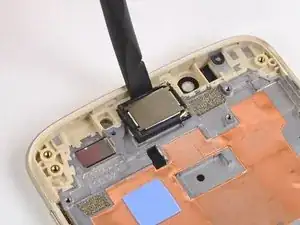
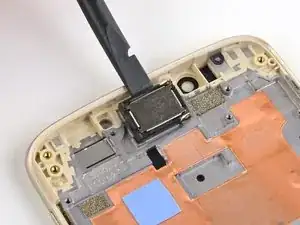
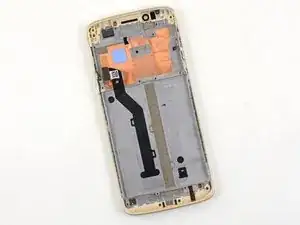
    • Use the flat end of a spudger to pry up and free the earpiece speaker from its recess.

    • The earpiece speaker is slightly adhered to the phone's frame, so a bit of resistance is normal.

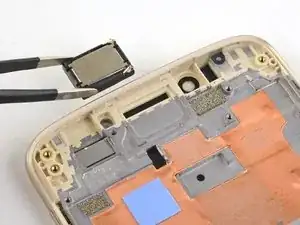
    • Use your fingers or a pair of tweezers to remove the earpiece speaker.

    • During re-assembly, be sure the two spring contacts on the earpiece speaker point upward and face the right.

  38. xfvdIcKHAvUEType
    xfvdIcKHAvUEType
    khpmRTPvaWmu2Ue2
    • Insert an opening pick into the gap between the volume buttons and the phone's frame.

  39. dqqCv3YLGtGGlEFo
    dqqCv3YLGtGGlEFo
    rPCqdCTOIQ6HeyH4
    • Slide the opening pick along the volume buttons to cut the adhesive securing it to the phone's frame.

  40. HRCEIAYYAtCivwdb
    HRCEIAYYAtCivwdb
    pJFxWwjIo2cEPYLW
    A52ZOrGvH1icbcKC
    • Use a pair of tweezers to remove the volume buttons from the phone's frame.

    How do the plastic volume buttons on the frame stay in place? I had to transfer them over. Each one removed easily. They go in fine on the new screen but fall out easily.

    mcavil -

  41. vVcOSGGpEgiHNQHR
    vVcOSGGpEgiHNQHR
    TPjCU1ZnE2vJ5WXC
    E66OLnYMPjMREFND
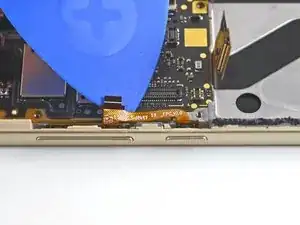
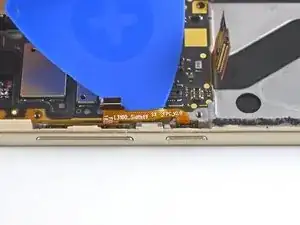
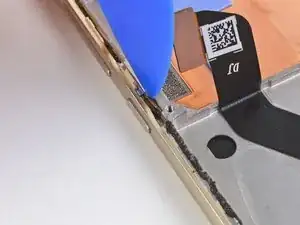
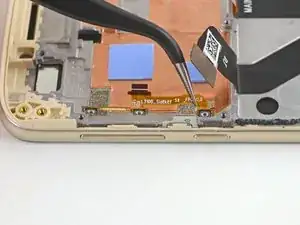
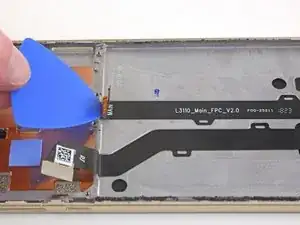
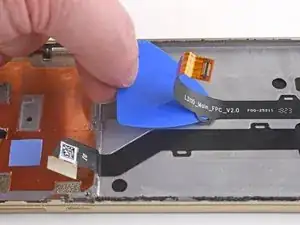
    • Insert an opening pick underneath the daughterboard cable near the motherboard connector at a 45-degree angle.

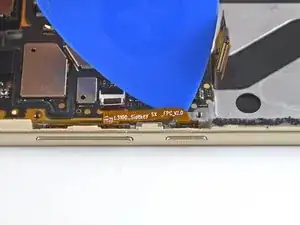
    • Slide the opening pick along the underside of the cable, slicing the adhesive and removing the cable from the phone.

  42. VvNHsokLfbRGsBZV
    • Only the frame, the LCD screen, digitizer assembly, and display cable remain.

    • Compare your new replacement part to the original part. You may need to transfer remaining components or remove adhesive backings from the new part before installing.

Conclusion

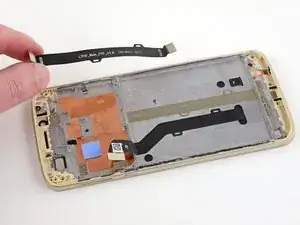
To reassemble your device, follow the above steps in reverse order.

Take your e-waste to an R2 or e-Stewards certified recycler.

Repair didn’t go as planned? Check out our Motorola Moto E5 Answers community for troubleshooting help.

Craig Lloyd

Member since: 10/02/16

35240 Reputation

0 comments