Introduction

Dim picture? No display? Discolored output? No problem! Use this guide to replace the burnt light bulb with a new one. To complete this replacement, you will need the following parts ready:

  1. htRVusYYZ33RvRZy
    htRVusYYZ33RvRZy
    S4Aya21WutNAgIHW
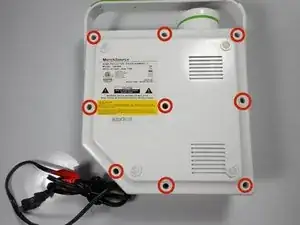
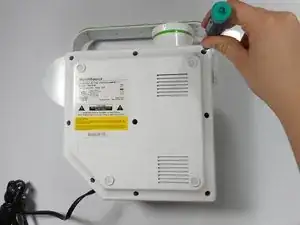
    • Flip the projector onto its back and unscrew the nine 15mm screws using the Phillips #0 screw driver.

  2. AXCDhLDCAFxZhuIK
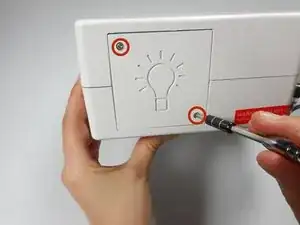
    • Flip the projector right side up and unscrew the two 12mm screws on the light bulb panel located at the rear of the projector with a Phillips #0 screw head.

    • The bottom right panel screw does not come completely out the panel door.

  3. ERl1a2hs2MKOdQ3D
    ERl1a2hs2MKOdQ3D
    sZ2OrjGBbI1FKAtp
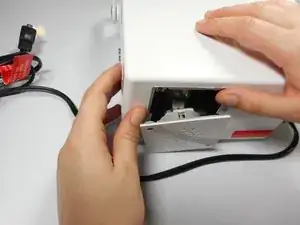
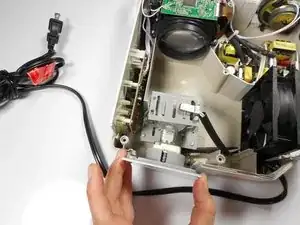
    • Using your hands, gently pry the top and bottom of the projector casing apart.

  4. HUrnYOEXEsvZA66g
    HUrnYOEXEsvZA66g
    kH2pGOt4NYWKQvRf
    cujYr3TtYhUn2qjw
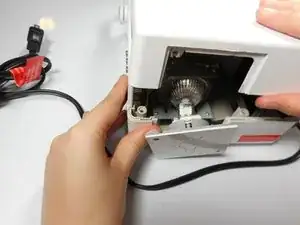
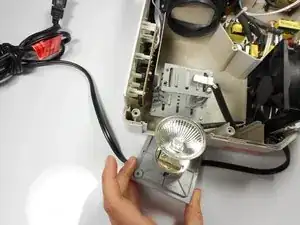
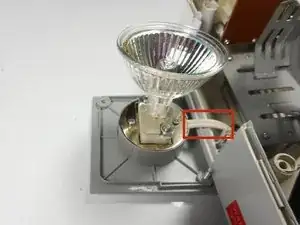
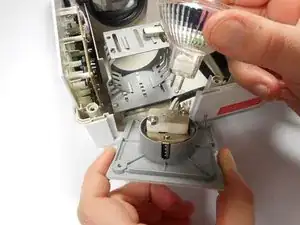
    • Remove the light bulb from its housing unit.

    • Do not damage the 2 white cables leading into the light bulb panel.

  5. lUKvNAHSS1UUPJCr
    lUKvNAHSS1UUPJCr
    GwG6h1JsqK3LOQhI
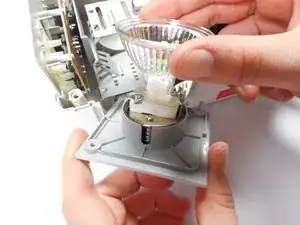
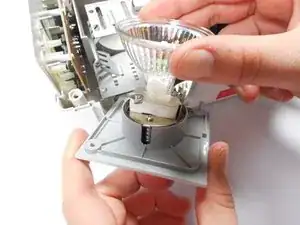
    • Remove the light bulb from the door panel by gently wiggling it back and forth. Do not twist the light bulb.

    • The light blub is held into the socket with prongs, and should easily pull straight out.

    What light bulb do I need?

    ingadewitt606 -

Conclusion

To reassemble your device, follow these instructions in reverse order.

Stephanie

Member since: 08/01/15

276 Reputation

One comment

Mi nuevo proyector no prende la luz ni el ventilador al conectarlo al tomacorriente y encenderlo.
JAVIER MUNOZ -