Introduction

This guide will teach you how to disassemble your Martian Victory Smart Watch, so that you can replace the Analog Watch Face. You might need this guide as your watch face is most likely broken and needing to be replaced. Repairing the watch face will allow the time to be seen easier, along with all the other features on the smart watch. Being able to solder might be useful in fixing your watch, but following the directions will help you with all you need.

  1. Vp1sWwZOwaKqpp1S
    Vp1sWwZOwaKqpp1S
    ZBq4tgOxIoK4pspP
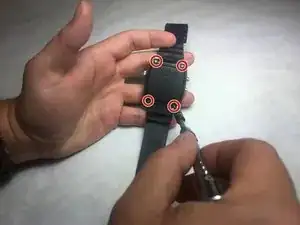
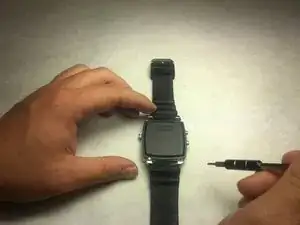
    • Unscrew the four 3.4 mm flat head screws

    where to buy this battery?

    Roy Caño -

  2. GeiDlUXUPOWRGoEW
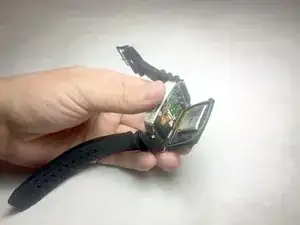
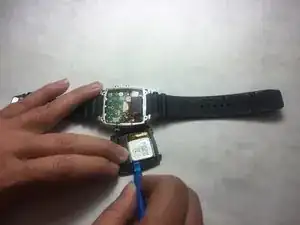
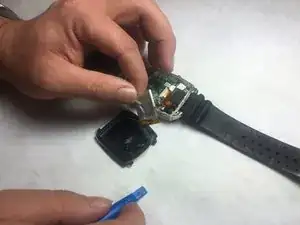
    • Carefully lift the back plate off the watch. You will notice a lithium battery and rubber gasket attached to the back plate.

  3. RXdVshdmEoJi24kr
    • If not replacing lithium battery, skip down two steps.

    • Using the plastic removal tool, pry the battery from the backing plate. The battery is simply attached with glue.

  4. TCbCG2t5ruhIQEEp
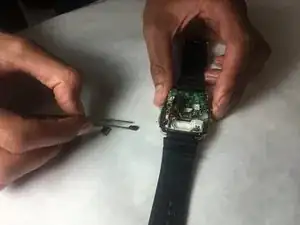
    • Desolder the battery connections from the motherboard. Learn how to solder components here!

  5. nF6CgAbksSBAnWaw
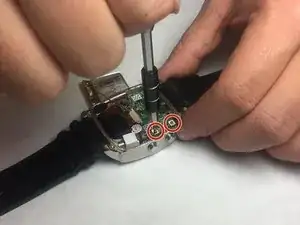
    • Use PH00 screw driver to remove two 2.4mm Phillips head screws.

  6. lHqQTqiP6hBBqegS
    • Use a spudger or tweezers to remove a white sticker that covers a Phillips head screw.

  7. KVBGpMkpjM12TMUt
    • Use PH00 screwdriver to remove 5.2mm Phillips head screw

  8. TlR6eScwadjTk5rA
    TlR6eScwadjTk5rA
    FXWasZFcbCQWOqht
    RTYRCZX5Lh2QArJK
    • Use ESD safe tweezers to remove the gold ribbon cable.

    • This will expose a second 5.2mm Phillips head screw that can be removed with a PH00 screwdriver.

  9. Vvt4v6wicLbmwJnP
    Vvt4v6wicLbmwJnP
    X3RglRqL4TAYF1Ie
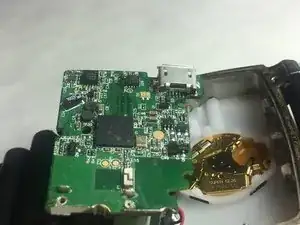
    • Use a spudger to gently pry on the motherboard towards the top of the watch, being towards the 12 o'clock position to loosen the motherboard.

    • You can now access the parts and pieces on the bottom of, and below the motherboard.

  10. ya4xrrMoAv1Fgbkp
    • Locate the ribbon connection, and use remove the clips holding the strip on each side using needle tool.

  11. lLqXpaPx2eD3Ybhl
    • With a pair of tweezers, carefully remove the ribbon strip connection.

  12. SrqvwvUUcDXGiCEK
    • Remove the screw driver holding the LED screen and Speaker in place.

  13. tOlKNt6j5xDEcy5B
    • Insert a small flat screw driver under the speaker in order to remove it.

  14. 4vXsDfnJjacKXbrB
    4vXsDfnJjacKXbrB
    bTCCtjuP6TYRDdlV
    • Using tweezers, remove the speaker and move off to the side.

  15. mSrTZUFLgLGHcKJG
    mSrTZUFLgLGHcKJG
    FwTpVylp3RtMabcB
    • Place a small flat head screwdriver under the LED screen, and carefully push it out of it's socket.

  16. jIBjlQVQCEbPTIHH
    • Remove final connection to accelerometer. The LED screen is now separated from the device.

  17. MvBF5vrYl3UyGjNT
    MvBF5vrYl3UyGjNT
    6mROs3aCQWEjLKFR
    • Grab the motherboard with tweezers and remove from watch cavity.

  18. PvuSQl2mIodEhhGj
    PvuSQl2mIodEhhGj
    vrVEEsQMKZUfQwfS
    • Stabilize watch with the metal prove. Place tweezers around crown and pull outward, so that the crown can be removed.

  19. wV5eaLTIWNrD5Soj
    • Insert the spudger under plastic panel cover in order to access watch face.

  20. hpOMv4XdhMmegcgM
    hpOMv4XdhMmegcgM
    cVypacwbkVCS4o5M
    bUxBIjgEW6ZqVuVe
    • Insert a spudger under the black watch face. Gently push up, so that it can be raised out of the watch.

    • Use tweezers or pin tool in order to remove from watch.

Conclusion

To reassemble your device, follow these instructions in reverse order.
Robert Sanchez

Member since: 01/11/16

201 Reputation

0 comments