Introduction

Rock out too hard? Use this guide to replace a blown-out rear speaker.

  1. RdKslWbbyVKNdorc
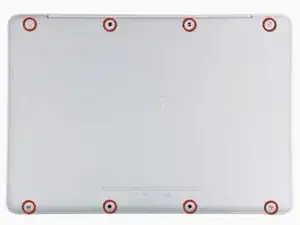
    • Remove the eight 4 mm Phillips screws securing the lower case to the MacBook.

    According to this page http://support.apple.com/kb/HT1651?viewl..., the 8 screws are not identical.

    Can anybody tell me where each kind of screw is supposed to go?

    Gregoire -

    They are all 100% Identical. You were probably looking at a different model, or Apple has entered the wrong information... Hey, It happens...

    Owen Davies -

    The screws on the Late 2009 are identical. The blue lock compound might make tightening some require a little more effort.

    svenaustx -

    Can I replace it with a SATA 3 cable?

    nm -

    A1342 macbook does not have the right controller to support sata III

    Owen Davies -

    hi, i just got back from the apple store and they are really keen for me to upgrade to a new laptop since my battery is old and the screen is cracked, so glad i found ifixit i would love to upgrade this puppy! gonna make it a real sleeper! styler hall wrote about sticking 16 gb of ram in his a 1342 ? is this a simply mather of ordering 3 4gb sticks ?aslo i currently have 4 gb and would like to upgrade to 8 ( or indeed 16) does that mean i need to buy all new sticks or can i continue to use the old one and stick a new one next to it ?

    thanks again mick van aar, perth western aus.

    michelvanaar -

    The A1342 will take up to 16 GB of RAM, however, there are only two RAM slots, so use two 8-GB RAM modules. Other World Computing (OWC) is a great reference source for info on exactly which RAM to use with which model; prices are usually much better on EBay though. Add an SSD from OWC and your machine will really scream!

    I hope that helps!

    gdesbrisay -

    Gregoire is right. The 8 screws are absolutely NOT identical, I’m looking at them right now, weeowey weeowey.

    John Guzman -

    I just wanted to say that, in 2020, i used these instructions to replace the magsafe socket on my A1286, mid-2012, pre-Retina MacBook Pro. The internal layout is not quite the same but close enough for me to do the job. I skipped the steps of fully disconnecting the fans and speakers because of what others had said about breaking the sockets. it just meant I had to be extremely careful when lifting up the main board so that I did not tear and break the connections. I was able to disconnect the old magsafe socket with the board flat and in situ, but there was no where near enough room to be able to aline and press home the new par home. Reluctantly i had to lever up the board. This was difficult as there is a tapped post that holds a screw in the way close to where the USB sockets are, that prevented the board lifting up and out. I had to be quite forceful to manouevre the sockets out from the edge of the case.

    Paul Burridge -

  2. 1hgTLEYwbMJScnWp
    1hgTLEYwbMJScnWp
    4FfgMS2wrQ1vpKT1
    GVdOUDCoEApQ1keZ
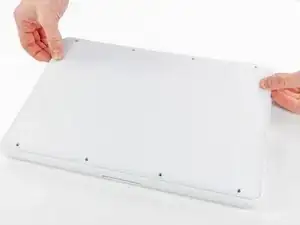
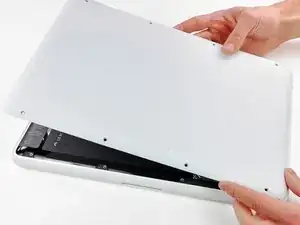
    • The lower case is constructed of rubber-coated aluminum. Do not excessively bend the aluminum during removal, as any permanent deformation will cause tolerance issues after reassembly.

    • Slightly lift the lower case near the vent opening.

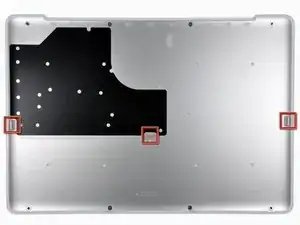
    • Continue running your fingers between the lower and upper cases until the upper case pops off its retaining clips.

    • The location of these three clips is shown in the third picture.

    Do the retaining clips have to be re-engaged when replacing the lower case?

    John Morley -

    Answering my own question, the clips re-engage when the lower case is correctly positioned. You can help them by gently pressing the lower case with your thumbs midway along the two short sides. When everything is correctly aligned the eight screw holes line up.

    John Morley -

    Rather than running your fingernail down the sides to free up the retaining clips, I found that using an old credit card, inserted about 1/4”, to run along the left and right side popped those end retaining clips right off with no problem. You may need to twist the card slightly when in the middle area to help pop those off.

    bdahl385 -

  3. uRyXhccipZHxG6cV
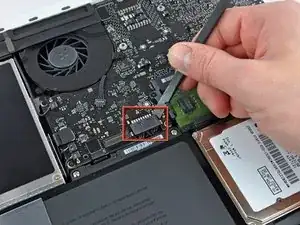
    • For precautionary purposes, we advise that you disconnect the battery connector from the logic board to avoid any electrical discharge. This step is optional and is not required.

    • Use the flat end of a spudger to lift the battery connector up out of its socket on the logic board.

    • It may be easier to use your fingernails to lift up on both sides of the connector.

    you do not need to remove the battery when replacing the hard drive or ram

    brilldoctor -

    beware not to lift the connector to close of the angle, as the picture suggest it. It might broke the angle. Attack by the middle.

    naamol -

    Not necessary?

    hikkymemo -

    Be careful of the corner of the battery cable connector when trying to pry it off with the spudge. I knocked the corner of mine. No operational impact but was not very pleasing!

    jljordanweb -

    Not necessary, but a good idea, so as to avoid any spurious charges going through the boards...

    svenaustx -

    @Svenaustx - What could happen if not removing this battery? Worst case? Not a geek on this but did change RAM on my Macbook Pro "15. Can't remember disconneting the battery back then. Shouldn't it be sufficient shutting the Mac off and ensure it has been used for an hour or so before replacing RAM?

    Allan Clarke -

    i used a metal pry and noticed some sparking when i disconnected the battery. replaced ram. now it wont turn on. did i fry it?

    Ian Lynch -

  4. QEq5LPE5LPF1bCb3
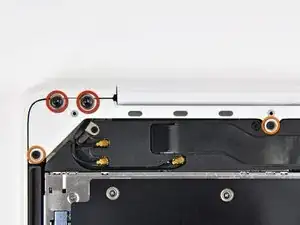
    • Remove the following screws from the optical drive side of the rear vent:

    • Two 10 mm T8 Torx

    • Two 5.2 mm Phillips

    Hi, i have an issue with the screw in the middle: it is blocked and the top is now damaged... Any suggestion?

    Corrado -

    I have a problem with the two middle screws

    Harlan Shannon -

    same here...

    rekidjinwoo -

  5. BfDr4UQCZRL3EXi5
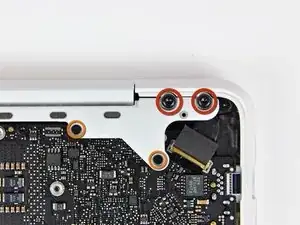
    • Remove the following screws from the port side of rear vent:

    • Two 10 mm T8 Torx

    • Two 5.2 mm Phillips

    The left-most philips screw in this picture does not seem to go in properly. The best I could do was use the screw with least of the blue screwlock on it and then err on the side of leaving the white plastic a bit Ioose in that location.

    QuincyMB -

    Be very careful when putting the Torx screws back as they are very easy to leverage and seems to bend the white piece at some point, making me nervous they could crack it. Don't overdo these.

    QuincyMB -

  6. WQrdxcAe2NRocHZa
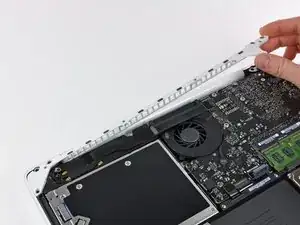
    • Carefully lift the rear vent out of the upper case.

    you can actually stop disassembling now and try to replace it now. after removing two t6 screws it came off pretty easily

    grze -

    Good tip, thanks! I skipped ahead to step 17 and had no problem getting the magsafe board out from under the logic board and the new one installed. Saves a lot of work disconnecting connectors indicated as Fragile!

    matt15 -

    Thank You! Saved me an hour or so of work and a lot of stress!

    15sweyandt -

    I also did Step 6, then skipped to Step 17 & 18. Once I had the display data cable off, I could remove the 2 T6 Torx screws holding the MagSafe board on and remove it. You can reach under the logic board with the point of the spudger to work the cable out of the socket. Note how you maneuver the board out of the tight space so you can maneuver it back in. When you put the new MagSafe board in, plug in the cable first. If you bend the wires so the plug approaches the socket at the appropriate angle, you can nudge it in with the pointed end of the spudger.

    hpendleton -

    Thanks a lot for this hint! You saved my macbook, when I failed to unscrew the fan because of one completely destroyed screw. Thanks to your comment I skipped steps 7-16 and went straight to replacing the magsafe board without problems. The spudger and some 3D imagination and done,

    Sebastian M -

  7. Y1mxNLVgI4LNsGLe
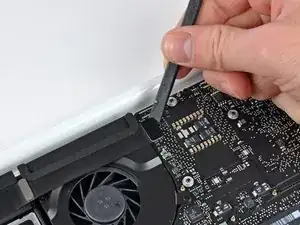
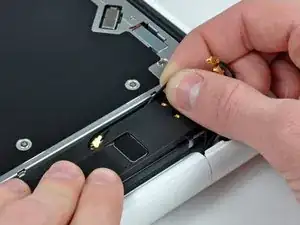
    • Use the flat end of a spudger to pry the AirPort/Bluetooth cable connector up off the logic board.

  8. DPsvoLhYGb3w5ITl
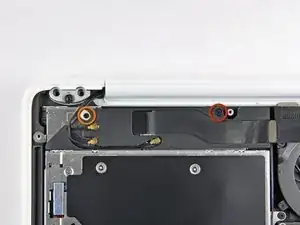
    • Remove the following screws securing the right speaker assembly to the upper case:

    • One 12 mm Phillips screw.

    • One 3 mm Phillips screw.

  9. AZmxqeUFYDppEpVt
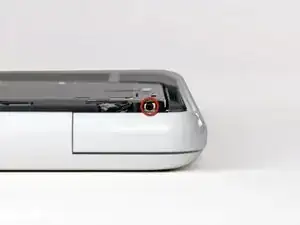
    • Remove the single 2.2 mm Phillips screw inserted horizontally into the side of the optical drive.

  10. lXbB61d2DYL4efRQ
    lXbB61d2DYL4efRQ
    1hHj2NnvTfCAuApX
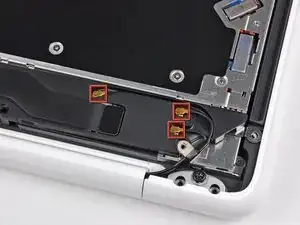
    • Pry the AirPort and Bluetooth antenna connectors (3 total) up off the AirPort/Bluetooth card.

    • De-route the long antenna from its channel in the rear speaker housing.

  11. WK63ijerZhK3ABvk
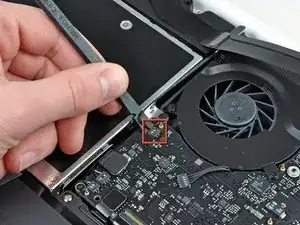
    • Use the flat end of a spudger to pry the rear speaker cable connector up off the logic board.

    This step is NOT necessary!!!

    ulrichkrenmayr -

    Agreed- this step is not needed. If you do detach it, you will have to reattach it. I used my mom's nail glue. I applied a 1mm dot of it on the logic board using a paperclip. I also applied a small amount to the back of the connector. I let it air dry til it was tacky, then carefully placed it on, and got the contacts aligned. Took me two tries, but after the second, I rebooted and had sound!

    Shelly Murney -

    I wasn't able to reconnect this cable and feel like I broke it. There's 2 other cables near that too and part of one seems broken as well. Honestly, why did I even have to remove that cable? Now I'm stuck without good sounds for a while.. :(

    Austin Vareith -

    Broken it also.. better is to remove this step in the instruction

    rikkok -

    +1 for REMOVING this step. The tutorial states to PRY the speaker cable from the logic board which results in BROKEN solders!

    Chris B -

    And now that I have disconnected the connector how to put it back?

    Giovanni Calandro -

    How can I f*****g fix it? You guys can’t be serious…..

    Jack son -

    how the &&^& can i fix this??!!!!!

    Jack son -

    Hilfe. Wie befestige ich dieses Kabel vom neuen Lautsprecher? er hält nicht, sowie auch der alte Stecker. Warum?

    bruno.graziano -

    Hi - how is this step not necessary when you have to remove the old speaker assembly? Does it detach at the other end? I’m about to get my speaker replacement in the mail and I will go through this tutorial.

    David Myer -

    If you're replacing the rear speaker then, of course this is not optional. If you're following these instructions in order to replace some other component (the MagSafe connector seems to be one example), then it probably is optional. FWIW I repaired a damaged speaker by applying some flexible rubbery glue with a toothpick to the cone surround to seal the hole. It doesn't look pretty but it sounds fine.

    John Morley -

  12. BlmaNLt2G4b5TRZZ
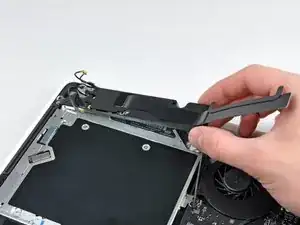
    • Remove the rear speaker assembly from the upper case.

  13. D3UYFSr2v3jvpOCK
    D3UYFSr2v3jvpOCK
    bdRAfrZCenVSstfK
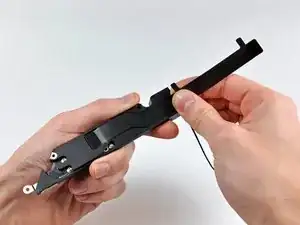
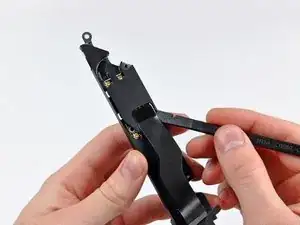
    • Carefully peel the AirPort/Bluetooth cable from its channel within the rear speaker assembly.

    • Use the flat end of a spudger to pry the AirPort/Bluetooth cable up off the rear speaker.

  14. DbYvIIKXe3Yaytr1
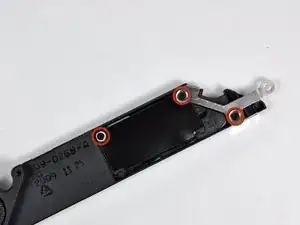
    • Remove three 3 mm Phillips screws securing the AirPort/Bluetooth board to the rear speaker assembly.

  15. wXgF6lOUOnnANWHH
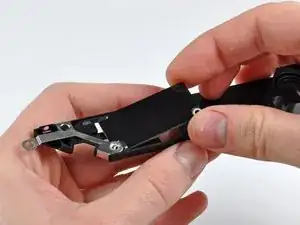
    • Lift the AirPort/Bluetooth board up off the rear speaker assembly.

  16. rLtsbKwpLQXf6FaV
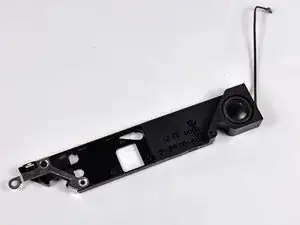
    • Rear speaker remains.

Conclusion

To reassemble your device, follow these instructions in reverse order.

Walter Galan

694047 Reputation

4 comments

Nice tuto ! Helped me so fine.

Rudy Pierrat -

Perfect! That helps to keep older gear alive!

W. Scholz -

How did you guys place the rear speaker wire back in place?
Kim Sluyk -

hi everyone! iʻm about to replace the rear speaker on my late 2009 A1342, but i also need to replace both the left and right speakers as well. would someone please help me out? i hope i donʻt have to pull the logic board (i already did that on my mid 2012 A1284, and it was, ok, but i have more gray hairs now . . .).

Kahana -