Introduction
Accessing the RAM in this computer is straightforward and requires minimal disassembly.
-
-
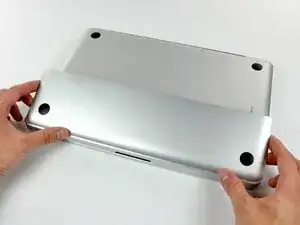
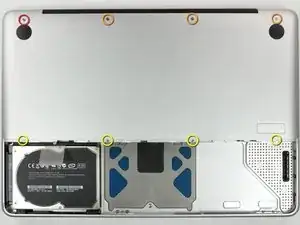
With the case closed, place the Unibody top-side down on a flat surface.
-
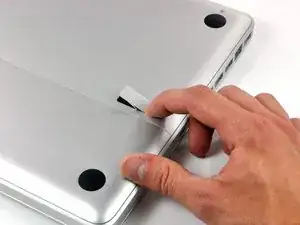
Depress the grooved side of the access door release latch enough to grab the free end. Lift the release latch until it is vertical.
-
-
-
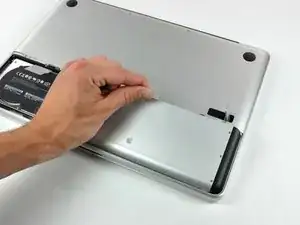
Remove the following eight screws securing the lower case to the chassis:
-
One 3 mm Phillips screw.
-
Three 13.5 mm Phillips screws.
-
Four 3.5 mm Phillips screws.
-
-
-
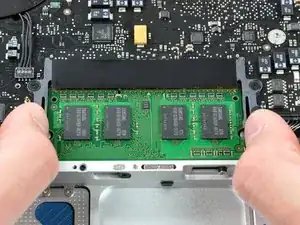
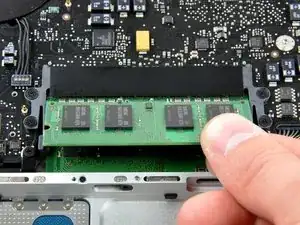
Release the tabs on each side of the chip by simultaneously pushing each tab away from the RAM.
-
To reassemble your device, follow these instructions in reverse order.

21 comments
Open back of unit, press two grey sides surrounding the chip, pull out the top (leave the bottom 2gb in) put in the new (4gb) chip; now there are 6gb of ram.
I just upgraded to 2 4GB chips. Works fine sofar!
That's awesome! I thought that I could only upgrade the RAM to 4GB (which is what I have now). Can you give me the type of RAM that you installed? I have this exact model MacBook.
Jonathan -
Uh oh. I replaced my 2 1GB ram with 2 2GB. I turned it on and it beeps at me about every second, the front status light blinks in time, but nothing else....what next?
Sounds like bad RAM. I would contact who you purchased it from. If it was us, email support [at] ifixit [dot] com
This is not a a1278 unibody MacBook Pro. A1278 MacBooks backs are one solid metal piece not two separate pieces. This guide is for a different MacBook Pro.
Brad Burgeson -
This guide isn’t for a pro; it’s a MacBook unibody.
Nicholas -
So, it turns out that Apple used the model code A1278 for quite a few different Mac models, including both Pro and non-Pro versions! This guide is for the non-Pro Macbooks. There’s also one for the Pro models with the same A1278 identifier.
tempelmann -