Introduction

Spruce up a worn down MacBook with a new set of feet.

  1. qPsGdXwUZZBT6RJa
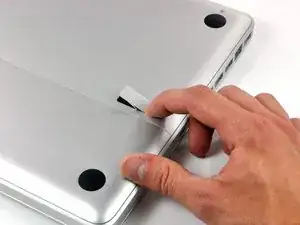
    • With the case closed, place the Unibody top-side down on a flat surface.

    • Depress the grooved side of the access door release latch enough to grab the free end. Lift the release latch until it is vertical.

    This is not a a1278 unibody MacBook Pro. A1278 MacBooks backs are one solid metal piece not two separate pieces. This guide is for a different MacBook Pro.

    Brad Burgeson -

    This guide isn’t for a pro; it’s a MacBook unibody.

    Nicholas -

    So, it turns out that Apple used the model code A1278 for quite a few different Mac models, including both Pro and non-Pro versions! This guide is for the non-Pro Macbooks. There’s also one for the Pro models with the same A1278 identifier.

    tempelmann -

  2. Pf4wGUpXWyJ3tAfH
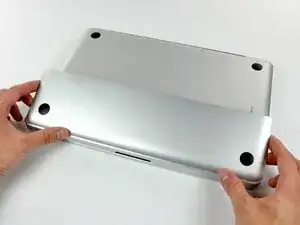
    • The access door should now be raised enough to lift it up and out of the Unibody.

  3. WkwQip2DfR1iJLMX
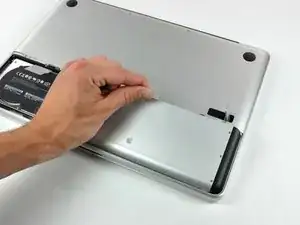
    • Be sure the access door release latch is vertical before proceeding.

    • Grab the white plastic tab and pull the battery up and out of the Unibody.

    Great tutorial ! great step !

    Leo Etcheverry -

    Even though it’s specifically stated, you have to make sure the access door latch is vertical or the battery won’t be removable.

    Henry Kim -

  4. mgYUuNTR1BjI1A6i
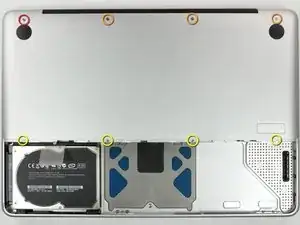
    • Remove the following eight screws securing the lower case to the chassis:

    • One 3 mm Phillips screw.

    • Three 13.5 mm Phillips screws.

    • Four 3.5 mm Phillips screws.

    On my model, it seemed the top-left was 3.5mm and the bottom 4 were 3 mm.

    Jim -

    Make sure you have a good quality Phillips screwdriver. Mine had removable tips and had a small play at the connection. As a result I didn't have a good feel and damaged my screws (those securing the fan and the top left in step 23). Game over for me installing new thermal paste...

    Be very carefull with your screws! Especially those on the inside.

    Nickolas Michelinakis -

    You can get away with a Phillips #00 for many of the screws involved but the 4 at the bottom case split are likely to strip if you don’t use a JIS #00 or, in a pinch, a Phillips #000.

    Bill Cole -

    I used the Phillips #00 tip from my Pro Tech Toolkit, and it worked well enough. But yes, maybe #000 might have been better on the lower row of screws. Note to myself: Always read the comments first.

    Les Kitchen -

    When replacing these screws, the order to replace them in is as follows:

    1, Top left

    2. Top right

    3. Top center-left

    4. Top center-right

    5. Bottom center-right

    6. Bottom center-left

    7. Bottom right

    8. Bottom left

    I hope this information is helpful.

    facebook -

    I followed my usual process of putting in all the screws loosely, then tightening them gradually in distributed pattern, to help ensure that the panel settles in place evenly. But maybe some orders are better.

    Les Kitchen -

  5. EZrPgfOVIaaIsXLR
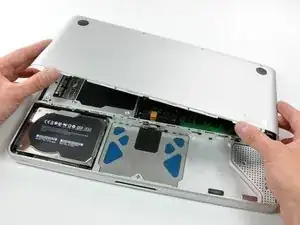
    • Using both hands, lift and remove the lower case off the upper case.

    Thanks for the guide!

    It's implicit in the two photos, but worth mentioning because it blocked my progress in this step for a bit: You have to put the release latch back into its horizontal, closed position before you can lift off the lower-case panel.

    Les Kitchen -

  6. LMJvTZiOXSGn3tTS
    LMJvTZiOXSGn3tTS
    63PwLrffwQT3m2ac
    JMX2fPIoAsf4EmfF
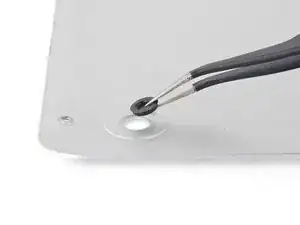
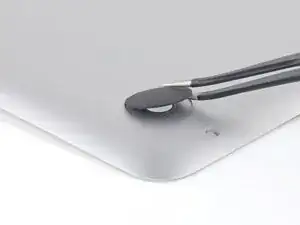
    • Remove any broken or damaged feet.

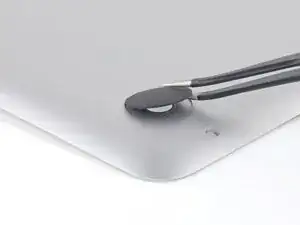
    • Remove any pieces from the old foot that may have broken off in the foot hole.

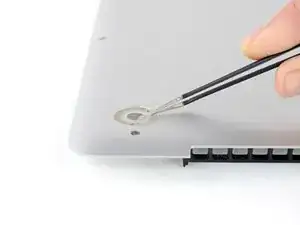
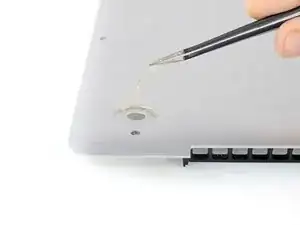
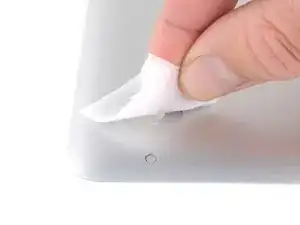
    • Use tweezers to peel up and remove the old adhesive tape from the foot pad.

  7. GuuAtNdCMeSnGFs2
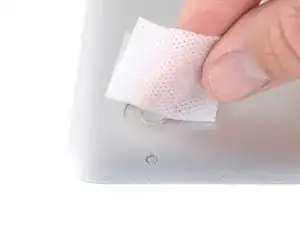
    • Scrub the foot pad with adhesive remover to remove any remaining adhesive.

    On my mid-2009 unibody MacBook Pro, there were thin, circular, black cloth pieces inside the case, covering the holes where the feet came through. I had to remove this tape, in order to push the feet through.

    Edward Horner -

  8. kC6ytQkgxiWO4UqO
    • Wipe the foot pad with an alcohol prep pad to remove any residue left by the cleaner.

  9. VlE16CROH5hnGjAQ
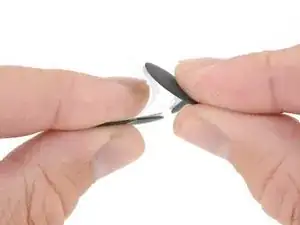
    • Peel a replacement foot from the plastic backing.

  10. 61BiwhBquQl2APmp
    61BiwhBquQl2APmp
    vnEQrCWXPjGNAVjE
    wnYnBavhXLSYvKc5
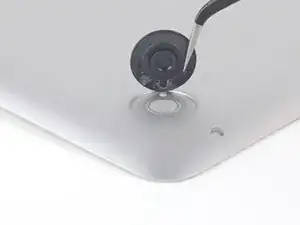
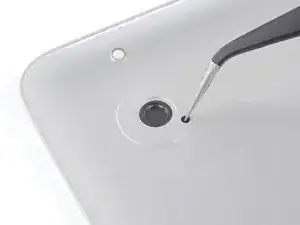
    • Align the new foot inside the foot pad.

    • Make sure the alignment nub on the foot is lined up with the small hole near the perimeter of the pad.

    • Lay the foot down while keeping it properly aligned.

    • Check for proper alignment from the inside of the lower case. Use tweezers to slide the alignment nub so it lines up with the hole.

  11. jxRDQPwxYdagNPHo
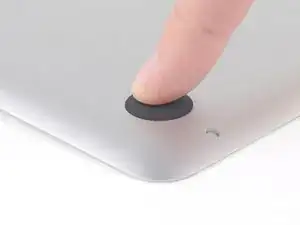
    • Press the new foot down firmly with your finger and maintain pressure for 30 seconds to set the pressure sensitive adhesive. Support the other side of the cover while you press the foot down.

    • Repeat the last six steps for any broken or damaged feet.

    Support the rear feet from inside with your other hand before pressing down on new foot. Failure to do so may damage the plastic air grille inside the rear of the lower case. See the photos in step 3 above.

    hterlecki -

    My A1278 hasn't got holes in the backplate?

    The feet just seem to be stuck on with adhesive.

    Do I still have to unscrew the back?

    Regards,

    Rob.

    Rob Haygarth -

    Hi Rob,

    If the backplate doesn’t have the holes, you can still use the feet by just glueing them on. You would not have to open the backplate.

    Arthur Shi -

    I have been told that if you are using adhesive, you should follow these steps and remove the bottom.

    This way, adhesive doesn’t get inside the machine.

    Larry D Turner -

    Hi Larry,

    That is definitely true, if you are adding liquid adhesives. The feet we sell come with adhesive pre-installed on the feet. All you have to do is peel and stick!

    Arthur Shi -

Conclusion

To reassemble your device, follow these instructions in reverse order.
Adam O'Camb

Member since: 11/04/15

195421 Reputation

0 comments