
Introduction
Use this guide to replace your MacBook Pro's optical drive. The Bluetooth board and optical drive cable are not included with a new optical drive.
-
-
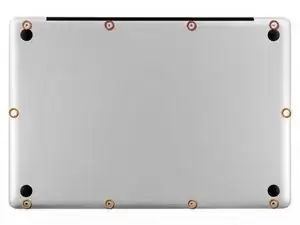
Remove the following ten screws securing the lower case to the upper case:
-
Three 13.5 mm Phillips screws.
-
Seven 3 mm Phillips screws.
-
-
-
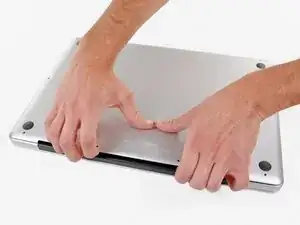
Wedge your fingers between the lower case and the vent, and lift upward to release the two clips holding the lower case to the upper case.
-
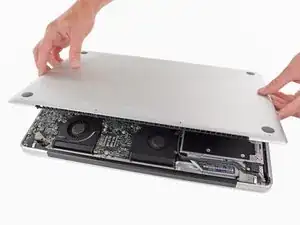
Remove the lower case.
-
-
-
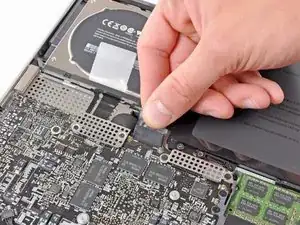
If present, grab the plastic tab attached to the battery connector and pull it toward the front edge of the device. For Late-2011 models the battery connector will not have a tab and is simply a plug that inserts straight down into the motherboard--to remove pry the plug straight up.
-
-
-
Use the tip of a spudger to push the small plastic cable retainer away from the camera cable socket for enough clearance to remove the camera cable.
-
-
-
Pull the camera cable toward the optical drive opening to disconnect it from the logic board.
-
-
-
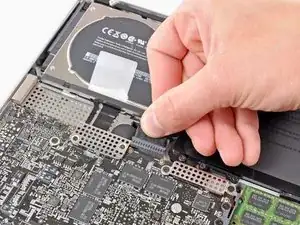
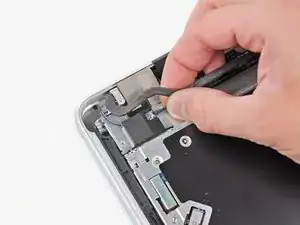
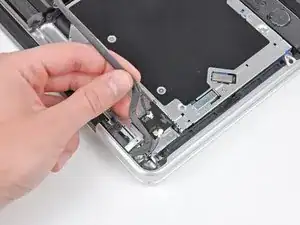
Carefully pull the Bluetooth cable toward the fans to disconnect it from the Bluetooth board.
-
-
-
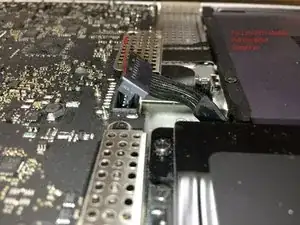
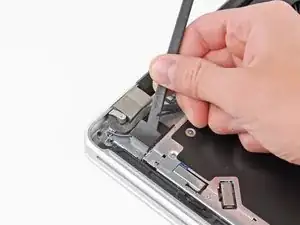
Use the flat end of a spudger to peel the thin plastic cover off the top and sides of the Bluetooth board housing.
-
-
-
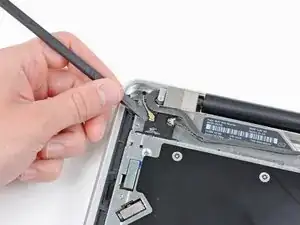
Use the flat end of a spudger to pry the Bluetooth antenna connector up and off its socket on the Bluetooth board.
-
-
-
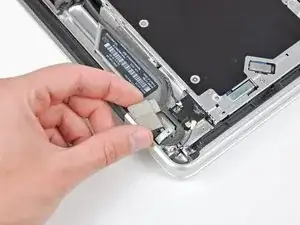
If present, remove the small piece of EMI foam near the Bluetooth board.
-
De-route the camera cable from the slot molded into the Bluetooth board housing.
-
-
-
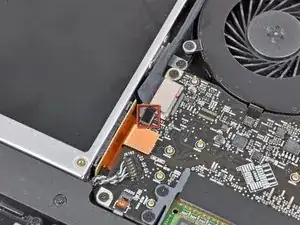
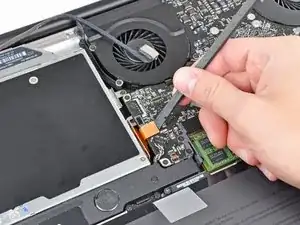
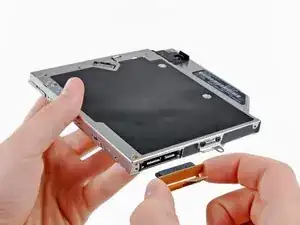
Use the flat end of a spudger to pry the optical drive connector up and out of its socket on the logic board.
-
-
-
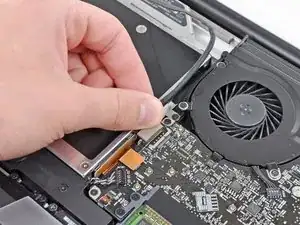
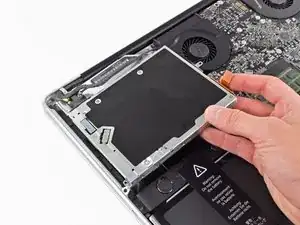
Grab the optical drive cable by its connector and pull it away from the body of the hard drive.
-
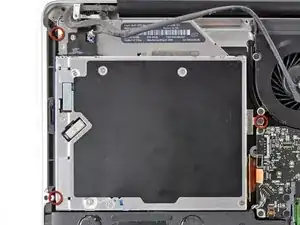
Remove the two black Phillips #0 screws securing the small metal mounting bracket. Transfer this bracket to your new optical drive or hard drive enclosure.
-
-
-
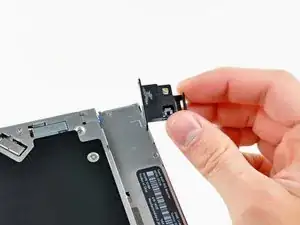
Remove the two 2.2 mm Phillips screws securing the Bluetooth board to the side of the optical drive.
-


To reassemble your device, follow these instructions in reverse order.

7 comments
Not sure which Unibody model is pictured, but my Late 2011 17” looks entirely different from this one.
I’m attempting to replace the internal optical drive with optical bay hard drive enclosure on a Model A1297 MacBook Pro 17" Unibody, but the interior looks a lot different from this guide. Have you had any luck getting a correct guide for your model?
Great guide. Helped me to do it the first time without screwing anything else up in my Macbook Pro. Appreciate the hard work put into creating this site and hope it sticks around for a long time.
sardoggy -
Andrew/iFixit Team,
Do you know of any third-party blu-ray player/burner that can be used to replace the standard DVD Burner/Player? Thanks so much for any advise? All the best. - emil
I have installed a Matshita UJ167AM DVDRW/BDROM which is a direct replacement.
Working fine with MacGo Bluray player.
Haven’t got around to a Bluray burner yet, I just wanted to play bluray.
important to reassemble the "lower case" successfully: the threads of the seven 3mm phillips screws are drilled at an angle :-/
mysterioes -
Same issue with me. After reassembling my 13-inch and my 17-inch, one of the screws are sticking out ever so slightly. Very annoying, especially since I scratch whatever surface I'm on now.
Kyle Spadaro -