Introduction

This guide is an internal private guide used as a prereq.

  1. Zh2pOnMrAV5iCHcJ
    • Apple sticks a small strip of clear plastic with adhesive applied to one side to the logic board behind the camera cable connector to keep it in its socket. When moving it out of the way, be sure not to break any surface-mount components off the logic board.

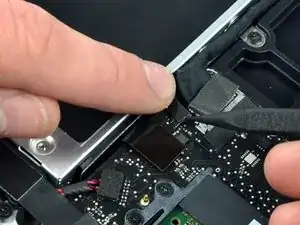
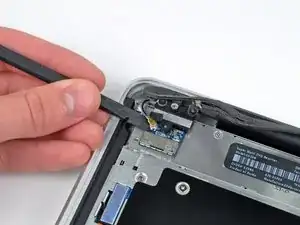
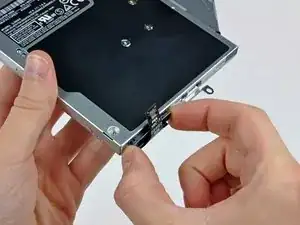
    • Hold the end of the cable retainer down with one finger while you use the tip of a spudger to slightly lift the other end and rotate it away from the camera cable connector.

    I tried to move the plastic piece, but it seemed risky for someone with no experience like me. It was not hard at all to just peel off the camera cable without messing with the connector, and then, carefully take the optical drive out.

    joaquingoyret -

    Totally agree. Optical drive is easily removed by peeling off camera cable

    John Doyle -

  2. TVvjKBOcMbINxlyB
    • Disconnect the camera cable by pulling the male end straight away from its socket.

    • Pull the connector parallel to the face of the logic board, not straight up.

  3. Kqd3ZeFOJnDD6Crc
    • Peel the camera cable off the adhesive securing it to the optical drive.

  4. IjPEwiE5RtYYvu6j
    IjPEwiE5RtYYvu6j
    viDidjS6wPXYvPkm
    • This step is only required if you have an anti-glare display. If you have a glossy display, skip this step.

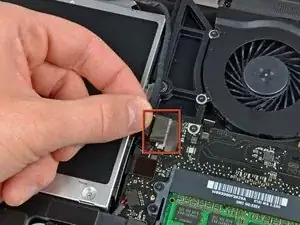
    • Disconnect the Bluetooth cable by pulling the male end straight away from its socket.

    • Pull the connector parallel to the face of the logic board, not straight up.

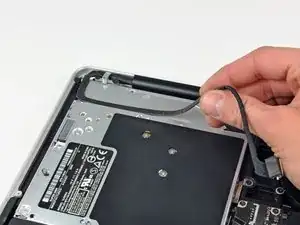
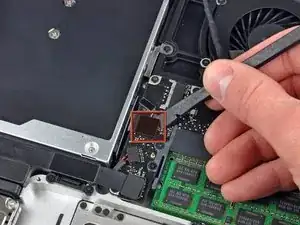
    • Use the flat end of a spudger to pry the Bluetooth antenna cable from its socket on the board.

  5. YMdXj5NiEBXYWBub
    YMdXj5NiEBXYWBub
    ZOP3GRxTDkMLKIPW
    • This step is only required if you have an anti-glare display.

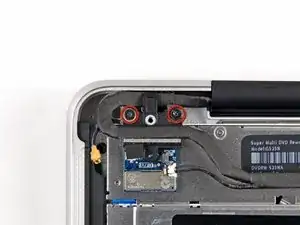
    • Remove the two 8 mm Phillips screws securing the Bluetooth/camera cable retainer to the upper case.

    • One of the screws may remain captive in the Bluetooth/camera cable ground loop. If replacing the display, be sure to transfer this screw to the new unit.

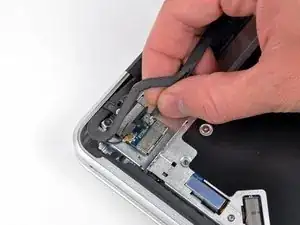
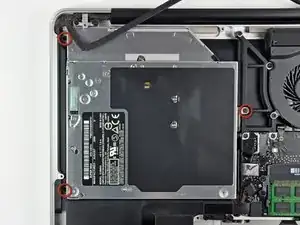
    • Lift the Bluetooth board/cable retainer assembly out of the upper case.

  6. U21dsKeHTKvIqVlp
    • Use a spudger to pry the optical drive connector straight up off the logic board.

  7. SJJW4cbZDsljflPq
    • Remove three 3.5 mm Phillips screws securing the optical drive to the upper case.

  8. 6hu2sKTENrPKhgqq
    6hu2sKTENrPKhgqq
    eIstg4xvNpaSxdWx
    • Lift the optical drive from its left edge and pull it out of the computer.

    • When reassembling, be careful that the SATA cable doesn't get stuck underneath the logic board.

  9. KVTEiPkQZkOWbCZP
    • Débranchez le connecteur du câble du lecteur optique de celui-ci.

Conclusion

To reassemble your device, follow these instructions in reverse order.
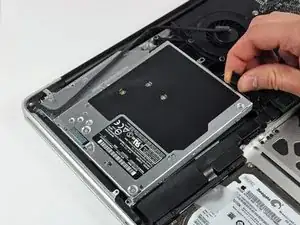
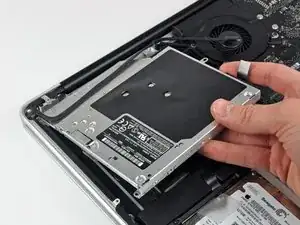
Walter Galan

694047 Reputation

0 comments