Introduction

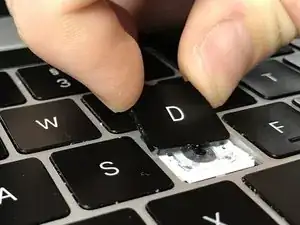
The keys of this MacBook Pro model tends to get stuck when dirt manages to slide under the key, not responding properly anymore when pressed. This guide shows you how to lift off the key caps with a thin credit card to blow off dust or replace a broken key cap.

  1. GraD1p5ZQftBHcUW
    • For blowing out the dirt you will need a bellow as they are used for camera cleaning.

    • Do not use compressed air or too much force when blowing. Underneath the key is a fragile black piece of plastic that blocks off some of the key backlight. Too much air pressure can break this plastic making that key permanently lighter than the others.

  2. 1pYQ3ujRUxYxslyB
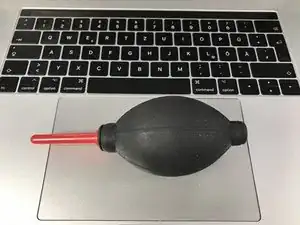
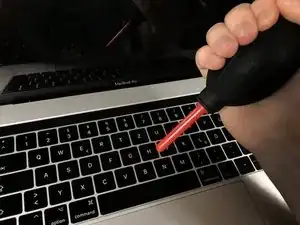
    • Use the bellow to clean your keyboard. Otherwise you might end up getting even more dirt into the key after removing the cap.

  3. jBRMKAN263ibvLlK
    • You need a thin credit card or laminated piece of thin cardboard. It needs to be thin enough to fit into the gap between key cap and casing, but sturdy enough to lift the cap up.

    • Most credit cards might be too thick for the job. I found one in my wallet that was thinner and more flexible than the others and it worked just fine.

  4. IVQJ5IGCnUOreh25
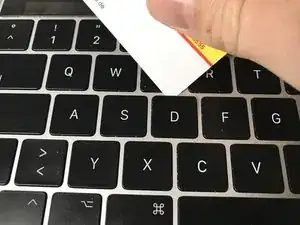
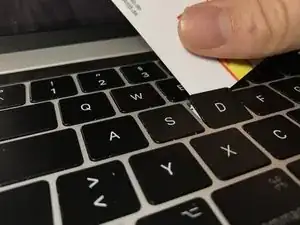
    • Slide the card into the gap between upper edge of the key cap and casing. (For the small "arrow up" key it's on the right side, for the "arrow down" key it's on the left side, for the "return" key it's on the left side.)

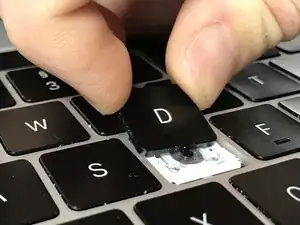
    • Gently lever up until you hear two clicks (or up to four for longer keys like shift or space bar). They indicate that the cap is released on both notches.

    • Be careful not to use too much force. All parts of the MacBook keys are quite fragile with tiny plastic notches that can easliy be broken.

  5. yYLIVv5pKu3KHuk3
    yYLIVv5pKu3KHuk3
    jGJK1CaetPlEAlXn
    KMTOCfA6YkrHfsh5
    • While lifted up, take the key cap with your fingers and gently pull it towards the display.

    • Again, don't use much force. The cap can easily be pulled when dragged towards the display being fully released afterwards.

    • When examining the back of the cap (second picture) you'll see that the notches on the upper edge of the key cap are designed to be pulled up (left circle) while the lower edge notches need to be slid (right circle).

  6. wmXYTWhlFsqsXl43
    • Using the bellow, blow out dust and dirt.

    • Remember not to use to much air pressure as the vulnerable black backlight cover is now directly exposed. Normal airflow is sufficient to get most of the dust out.

Conclusion

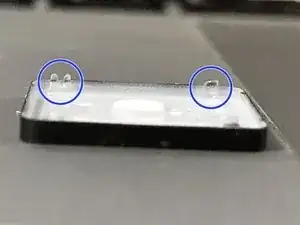
To put the key cap back on, follow the steps in reverse order: First you need to slide in the key cap on the lower edge and then gently press it into the two notches on the upper edge.

marmuc100

Member since: 01/12/20

931 Reputation

8 comments

Does the replacement key come with the transparent plastic cover that goes over white butterfly mechanism? When this is damaged, is it possible to replace the key so it functions as new? Thanks for info.

Marceli Cieplik -

I haven’t bought a replacement key yet so I can’t guarantee this 100%, but I think, that these transparent “sockets” for the white butterfly mechanism are part of the key cap. So I’d guess: Yes, the transparent part is integrated in the replacement key.

If you buy one, I’d be happy if you’d let me know whether this is true! :)

When this is damaged, is it possible to replace the key so it functions as new?

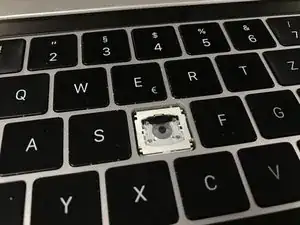
It depends on what’s damaged. Most likely it’s not the key cap but the white butterfly mechanism itself. If you replace that it should work as new. But I recommend to try cleaning as in the instructions above first – for me and my friends keyboard issues with these models always came down to dirt in the mechanism.

In theory, the transparent clips shouldn’t really affect the function of the key. It rather holds the key cap in place, so if these are broken, it is more likely that your key caps don’t stay in place (e. g. are lifted up or slightly turned when typing).

marmuc100 -

I picked up one of these kits from www.laptop-keys.com and they were able to provide the key cap, plastic scissor mechanism and that plastic part the sits underneath. Along with this guide, I was able to restore my MacBook keyboard back to new. Thanks for the great write-up!

Jeff Horton -

Thanks for sharing this! They even seem to ship internationally for about $3, that is really useful!

marmuc100 -

I've just broken two of my MacBook Pro's keycaps while trying to get them out.

Miguel F. -

My Device is

Apple MacBook-Pro 6.2 A1286 15Zoll mid-2010

I'm searching for certain keycaps mostly the small halfones like cursor control, so looked to cdx but photos are overtuned. You see almost only white. Need some grey background?

Is there an alternative to determine exactly the make of mechanic?

Difference in mechanics is the scissors on mine are turned 90 degree to those displayed here -axis of scissors from horizontal to vertical? And when I fixed them again, I first got the nozzles on the right side slipped in with the cap stand upright to look at it. Then layed it down over the scissor and a slight push to let nozzles slip over and fixed it finally.

oldmacbook -

Where do the replacement keys ship from? Do the key caps for the macbook pro 15 fit for the macbook pro 13."?

Kelly

Kelly EM -

Can keyboard (Key Cap) from 2017 be used on 2018 (A1990) EMC 3215, 15" with touchbar.

(Yes I know 2018 has plastic underneath..https://www.macrumors.com/2018/07/19/app... )

with;

MacBook Pro 15" Touch Bar 2017 Keyboard Key Cap Replacement. ??

And is it possible that after changing the keyboard and changing the battery, (at APPLE REPAIRER!), THE BATTERY CURRENT CYCLE DROPPED FROM 100% TO 87% AFTER CHARGE STATUS OF 114.

Full charge capacity (mAh): 6338

Charging status (%): 87% (from 100% approx. 1 year ago)

Information about condition:

Number of cycles: 114

Condition: Normal

jarleiceman4 -