Introduction
The ins and outs of replacing your upper case.
-
-
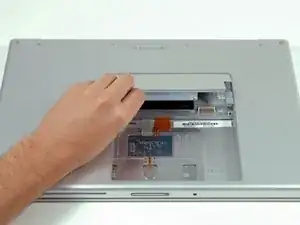
Use your fingers to push both battery release tabs away from the battery, and lift the battery out of the computer.
-
-
-
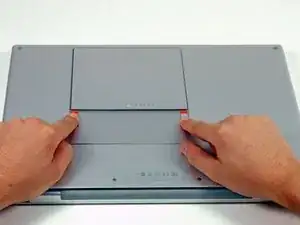
Lift the memory door up enough to get a grip on it, and slide it toward you, pulling it away from the casing.
-
-
-
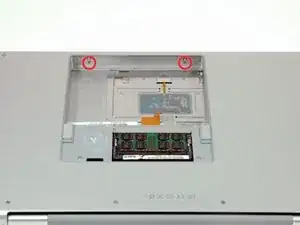
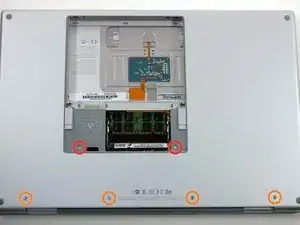
Remove the following 6 screws:
-
Two 10 mm T6 Torx screws on either side of the RAM slot.
-
Four 14.5 mm Phillips screws along the hinge.
-
-
-
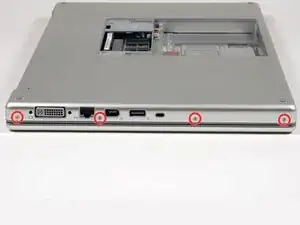
Rotate the computer 90 degrees and remove the two Phillips screws from the rear of the computer.
-
-
-
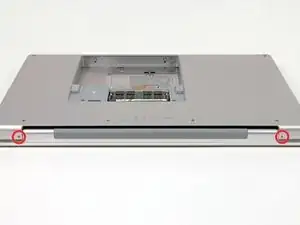
Rotate the computer 90 degrees again and remove the four Phillips screws from the side of the computer.
-
-
-
Lift up at the rear of the case and work your fingers along the sides, freeing the case as you go. Once you have freed the sides, you may need to rock the case up and down to free the front of the upper case. This stage can be quite tricky. Over the DVD reader are 4 tabs set back which pull out vertically.
-
Note that the two small tongues on the left hand front of the upper case may bend while you remove the upper case. When re-installing, you may need to bend them back to fit in the grooves in the lower case.
-
-
-
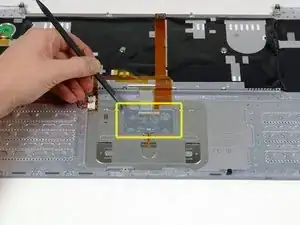
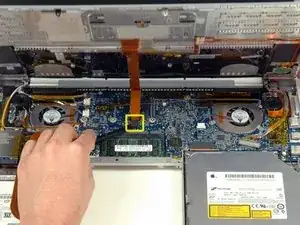
Disconnect the trackpad and keyboard ribbon cable from the logic board, removing tape as necessary.
-
Remove the upper case.
-
-
-
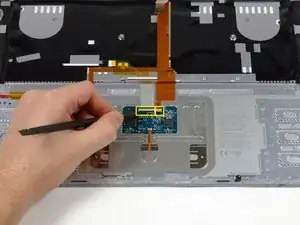
Use the tip of a spudger to flip up the black plastic flaps locking down the keyboard and keyboard backlight ribbon cables.
-
-
-
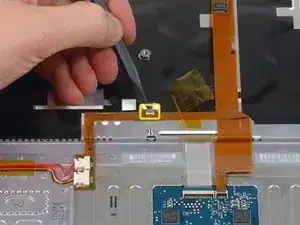
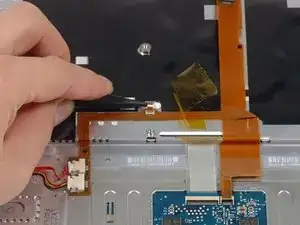
Peel up the orange tape covering the keyboard backlight connector.
-
Use the tip of a spudger to flip up the brown plastic flap locking down the keyboard backlight ribbon cable.
-
-
-
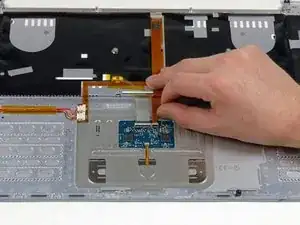
Carefully peel up the orange ribbon cable which carries the power and sleep signals, removing tape as necessary.
-
-
-
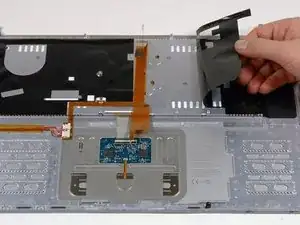
Peel back the black protective sheath on the right side of the upper case. It is not necessary to fully remove this shield. Simply peel it back enough to access the screws beneath.
-
-
-
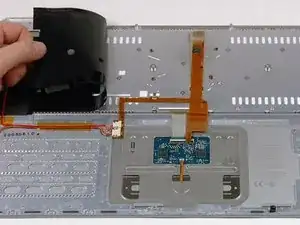
Peel back the black protective sheath on the left side of the upper case. It is not necessary to fully remove this shield. Simply peel it back enough to access the screws beneath.
-
-
-
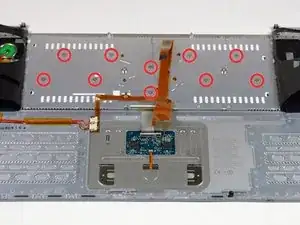
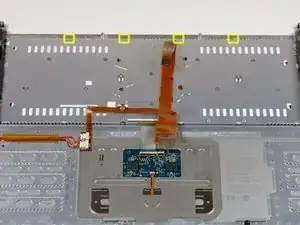
There are four locking tabs along the back edge of the keyboard holding it in place. These tabs must be straightened before you can remove the keyboard.
-
-
-
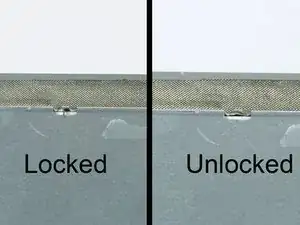
The first frame shows a tab in the "locked" position and the second frame shows the same tab in the "unlocked" position.
-
Use needlenose pliers or a spudger to bend each of the four tabs so that they are all in the "unlocked" position.
-
-
-
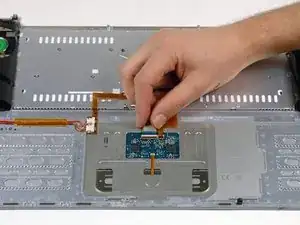
Place the upper casing on its edge and use a spudger to push the keyboard away from the casing, poking the spudger through the central keyboard screw hole. Grasp the keyboard as it separates from the casing.
-
-
-
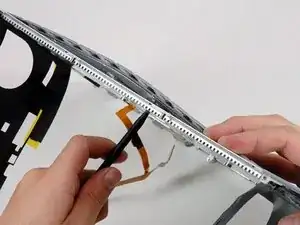
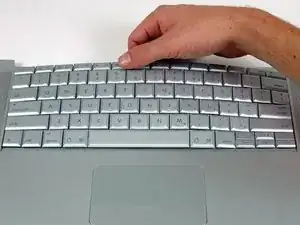
Maintaining your hold on the keyboard, lay the casing flat and gently bow the keyboard until the two tabs on either side of the keyboard come free.
-
Slide the keyboard away from the trackpad and out of the upper case.
-


To reassemble your device, follow these instructions in reverse order.

Before beginning, I found some small plastic bags and labeled each of the with the location the screws would come from once removed and the appropriate step number. Once the screws were removed I placed them in the labeled bags and did not have to worry about mixing screws up. Also, provided a good way to insure that no steps were skipped in the reverse process
rpbetancourt -