
Introduction
Removing a few screws will remove this part and allow access to your RAM.
Tools
Parts
-
-
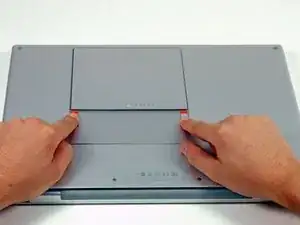
Use your fingers to push both battery release tabs away from the battery, and lift the battery out of the computer.
-
-
-
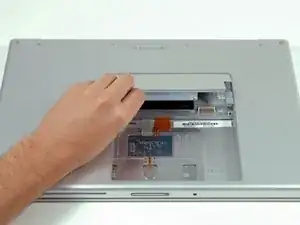
Lift the memory door up enough to get a grip on it, and slide it toward you, pulling it away from the casing.
-
Conclusion
To reassemble your device, follow these instructions in reverse order.

Before beginning, I found some small plastic bags and labeled each of the with the location the screws would come from once removed and the appropriate step number. Once the screws were removed I placed them in the labeled bags and did not have to worry about mixing screws up. Also, provided a good way to insure that no steps were skipped in the reverse process
rpbetancourt -
If you don't have any plastic bags, you can always print out the photos in black and white as you go, and then tape the screws on to the print outs over the circles that denote the screw positions in the photos. This method helps get every single screw back in it's exact location, even months after a tear down. ;o)
Adam -
Thank you very much!
Evgeniy -
When I did this, I used a empty egg carton to store my screws. I wrote the steps where I removed screens in Sharpie on the bottom of the "egg cup" and then dropped the screws in as I went. Then I just worked backwards to put it all back together.
mark93 -
I Generally just use a piece of paper with a rough sketch of the system and locations of the screws with prestik.
Tarn Alcock -