Introduction
This guide will show you how to remove the hard drive cable from your MacBook.
-
-
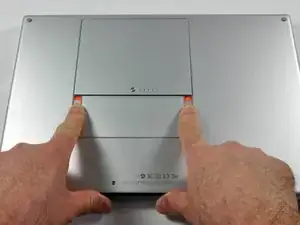
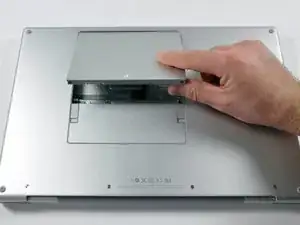
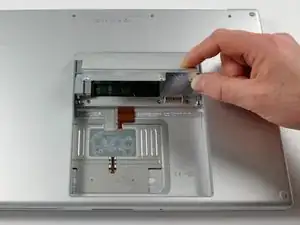
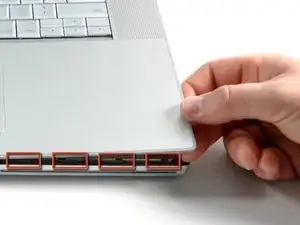
Use your fingers to push both battery release tabs away from the battery, and lift the battery out of the computer.
-
-
-
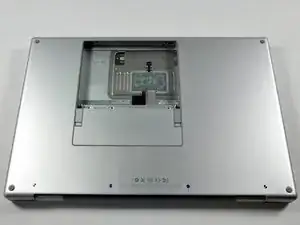
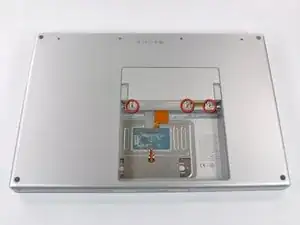
Remove the three identical 2mm Phillips screws from the memory door.
-
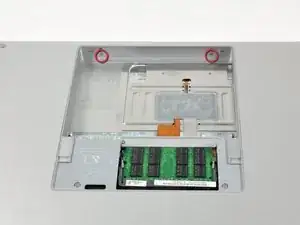
Lift the memory door up enough to grip it and slide it toward you, pulling it away from the casing.
-
-
-
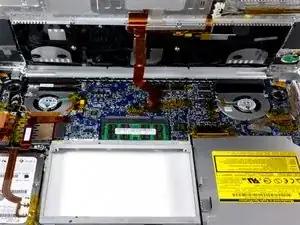
Remove the following 6 screws:
-
Two 10 mm T6 Torx screws on either side of the RAM slot.
-
Four 14.5 mm Phillips screws along the hinge.
-
-
-
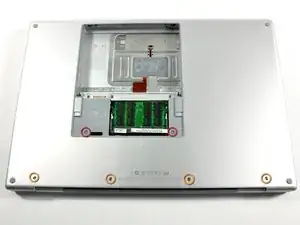
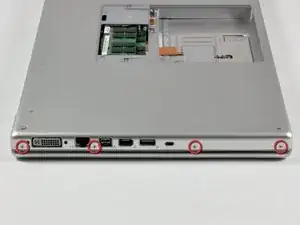
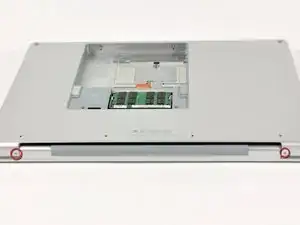
Rotate the computer 90 degrees and remove the two 3.2 mm Phillips screws from the rear of the computer.
-
-
-
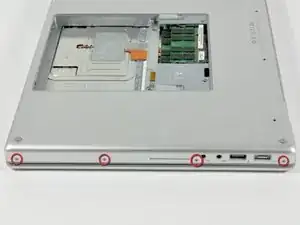
Rotate the computer 90 degrees again and remove the four 3.2 mm Phillips screws from the side of the computer.
-
-
-
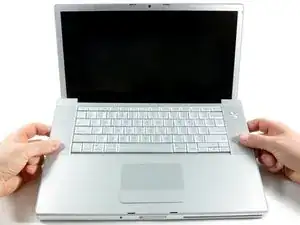
Lift up at the rear of the case and work your fingers along the sides, freeing the case as you go. Once you have freed the sides, you may need to rock the case up and down to free the front of the upper case.
-
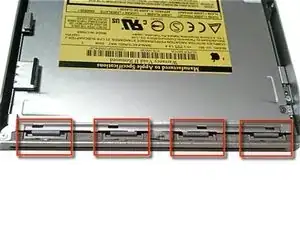
There are four plastic clips above the DVD slot, and another above and to the left of the IR sensor. These clips can be very difficult to disengage without prying. They can also be difficult to re-engage during reassembly.
-
-
-
Disconnect the trackpad and keyboard ribbon cable from the logic board, removing tape as necessary.
-
Remove the upper case.
-
-
-
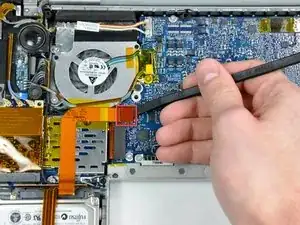
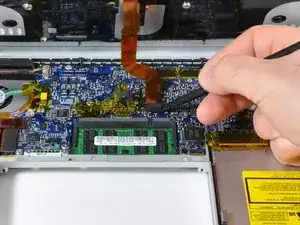
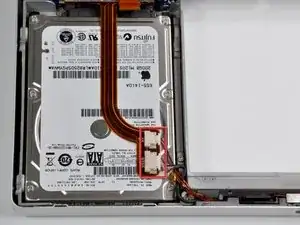
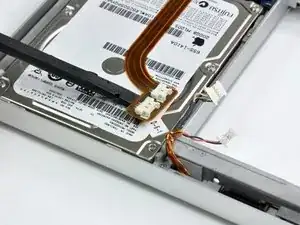
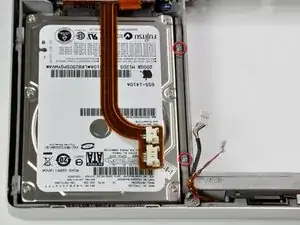
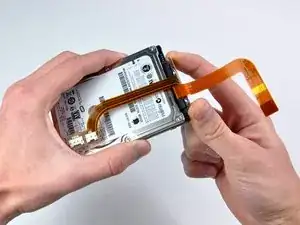
Disconnect the sleep light and IR sensor connectors from the ribbon cable on top of the hard drive.
-
-
-
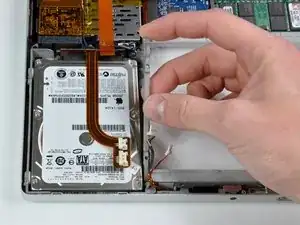
Using a spudger, carefully loosen the adhesive holding the ribbon cable to the surface of the hard drive.
-


To reassemble your device, follow these instructions in reverse order.

One comment
Be careful when you'll disconnect the SATA connector on the HDD itself: the area where the ribbon cable bends is quite prone to wear and tear.
After several disassemblies, I actually broke that ribbon cable by making a slight "cut" on the junction between the upper part of the ribbon cable (the one which goes from the HDD to the motherboard) and the lower part (the one which goes to the latch LED and IR sensor).
It took me quite some time to find that this ribbon cable was actually broken; as I had no HDD issues, I thought that it was fine. That's only when I found that I had no more latch LED and unrecognized IR sensor, that I carefully examined the ribbon cable, just to find that there was that little cut in the circuitry. Hopefully, I had a spare one, and you can still find it for a few bucks.
Before start, make a clone of your old HD into the new one, if you don't want to initiate a fresh copy. (Carbon Copy software is good).
ColmillodeChile -
Besides using WD 500GB models, are the WD 640GB and WD 750GB (the 9.5mm thickness model) good to go for? I am still considering as I have heard from other websites on the computer does not draw enough power to power up the 640 and 750 as it has the clicking sound and the rainbow keeps appearing. Anyone has install one before yet?
Please advice. Appreciated! Thanks a million to all the Mac gurus out there!
Danny Lim -