
Introduction
Replacing a defective fan is pretty easy and will keep your laptop running cool.
-
-
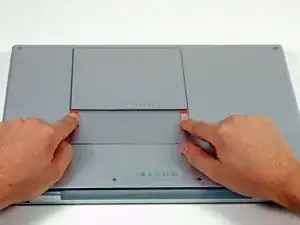
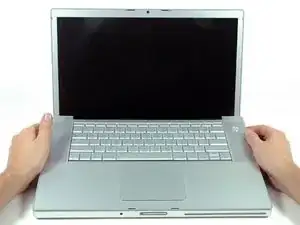
Use your fingers to push both battery release tabs away from the battery, and lift the battery out of the computer.
-
-
-
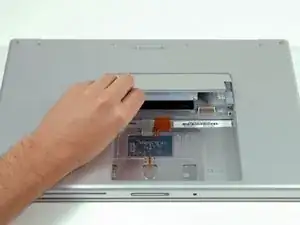
Lift the memory door up enough to get a grip on it, and slide it toward you, pulling it away from the casing.
-
-
-
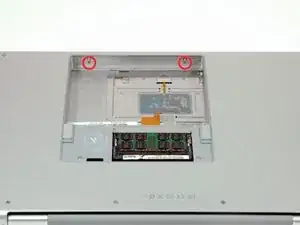
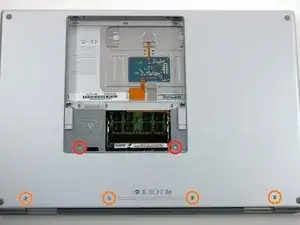
Remove the following 6 screws:
-
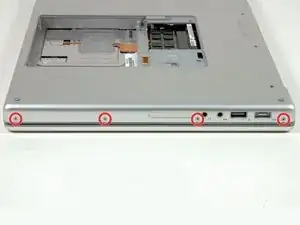
Two 10 mm T6 Torx screws on either side of the RAM slot.
-
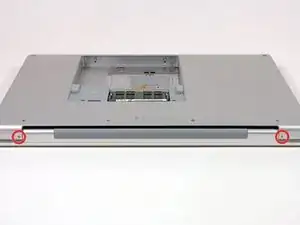
Four 14.5 mm Phillips screws along the hinge.
-
-
-
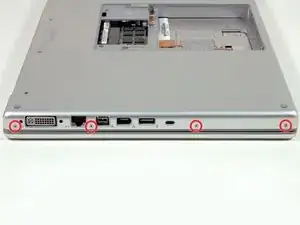
Rotate the computer 90 degrees and remove the two 3.2 mm Phillips screws from the rear of the computer.
-
-
-
Rotate the computer 90 degrees again and remove the four 3.2 mm Phillips screws from the side of the computer.
-
-
-
Lift up at the rear of the case and work your fingers along the sides, freeing the case as you go. Once you have freed the sides, you may need to rock the case up and down to free the front of the upper case (there are some hidden plastic clips that need to be clicked off).
-
-
-
Disconnect the trackpad and keyboard ribbon cable from the logic board, removing tape as necessary.
-
Remove the upper case.
-
-
-
Disconnect the iSight cable from the logic board by sliding the cable to the left and out of its connector.
-
-
-
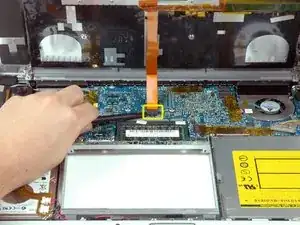
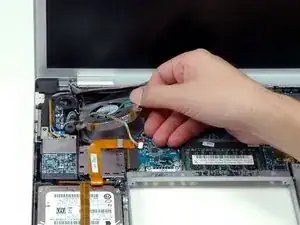
Disconnect the inverter, left fan, and left ambient light sensor cables by placing a spudger beneath each cable and lifting up.
-
-
-
Peel up the left ambient light sensor cable from above the left fan, removing tape as necessary.
-
-
-
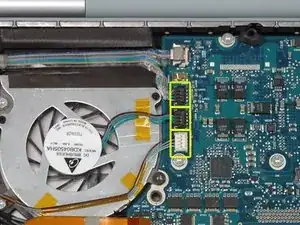
Remove the following 3 screws:
-
One 6.2 mm black T6 Torx screw from the right side of the fan.
-
Two 9.4 mm silver T6 Torx screws from the left side of the fan.
-
-
-
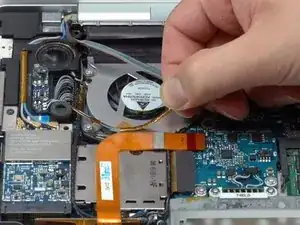
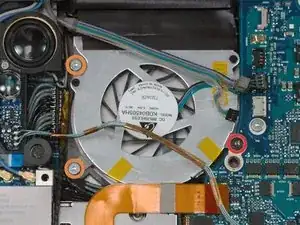
Lift the left fan up and carefully peel up the tape securing the fan to the heat sink as you go.
-

To reassemble your device, follow these instructions in reverse order.

6 comments
Hi Folks!
I'm a crotchety, 82 year-old geezer with big hands, and somehow or the other I managed to replace the left fan in my MacBook Pro 15" 1211 in about one hour! It was helpful to use a paper-mache egg carton to organize the little itsy-bitsy screw, because if you ever lost one you would never, ever find it again!
I had to use a big hammer occasionally to get things back together, but lo and behold my wife turned on her beloved machine and was very surprised to find that it works perfectly.
Many thanks for your great help and instructive manual!
Sincerely, Doc Botsford
what a money saver and life saver. iFixit is awesome! Have to admit though you need to be fearless to open up your computer and take a chance. Be VERY careful with the connectors, and know how they are connected or they will break. The iSight cable pulls out to the left, but DONT pull on the wires. Use the spudger to wiggle out the metal tabs on the connector. Don't lift up on the connector. And the heat sink tape doesn't come off that easiy either. Once you pull the front of the fan upright so it's on it's edge, then use the spudger and go behind to pull the black tape off SLOWLY. And while you're reaching over those delicate prts, make sure you don't bang down on some resistor or other part. It's a thrill when you put it back together and you DON'T HEAR A THING! The fan is QUIET. Didn't realize how loud it was getting.
Bill -
I finally got around to replacing both my fans. I had tried cleaning and putting drop of WD40 on the post of each one. They worked, but were noisy. Now I have replaced both fans and the computer is absolutely quiet(as far as I can tell) And cooler too. I went ahead and upgraded to 10.7(the highest OS it will take), so it is like I have a new computer. Thanks, ifixit
Years ago, I had to return/replace this type of a battery several times because of erratic behavior in the laptop. Suddenly I had one that lasted for 5 years before not taking any charge anymore. So, I'm going to order a new one hopefully without having to restart the return charade BECAUSE:
I observed that the battery's CONTACTs are unreliably INTERMITTENT. So far, it helped for a while moving it in and out in order to chafe the contacts' surfaces against each other.
moise -