
Introduction
-
-
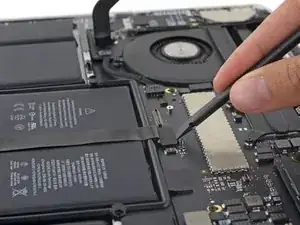
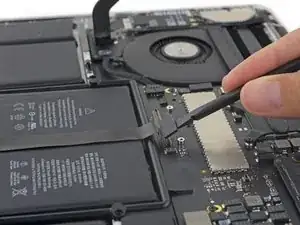
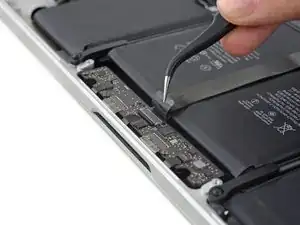
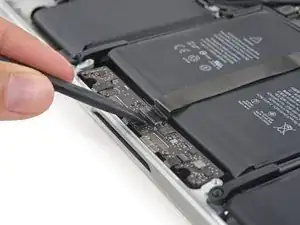
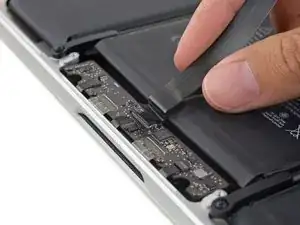
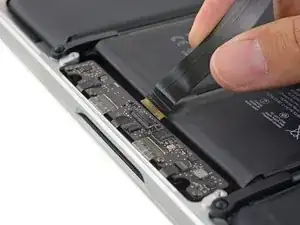
Use the flat end of a spudger to pop the trackpad connector straight up off its socket on the logic board.
-

Conclusion
To reassemble your device, follow these instructions in reverse order.

3 comments
Why remove the screw in step 5?
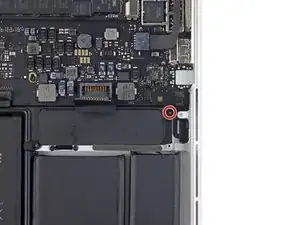
Step 5: Remove the single 3.7 mm T5 Torx screw.
Step 6: Re-screw single 3.7 mm T5 Torx screw.
The trackpad cable can also be of a different type where you pull the tape on it
Rogier van der Heide -
If you are replacing an old battery with a new battery, and the trackpad cable goes “under” the battery from the trackpad connector to the other side of it (instead of the trackpad cable going “over” the battery from its trackpad connector as shown in the provided image), then you might instead see a trackpad connector that has a loose tape on it. If the trackpad cable goes “under” the battery then it is possible to skip this step. It is not necessary to pull the tape. Note that I had an A1502 MacBook Pro laptop and was replacing its A1493 battery, it had the trackpad cable going “under” the battery, so I skipped this step and was still able to successfully replace the battery.
Luke Schoen -
If you also remove the other end of the mouse cable, remember to lower the lever when you reinsert it.
Maximillian -
It is important to be really GENTLE with the trackpad cable.
It is sometimes glued on very strong, and it is easy to damage it internally with no visible outer damage. In my case, I damaged just one line, and at first I didn't realize it.
My TRACKPAD was working fine, but the Force Touch haptic Feedback wasn't working. I tried everything else, but eventually I replaced this ribbon cable with a cheap used one and that fixed it immediately.
Flo -