
Parts
-
-
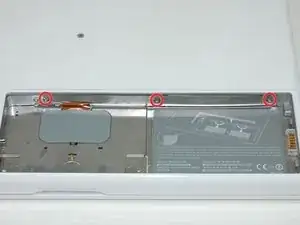
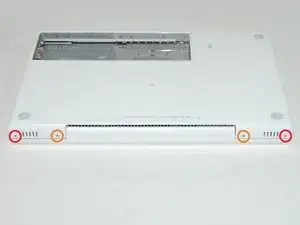
Remove the three evenly-spaced Phillips screws from along the rear wall of the battery compartment.
-
-
-
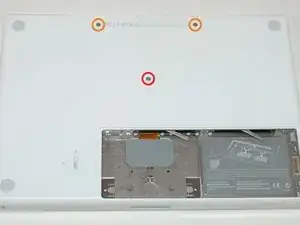
Remove the following 3 screws:
-
One 11 mm Phillips #00 in the middle of the case.
-
Two 14.5 mm Phillips #00.
-
-
-
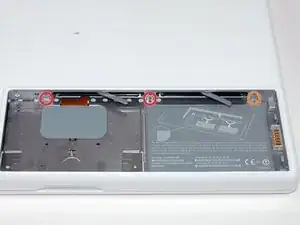
Remove the following 3 screws from the rear wall of the battery compartment:
-
Two 3 mm Phillips #00. (A1181 has three 3 mm screws and one 4 mm.)
-
One 4 mm Phillips #00 on the right side.
-
-
-
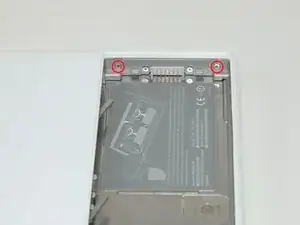
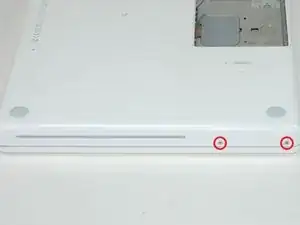
Remove the two 6 mm Phillips #00 screws from either side of the right wall of the battery compartment (not the ones closest to the battery connector).
-
-
-
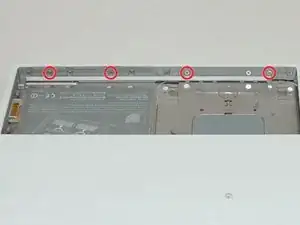
Remove the four 3 mm indicated Phillips #00 screws from the front wall of the battery compartment. When working from the left, remove the 2nd, 4th, 7th and 9th screw.
-
-
-
Remove the following 4 screws from the back of the computer:
-
Two 7 mm shouldered Phillips on the far sides.
-
Two 10.5 mm Phillips toward the center.
-
-
-
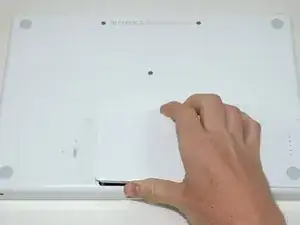
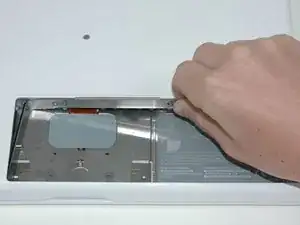
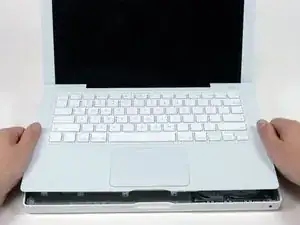
Starting near the display and working around to the front of the computer, pry up on the upper case. It is held with clips on the right above the optical drive. These will release with some firm lifting pressure.
-
Be careful when prying up the upper case. It's very easy to slice open a fingertip and thus provide the blood sacrifice the Mac gods sometimes require of those who insist on doing their own repairs.
-
-
-
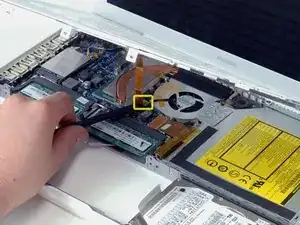
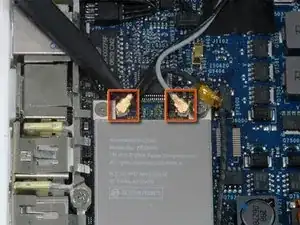
While holding up the upper case (from the bottom or the top), use a spudger to pry up the orange trackpad and keyboard cable from its connector.
-
-
-
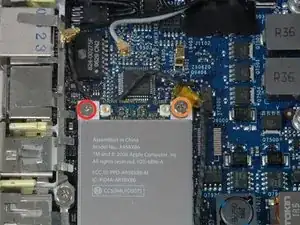
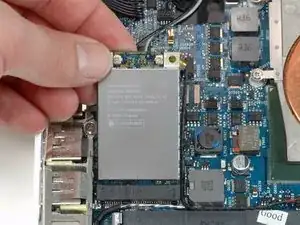
Remove the following 2 screws from the Airport card:
-
One 3 mm Phillips from the left side.
-
One 8 mm Phillips from the right side.
-
To reassemble your device, follow these instructions in reverse order.

5 comments
You'll have to remove a lot of different sized screws. Be careful to take care of properly placing them while doing the steps - you'll have to put them back the way you took them out. I personally placed them the way the pictures show them.
I did not install an AirPort card However I used the guide to open my MacBook to give it a good cleaning inside. Perfect!
deejai58 -
Thank you thank you thank you. A lifelong PC user, with their wife's MacBook ( so lots of pressure not to break it) was able to follow this walk through and make their wife so happy with the improved performance. Thanks for giving me the confidence to tackle other upgrades that can be done on this MacBook!
-Geoff K
This is a difficult project. It is imperative that you read the entire guide before you proceed. Have a system in place to keep track of the screws so you know what goes where. Budget several hours for this.
jonathan55 -