
Introduction
Prerequisite only.
-
-
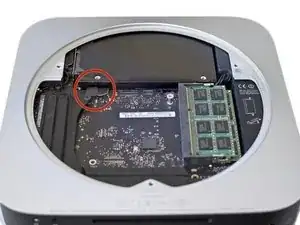
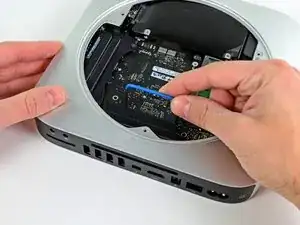
Use the flat end of a spudger to pry the hard drive connector up from its socket on the logic board.
-
-
-
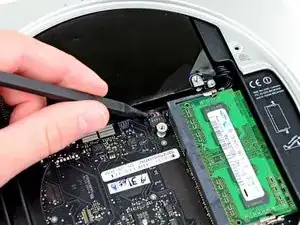
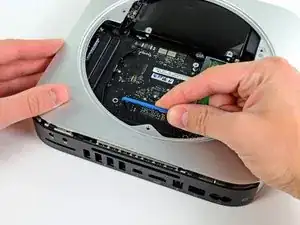
Use the tip of a spudger to lift the IR sensor connector up and out of its socket on the logic board.
-
-
-
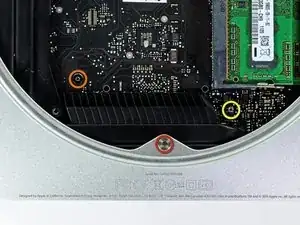
Remove the following three screws:
-
One 5.0 mm T8 Torx or 2.0 mm Hex screw (either screwdriver will work)
-
One 16.2 mm T6 Torx screw
-
One 26 mm T6 Torx standoff
-
-
-
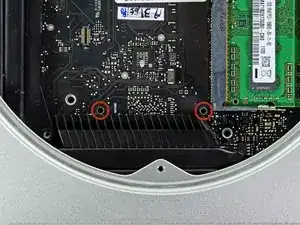
Insert the Mac mini Logic Board Removal Tool into the two holes highlighted in red. Be sure it makes contact with the top side of outer case below the logic board before proceeding.
-
Carefully pull the tool toward the I/O board. The logic board and I/O board assembly should slightly slide out of the outer case.
-
Remove the Mac mini Logic Board Removal tool.
-
-
-
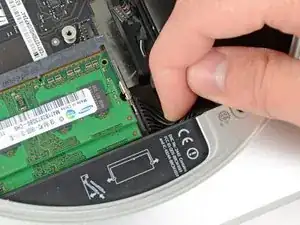
Pull the I/O board/logic board assembly out of the outer case enough to access the power connector.
-
Use your fingers to disconnect the DC-In cable from the logic board.
-
Pull the power cable connector toward the front side of the mini.
-
-
-
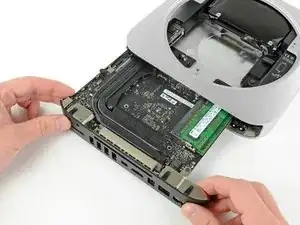
Carefully slide the logic board assembly out of the mini, minding any cables that may get caught.
-


It may just be my own experience, but the hard drive connectors appear to be "sensitive" to ANY pressure, even when (re)connected properly. I found that I had to repeatedly re-seat them when re-installing the drive, AirPort antenna, and cowling. I would recommend holding off on putting the screws back for the AirPort antenna and cowling until both are in place, and re-checking the hard drive connectors before installing/tightening those screws.
UNSC Jon 117 -
Note the hard drive connector attaches to the outermost connector on the logic board. On my Mini it attached to the inner connector.
The cable I got in the Dual Drive kit was exactly the same as the one installed in my Mini. I had to fold it to shift it over to snap on the outer connector.
And, no, my hard drive wasn't where the picture shows it to be.
jpmist -
As UNSC Jon 117 says, these connectors are worryingly prone to pop off if there's any movement of the drives. Fortunately they're accessible even after refitting the antenna plate, so I would wait until then for a last-minute check. I've done this job three times now on the same Mac and everything has been fine.
Charles Butcher -
The server version of the MacMini 2011 has three extra two wire cables for temperature sensors: two on the drive directly under the antenna plate, one on the other drive.
The small connectors have to lifted up from the logic board just like the fan connector and the IR sensor connector.
Take care when transferring the sensors to a new drive because two of those three extremely tiny PC board need to be removed of the old drive and are glued in place.
ernstcline -
The "pop off" seems only to happen during reassembly if you press on the harddisk body. The harddisk at this time can be pressed in the direction of the underlying drive (in my case a SSD Drive) . Once the grid with the antenna has been attached (two red screws in step 8) this cannot happen any more.
John Doe 9th -