Introduction

  1. xKSRc5uqeIuJWTbS
    xKSRc5uqeIuJWTbS
    PTHYdljJumeHZjcg
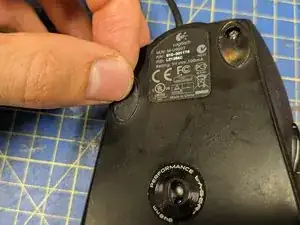
    • The screws are hidden under the four rubber feet on the underside of the mouse.

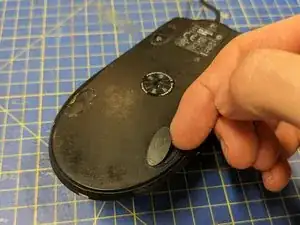
    • Carefully peel away each foot and its layer of adhesive, putting them to the side to replace later.

  2. egYe2ciRokBPp1Td
    egYe2ciRokBPp1Td
    FdiRtxFJ1PsJcqSH
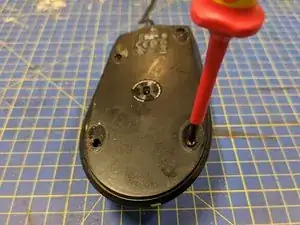
    • Unscrew the four Phillips #0 screws hidden by the feet.

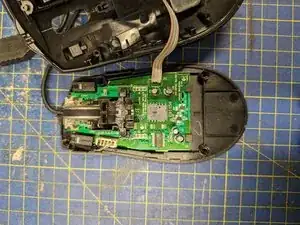
    • The top casing should now come loose with just a shake.

  3. YqdIIJBJUJ1jmiXP
    YqdIIJBJUJ1jmiXP
    mWRBuN5tJTVbRhph
    • Gently pull the USB cable out of its channel.

  4. kCBbwFsaLYtMFQiQ
    kCBbwFsaLYtMFQiQ
    ZnDnZw5VW1oau3Hv
    • Grip the white plastic plug and remove it from its socket.

    • This may take some force. Try to pull straight upwards as much as possible, but it may help to wiggle the plug back and forth.

  5. sjivpQReBGOjCsrn
    sjivpQReBGOjCsrn
    q4uvdykFZtDgQxRp
    TEGbqiIhLtL2GHH1
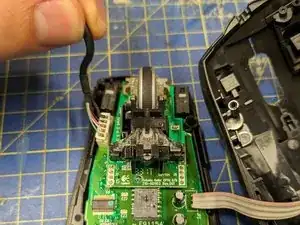
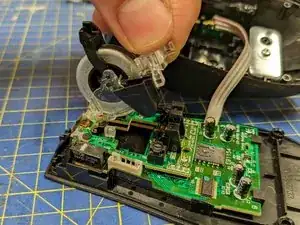
    • The scroll wheel is held in place by a plastic pin. Pull it sideways to remove it.

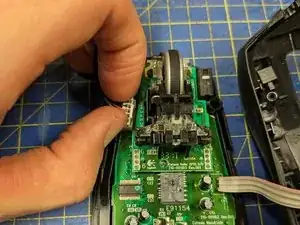
    • Grip the scroll wheel assembly by the transparent part and lift it out.

    • Two small springs at the front of the mouse are held in place by this assembly. Be careful not to lose them when removing it.

Conclusion

To reassemble your device, follow these instructions in reverse order.

Harry Cutts

Member since: 15/06/20

835 Reputation

0 comments